

Building your own solar generator might sound complicated, but with the right parts and a clear plan, it’s doable. The key is choosing the right components, like a suitable solar panel, a reliable battery, and an efficient inverter, to match your power needs.
Once you understand how to select and connect these parts properly, you’ll be able to create a custom system that reliably powers your devices.
Keep reading to see exactly how to put it all together step by step.
Gather These Components for Your DIY Solar Generator
To assemble a reliable DIY solar generator, you’ll need four core components: a solar panel (100W–200W monocrystalline), a charge controller (preferably MPPT for improved performance in low-light conditions), a lithium Iron Phosphate (LiFePO4) battery for extended cycle life, and a pure sine wave inverter to convert DC power to AC. When choosing your battery, integrating a smart shunt or battery monitor is essential for tracking voltage and the state of charge, which helps prevent deep discharge and prolongs battery life. Using MC4 connectors ensures weatherproof and compatible outdoor connections between your solar panels and charge controller. AGM batteries are a viable alternative, but they are not deep-cycle and have shorter lifespans than LiFePO4, making them less optimal for a DIY solar generator. To achieve a secure connection, you must follow the precise crimping sequence with the correct die set for the wire gauge. For additional AC line protection, you can install a surge protector in your breaker box to safeguard household circuits from voltage spikes.
Proper wiring techniques are critical for safety and efficiency. Use heavy-duty red and black cables for positive and negative connections, respectively. Install inline fuses—ranging from 7.5A to 20A—on each branch to protect against short circuits. A battery disconnect switch provides a safe way to isolate the system during maintenance or emergencies. Secure all wiring with ring terminals and M8 connectors to ensure solid, corrosion-resistant connections. Additionally, incorporate a fuse holder for easy fuse replacement and a bus bar to organize power distribution neatly. Following this systematic approach guarantees your solar generator operates dependably and safely before you fine-tune your component sizes.

【N-Type Technology, Up to 25% Efficiency】The Callsun 100 watt solar panel features advanced N-type monocrystalline cells that deliver up to 25% conversion efficiency, offering higher power output and more stable performance than standard solar panels 100 watt, making it an excellent choice for solar energy systems.

[23% High Efficiency] This package contains the solar panel only. JJN 100 watt solar panels utilize a 10BB cell design made from high-quality Grade A cells, achieving a conversion efficiency of up to 23%. These 100W solar panels can produce around 500Wh of electricity per day (depending on sunlight availability).
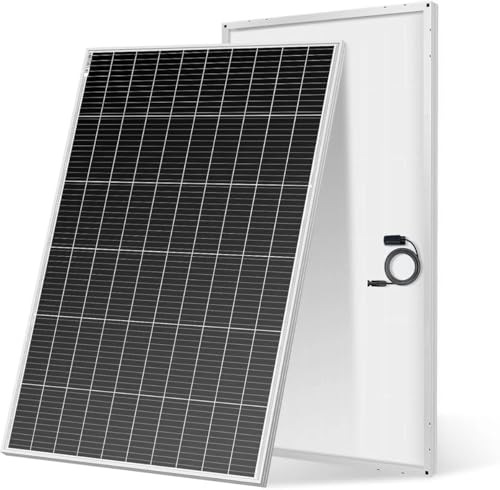
【Power for Every Off-Grid Life】 Use on rooftops, RVs, boats, cabins, or farms to enjoy clean solar energy anywhere. A simple way to cut energy costs and stay independent from the grid.
Size Your DIY Solar Generator Components
Start by calculating your total load wattage, which involves adding up the wattage of all devices expected to run simultaneously. This peak wattage will determine your inverter size. Multiply each device’s wattage by the number of hours it runs daily, then sum these values to determine your total daily watt-hours. To account for real-world inefficiencies, add a safety margin of 20 to 40 percent. For smaller projects, a cable tie setup can help organize and secure wiring during assembly.
Remember to include startup surge wattage, especially for motors, as these can spike to two or three times the rated watts temporarily. To size your inverter, select one with a continuous rating at least 1.25 times your peak wattage. Match the inverter’s voltage to your battery bank’s voltage for proper operation.
Convert your daily watt-hours to battery capacity by dividing by the usable depth of discharge. For lead-acid batteries, double this value to prevent excessive wear; for higher-usable chemistries, divide by 0.8 to adjust for deeper discharges. When running wires from your inverter to the battery bank, consider using MC cable for a flexible and protected installation without the need for separate conduit. To size your solar array, divide your daily watt-hours by the peak sun hours to find the required wattage, then add a 25 percent safety margin and apply a 0.75 efficiency derate to account for system losses. When assembling the panels, follow a documented wiring layout and build order to ensure safe connections and optimal performance.
Finally, size your charge controller by dividing the total array wattage by your battery voltage, then add a 25 percent margin to ensure adequate capacity. Proper component sizing simplifies battery maintenance, prolongs system life, and ensures consistent performance.

Powerful yet Compact: Boasting a 1,500W AC output and a 3,000W surge peak, the Solar Generator 1000 V2 can power multiple appliances, including AC units, fridges, and electric pots. With a 1,070Wh capacity and a lightweight build of only 23.8 lbs, along with a foldable handle, it makes an excellent companion for outdoor camping, road trips, or emergencies.

☀ [Upgraded Pure Sine Wave] JARXIOKE inverter delivers 1500W continuous and 3000W peak power. 12V to 110/120VAC Pure Sine Wave technology has a high conversion efficiency (>90%) and low no-load loss, which saves more energy.

[288Wh On-the-Go Power] - Only 9.4 lbs lightweight, carry it anywhere during storms! 288Wh capacity meets daily & outdoor needs—camping, road trips, beach visits, or home emergencies. Extend your smart green energy life to every corner of your ideal lifestyle with this compact entry-level power station.
Choose Lead-Acid or LiFePO4 for Your DIY Solar Generator
LiFePO4 batteries outperform lead-acid in cycle life, with 3,000 to 6,000 cycles compared to 300 to 800. This means fewer replacements over the lifespan of your solar generator, making LiFePO4 more cost-effective in the long run. They also offer a higher usable capacity—about 80 to 90% of their total—while lead-acid batteries typically provide only around 50% to prevent damage. Recharge efficiency is another key advantage: LiFePO4 achieves 92 to 98%, capturing more solar energy, whereas lead-acid averages 70 to 85%. Additionally, LiFePO4 batteries are lighter, weighing roughly one-third of lead-acid, which simplifies portability. Although initial costs are higher for LiFePO4, their durability and efficiency often translate to lower total ownership costs, especially with frequent deep discharges. A long-lasting battery also helps maximize your solar inverter’s lifespan by reducing the strain from frequent deep discharges and replacements. For those considering commercial alternatives, the portable power stations for home backup from the knowledge base typically use LiFePO4 chemistry for these very advantages. Many top battery picks with terminals in the market prioritize LiFePO4 technology for its superior performance and value over traditional options.

Ultra-Lightweight: At only 7.5 lbs, the Explorer 300 delivers a robust 292Wh capacity while remaining 17% lighter than the industry average. The sleek, integrated handle makes it effortless to carry on long hikes or pack with your camping gear, providing reliable off-grid power without adding bulk to your load.
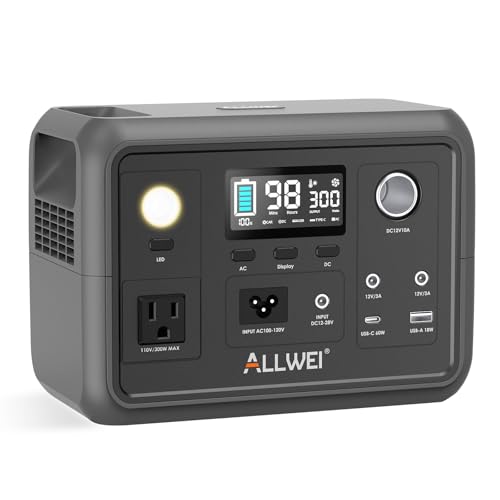
【Reliable Power for Every Scenario】This portable power station packs a 256Wh Capacity, delivering 300W continuous power and 600W peak surge (pure sine wave) to run your essentials seamlessly. As a versatile power station, it’s perfect for road trips (portable generator for camping), home emergency backup (portable generators for home use), and outdoor adventures—powering laptops, mini fridges, CPAP machines, drones, and more without damaging sensitive devices

【SLIM & POCKETABLE】This portable power bank is about the size of a smartphone (6.5×3.3×4 inches) and weighs only 2.54 pounds. It features an ergonomic soft handle for easy portability. It easily fits into a backpack for convenient portability. Pro Tip: Fully charge and discharge the battery twice initially for the best experience.(Solar panel and cable not included)
Wire the Solar Panel, Charge Controller, and Battery Correctly
Connect the battery to the charge controller first, ensuring the system can detect the correct voltage—such as 12V, 24V, or 48V—before adding the solar panel. Always verify polarity matches exactly: connect the positive lead to the positive terminal and the negative lead to the negative terminal to prevent reverse polarity damage. Use a fuse rated at 125% of the charge controller’s maximum charge current for the battery-to-controller connection, and install it within 7 inches of the battery’s positive terminal for effective protection. When disconnecting the battery for maintenance, remove the negative cable first to reduce the risk of accidental short circuits against grounded metal components.
Select cable sizes between 4 AWG and 10 AWG for the runs from the battery, depending on current and distance, ensuring the wire ampacity exceeds the fuse rating. Confirm the wiring is secure and tight to minimize voltage drops and prevent accidental disconnections. After the battery and controller are connected, wire the solar panel to the PV input on the charge controller, again checking for correct polarity. Make sure the panel’s open-circuit voltage does not exceed the maximum input voltage of your charge controller, especially in cold weather when voltages can rise. Every cable run from the battery requires independent overcurrent protection to safeguard against faults. If your system will power AC devices, you will need a power inverter to convert DC battery power to usable AC electricity. After installation, test all connections to verify the system operates safely and efficiently before relying on it for regular use.
![[Upgraded] 30A PWM Solar Charge Controller with Auto Parameter LCD Display](https://m.media-amazon.com/images/I/41opvkWthjL._SL500_.jpg)
【UPGRADED SOLAR CONTROLLER】This solar charge controller helps you manage the working of solar panels and batteries in solar systems automatically with the build-in industrial microcontroller. You don't need to reset it when the battery runs out cause it will memorize various parameters set by the user
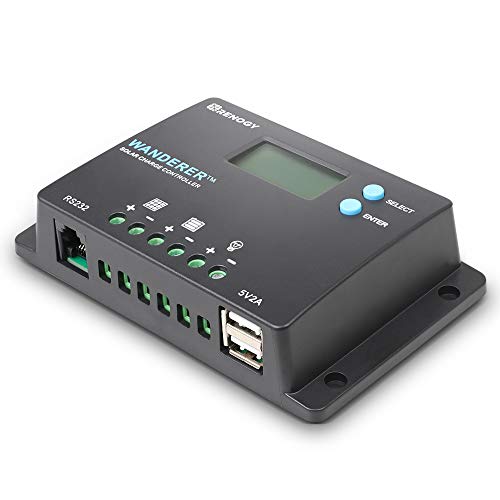
𝐒𝐦𝐚𝐫𝐭 𝟒-𝐒𝐭𝐚𝐠𝐞 12V/24V Solar Charge Controller: Renogy charge controller 𝐦𝐚𝐱𝐢𝐦𝐢𝐳𝐞𝐬 𝐁𝐚𝐭𝐭𝐞𝐫𝐲 𝐋𝐢𝐟𝐞 & 𝐒𝐨𝐥𝐚𝐫 𝐄𝐟𝐟𝐢𝐜𝐢𝐞𝐧𝐜𝐲, this advanced pwm solar charge controller utilizes intelligent 4-stage charging (Bulk/Boost/ Float/Equalization) to optimize power delivery for AGM, Gel, Flooded and Lithium batteries. RV solar charge controller prevents overcharging and gas buildup while 𝐚𝐜𝐡𝐢𝐞𝐯𝐢𝐧𝐠 𝟑𝟎% 𝐥𝐨𝐧𝐠𝐞𝐫 𝐛𝐚𝐭𝐭𝐞𝐫𝐲 𝐥𝐢𝐟𝐞𝐬𝐩𝐚𝐧 compared to basic charge controllers.
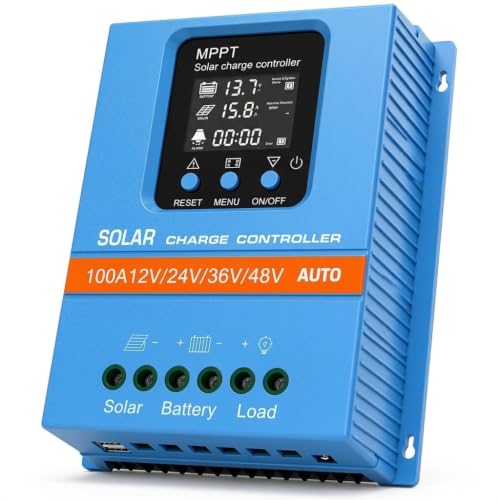
【Product Advantages 】: 100A intelligent adjustment controller with precise time control and light control, can switch loads on and off at a fixed time, adjustable voltage parameters, and memory function. Large LED display screen, real-time display of working voltage, clearer data reading. Flame retardant materials are safe and durable, fashionable and simple. Large section wiring port, wire spacing increased by 99mm
Pick the Inverter and Add AC Outlets to Your DIY Solar Generator
Select a pure sine wave inverter to ensure clean, steady household power; its waveform closely matches utility AC, which protects sensitive electronics and motors. Determine the total continuous wattage by adding up all expected AC loads, then include a safety margin of about 25% to provide extra headroom. Pay close attention to inverter efficiency—higher efficiency means less battery drain and less heat generation. Make sure the inverter’s DC input voltage matches your battery bank exactly, whether it’s 12V or 24V, to ensure proper operation and longevity. For guidance on selecting a high-quality model, review comparisons of top pure sine wave inverters found in performance guides. The inverter can also be connected directly to the battery using screws as outlined in the diagram indicators for secure wiring. An understanding of the working principle helps you appreciate why pure sine wave models are recommended for sensitive electronics.

【POWERFUL DC-AC】This renogy 1000 watt inverter 12V to 110V provides 1000W continuous DC to AC power, 2000W peak surge during load start-up, 12V to 120VAC pure sine wave with conversion efficiency >90%, reduces conversion loss

BESTEK 300W Pure Sine Inverter (Patent Number US D818,853 S): Designed for your devices that require careful protection, provide 300W continuous DC to AC power and 700W of peak power featuring 2 AC outlets and 2 USB charging ports, great for Christmas gift, charging string lights, laptop, speakers, camera, nebulizer, game console, kindle, iPad and other

【𝟏𝟎𝟎𝟎 𝐖𝐚𝐭𝐭 𝐈𝐧𝐯𝐞𝐫𝐭𝐞𝐫】--- This pure sine wave inverter can provide 1000W continuous clean DC to AC power (2000W surge) with >91% efficiency, which strongly and effectively reduces conversion loss and protecting sensitive electronics (LEDs, Laptops, CPAPs, Microwave Oven) from damage. Handles heavy startups (Kettles, Power Tools) effortlessly. For RV, Home, Solar, Emergencies.
Fuse Safety and Full Test of Your DIY Solar Generator
Proper fuse protection is essential for safety and component lifespan. Install correctly rated, DC-rated fuses at three critical points: between the solar array and charge controller, between the charge controller and battery bank, and between the battery bank and inverter. For correct placement, position the main battery fuse on the positive cable within seven inches of the terminal. Select fuses by multiplying the circuit’s maximum current by 1.25 to determine the appropriate fuse rating, and ensure the DC voltage rating matches or exceeds the system voltage. When selecting a charger for the battery bank, consider top recommendations for 6 volt batteries to ensure compatibility and performance. Additionally, reviewing top solar chargers without batteries can help you identify efficient photovoltaic panels for your setup. For homes with limited space, choosing a small house model for the solar array can maximize energy yield while fitting the roof.
When testing your system, start by tightening all terminal connections and verifying each fuse is in its correct positive-line position. Power up gradually: first connect the battery, then the charge controller, followed by the photovoltaic input, and finally the loads. Monitor the system during startup to confirm the charge controller charges normally and that no fuse warms or shows signs of overheating. To test the inverter, simulate a fault by disconnecting its input source and verify it restarts cleanly once reconnected.
After testing, inspect all cables for heat, discoloration, or signs of damage. Document each fuse’s rating and exact location within the system for future reference and troubleshooting. Properly installed and tested fuses help ensure your DIY solar generator remains safe and reliable over time.