


Struggling to keep your cables neat and organized? Using cable ties correctly can make a big difference in preventing tangles and damage.
Once you know how to measure, wrap, and space them properly, your setup will look cleaner and be safer to use.
Keep reading to learn the simple steps to get your cables under control.
How to Select the Correct Cable Tie Size and Strength
To select the correct cable tie size, start by measuring your bundle at its widest point. Use the circumference for flexible bundles, as relying solely on diameter can be misleading. Choose a tie that is at least 25–30% longer than your measurement to ensure a snug fit without overstressing the tie. Match the width of the tie to the load it needs to handle; wider ties typically support higher loads. For indoor use, nylon 6.6 material is suitable, while UV-stabilized black nylon is better for outdoor environments where exposure to sunlight could degrade standard nylon. When securing bundles near solar panels, using ties with MC4 connectors can simplify cable management. For home battery backups, similar UV-stabilized ties are recommended to secure cables around battery systems without degrading from heat exposure. For heavy-duty generator connections, selecting the best interlock kit ensures both safety and code compliance.
Tensile strength guides your width choice: a typical 4.8 mm nylon tie can handle approximately 22 kg. To ensure safety, select a tie rated 20–50% above your expected maximum pull force. Remember that actual performance can be affected by dynamic forces and environmental factors, which often reduce the tie’s effective strength.
Pairing the length with the diameter of your bundle is essential for security. For example, a 300 mm tie generally suits an 80 mm bundle diameter. Careful measurement and matching these parameters help guarantee that your cable tie will secure your bundle effectively, avoiding failure or damage.

✅ 𝟒𝟎𝟎-𝐏𝐚𝐜𝐤 𝐙𝐢𝐩 𝐓𝐢𝐞𝐬 𝐀𝐬𝐬𝐨𝐫𝐭𝐞𝐝 𝐒𝐢𝐳𝐞𝐬 (𝟒+𝟔+𝟖+𝟏𝟐 𝐈𝐧𝐜𝐡): From bundling thin wires to securing thick cables, these zipties handle home improvement, garage tools. With 100 pieces per size, tackle any project – big or small!

【Package Detail】The package includes black heavy duty zip ties 10inch/250mm .Cable ties width: 0.23inch/5.8mm Total Quantity: 200 pcs

100 Pack: With 100 zip ties in each package, you don't have to worry about running out of in the middle of your project.
Straighten and Group Cables Before Bundling
Start by disconnecting and separating the cables based on their device paths, keeping power and data lines in separate groups to prevent interference. Lay the cables flat on a surface, untangling any knots and gently straightening each one into a relaxed, parallel line. Avoid sharp bends that can damage the cable jackets, and ensure there are no twists inside the bundles. For additional accuracy, you can use a wire stripper to cleanly remove excess jacket material from individual cables before straightening them, checking for nicks that could weaken the conductor. Align the cables by route and length, positioning longer cables behind shorter ones to minimize overlap. Group cables logically by function, such as power, video, or USB, and form smaller sub-bundles before combining them into one larger bundle. Keep the bundle loose and uncompressed until you are ready to secure it with a tie. Equalize the slack across all cables to prevent bulges, and double-check that no cable is twisted inside the bundle. Many truckers use a dedicated top power inverter to run sensitive electronics from their vehicle’s battery without interference. Properly preparing and aligning the cables reduces stress points and cross-interference, ensuring a more reliable and durable bundle when secured. Before bundling power cables, always ensure the circuit breaker feeding that line is turned off to prevent any risk of electric shock during handling.
Wrap and Thread the Tie Through the Locking Head
Wrap the tie around the bundled cables so the strap forms a complete loop. Position the locking head where you can easily thread the tail straight through. Keep the strap flat against the bundle to prevent stress concentration. Feed the tapered tail into the head’s slot, making sure the serrated side faces the locking mechanism. Insert the tail straight, avoiding at an angle, to prevent pawl misengagement. You will feel light resistance as the teeth meet the lock—don’t force it. Pull the tail through until the bundle is snug, maintaining a steady, axial pull. Using a flush cutter is a simple way to achieve a clean finish after trimming. Stop when the cable feels secure and the tie cannot rotate freely. You should hear a firm click, confirming lock engagement. As a safety measure, avoid over-tightening, which can damage cable insulation. The locking head’s internal pawl grips the serrations to prevent slippage. After tensioning, verify that the tail doesn’t slip backward to ensure the bundle stays securely fastened. Always check your proper multimeter settings before testing connectivity to avoid damaging components.
Place the First Cable Tie Near the Connector
Place your first cable tie close to the connector, about 1 inch or 20–30 mm from its end. This initial tie helps control the cable run early, reducing pull and stress on the port before movement reaches the connector body. Make sure the tie does not press directly on the housing or create a sharp stress point, which could damage the connector. Use a material suited to your application—nylon for static setups or weather-resistant variants for moving or outdoor environments. The connector itself serves as a reliable anchor point, aligning conductors as they exit and establishing the routing without causing immediate bends or strain. Avoid compressing the cable jacket when installing the tie, as excessive pressure can accelerate wear and failure. This first tie also sets the spacing pattern for the rest of the run; typically, subsequent ties are placed 50 to 80 mm apart to prevent slack and snagging. Proper placement of this initial tie ensures a secure, neat cable bundle that maintains flexibility and protects the cable over time. For applications involving power storage, selecting terminals with high-quality materials can further reduce connection resistance and extend system longevity. Using a high-quality charger helps maintain battery health and performance. To avoid damaging the panels during related outdoor work, follow the safest fix order for cleaning and inspecting equipment.

Long Zip Ties 20 Inch Black - Extra Large Zip Ties Heavy Duty Outdoor, long cable ties 20 inch / 500mm with 12mm width, wider, thicker and more durable for use

Heavy Duty: Karoka black zip tie 12 inch is 0.19 inch(4.8mm), while industry standard is 0.14 inch(3.6mm), Stronger than other wire ties.
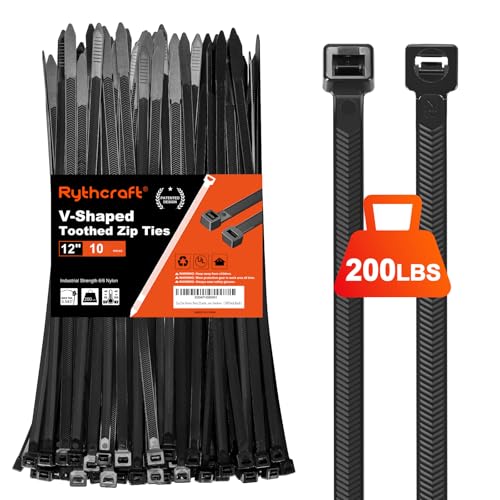
【200lb Tensile Strength】: The more width and Thickness, the more tensile strength. our zip ties 12 inch width is 0.3 inch(7.6mm), while industry standard is 0.19 inch(4.8mm), our zip ties 12 inch Thickness is 0.076" inch(1.95 mm), while industry standard is 0.055 inch(1.38mm),Our Double sided tooted heavy duty zip ties, provide 200 lbs tensile strength.
Tighten Until Snug, Not Until Cables Deform
Tighten the cable ties only until they feel snug—never until the cables deform. Position the first tie near the connector and tighten it just enough to secure the bundle without causing compression of the cable jacket. Proper bundling emphasizes tightness, not force, preventing damage and maintaining signal integrity. Stop tightening once the cables no longer slide freely within the bundle. For a quick diagnosis, check if the tie is too loose or too tight by attempting to slide a cable within the bundle. When choosing a cable gland, ensure its sealing and clamping parts match the cable diameter to prevent ingress and strain, but for cable ties, the goal is simply to avoid over-compression. If you need to remove a tie, learn the safest fix order to minimize the risk of cutting nearby cables.
Checking for visible indentations or deformation is essential; if you see marks or flattening of the outer jacket, you’ve applied too much tension. Over-tightening can cause permanent damage: it may pinch internal conductors, alter impedance in data cables, and degrade performance over time. Different tie materials behave differently; nylon ties, for example, can bite into insulation if overtightened. Hand-tightening or finger-tightening usually provides sufficient tension to keep cables organized while avoiding damage. Always inspect the bundle after tying—no compression should be evident, ensuring consistent moderate tension that guarantees reliability without impairing cable function.
Cut the Excess Tail Flush to Avoid Sharp Edges
To avoid sharp edges, cut the excess tail flush with the locking head after tightening the cable tie. Use flush-cut pliers or specialized cable-tie cutters, not standard diagonal cutters, which can leave a pointed stump. Position the cutter’s flat side directly against the locking head to achieve a near-level, smooth finish. A clean, single cut reduces the risk of deformation and minimizes snag points. Standard diagonal pliers and similar tools typically leave a sharp spike that can cause injury when running hands through wiring harnesses. Keep in mind that this cutting technique is similar to trimming waste safely, much like reducing the power draw of connected appliances to avoid overloading a circuit. Using a quality multimeter with battery testing can help verify that a battery is not defective before you secure it into a harness with cable ties. This same principle of clean trimming applies to managing the solar panel wiring in a photovoltaic system to prevent sharp edges from damaging the insulation. Always inspect the trimmed end for any protruding plastic or burrs. Even if the cut looks flush, a small spike may remain. Use a file or fine-grit sandpaper to smooth out any sharp remnants. Proper trimming prevents the tail from scratching your hands, catching on insulation, or snagging on nearby components. Flush cutting isn’t just for appearance; it’s a vital step to ensure your cable bundle remains neat, safe, and hazard-free.
Space Multiple Ties Along the Entire Cable Run
Proper cable tie placement along the entire run is crucial for effective cable management. You should divide the full run into segments and apply ties at regular intervals to maintain consistent spacing. For light AV or data cables, keep ties spaced 6 to 8 inches apart in short desk runs. Longer furniture runs may require spacing of 12 to 16 inches to prevent sagging and drift. Match the spacing to the cable weight: thin USB bundles need ties every 4 to 6 inches, while heavier power cables benefit from wider, evenly spaced supports. Tighter spacing helps reduce sag and keeps cables aligned, especially in vertical runs. Before tightening each tie, mark its position, add extra ties near bends and endpoints, and secure each tie uniformly without constricting the bundle too tightly. Proper placement and tensioning ensure a neat, safe, and durable cable layout. Using a lithium battery charger for power tools ensures consistent performance without overcharging risks.
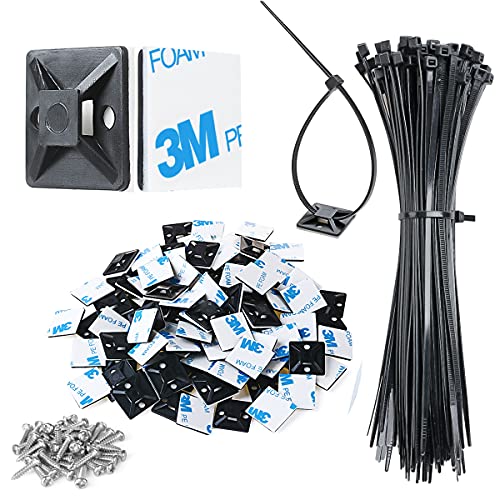
High quality material:XHF Adhesive Zip Tie Mounts are manufactured from 3M Strong Adhesive and PA66 nylon

Reusable cable ties are made from premium nylon adhesive materials can be environmentally used multiple times

【Heavy Duty】 Strength tensile is decided by Width-- Our wire ties 0.14inch / 3.5mm wider make the ties stronger than the same size for more projects.
Inspect for Slipping, Pinched Insulation, or Snags
Check for snags by running your hand along the bundle. Feel for sharp cut ends or burrs that can catch clothing or nearby wiring. Ensure that tails are trimmed flush and oriented away from walk paths to prevent accidental snagging. Replace any ties with jagged edges or cracked heads to avoid damage. After settling the bundle, recheck for any new issues. When securing solar panel cables, similar attention reduces insulation damage from sharp edges. Recording recurring damage can help you refine your technique and improve future installations.