


Struggling to remove cable ties without damaging your cables or tools? Whether you need to reuse a tie or cut one off cleanly, the method depends on the type.
Reusable ties have a small release tab, while standard ones require careful snipping.
In this guide, you’ll learn simple, safe techniques to open or cut cable ties with ease.
Identify Your Cable Tie: Releasable or Standard?
To determine whether a cable tie is releasable or standard, look at the head for visual clues. A releasable tie has a visible tab, lever, or paddle, indicating it can be released and reused. If the head is plain and rounded with no moving parts, it’s a standard, non-releasable tie designed for permanent fastening. Pressing the tab on a releasable tie should cause the strap to disengage, confirming its releasable function. Material differences also offer clues: standard ties often use rigid nylon suited for permanent use, while releasable versions may incorporate more flexible compounds for easier release. Occasionally, color coding can help identify releasable ties, but always verify by checking product packaging or datasheets if you’re unsure. When selecting a charger, ensure it is compatible with your battery’s voltage and chemistry to avoid damage, similar to how choosing the right lithium battery chargers ensures safe and efficient charging. For installation guidance, refer to safe and effective methods covered in the knowledge base. A licensed electrician should be called for any breaker box wiring to ensure safety and code compliance.
Open a Releasable Cable Tie Without Cutting It
To open a releasable cable tie without cutting it, locate the small release tab on the locking head. Using your thumbnail or a thin tool like a paperclip, gently press down on the tab to disengage the locking pawl. While holding the tab in the pressed position, carefully pull the strap backward through the head. A gentle wiggle can help if the tie feels tight. If the mechanism remains intact after releasing, you can reuse the tie, supporting smart storage practices and reducing waste. Many solar panel installations use MC4 connectors to achieve secure and efficient electrical connections. Reusable ties are easier to undo than single-use ones, making them more practical for repeated use. High-quality battery terminals rely on similar durable locking mechanisms to maintain reliable performance.
For hard-to-reach tabs, only use light tools and avoid forcing them. Applying gentle, controlled pressure helps preserve the integrity of the locking head, enabling repeated use. Proper release technique ensures the tie stays functional, saving money and minimizing environmental impact by avoiding unnecessary disposal. Remember, only cut the tie if the release tab breaks; otherwise, carefully reopening it keeps your organizers handy for future projects.

Reusable & No Scissors Needed: Say goodbye to the hassle of scissors! Our quick release zip ties let you adjust and reuse with ease, saving you time and money while making your life a little simpler
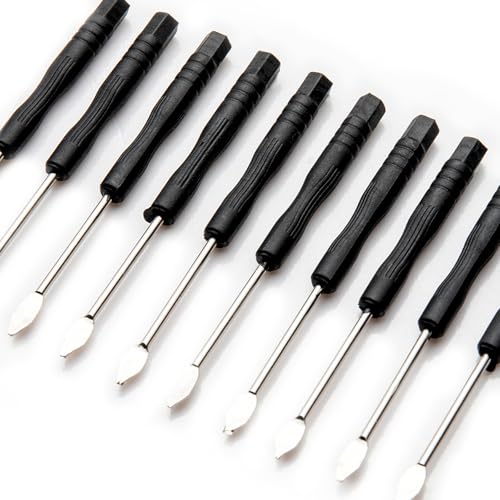
[Easy Operation] Special release tool for stainless steel insulated locks. Enables you to loosen zip ties in tight spaces easily without cutting. It is convenient and safe.

Application - The cable tie opener tool can easily untie plastic and nylon cable ties, but it is difficult to untie metal cable ties. So before purchasing, please check the product to make sure it fits.
Cut a Standard Cable Tie Cleanly and Safely
To cut a standard cable tie cleanly and safely, use a sharp flush cutter or diagonal cutter. Avoid knife-style blades because they tend to slip and can damage nearby cables. Stabilize the bundle with one hand, then align the cutter’s blades as close as possible to the locking head. This positioning ensures a flush cut and minimizes sharp ends that could cause injury or damage. However, for an even safer alternative that leaves no sharp edge, place flat-nose pliers against the tie at the base and twist to break it cleanly.
Make a single, controlled cut—avoid sawing or making multiple snips—to prevent creating jagged edges. After cutting, inspect the end for burrs or sharp protrusions. If you’re working with custom-colored ties, precise cutting is important before engaging in cable tie dyeing or decoration to keep the finish neat and professional. Dispose of the cut pieces immediately to prevent potential hazards. If the tie is under tension, wear gloves and eye protection because the cut end may spring back quickly. For a completely tie-free approach, consider wrapping cables without ties using friction-based methods like the over-under technique to avoid sharp ends entirely.
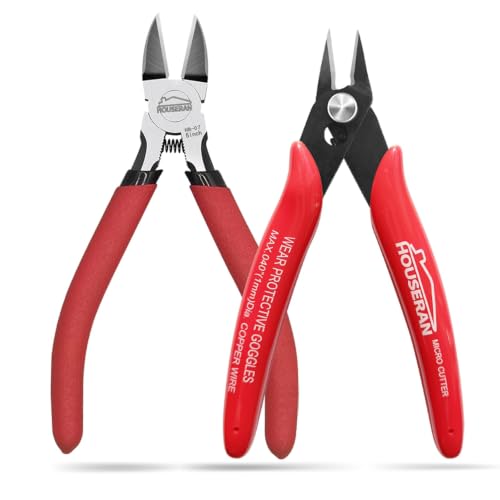
2 ESSENTIAL WIRE CUTTERS: A powerful professional-grade 2-piece cutting set pairing 1 x 5" Micro 170 Flush Cutter with 1 x 5" Standard Side Cutter for maximum efficiency.

WIDELY APPLICATION - The micro wire cutter can be used to cut copper wire and aluminum wire≤16 AWG( Φ1.3mm), iron wire of Φ≤0.8mm, PCB board, zip tie, plastic burrs, jewelry craft, soft copper wire, soft iron wire, etc, not for steel wires.

Cutting Capacity: 5/32 inch (4 mm) for copper wire and 3/32 inch (2.3 mm) for other soft wires. Not suitable for hard or large-gauge wires
The Best Tools for Removing Cable Ties
Flush cutters provide the cleanest and safest results when removing nylon cable ties in professional settings. Their flat cutting face leaves a flush finish near the tie head, minimizing the risk of damaging nearby cables in control panels or tight spaces. For open-access field work, diagonal cutters are effective but require careful attention to their blade angle to prevent pinching adjacent cables. Dedicated removal tools, such as specialized snips or pliers, allow for controlled, repeatable cuts, particularly useful for high-volume removal. To release reusable ties, a small flathead screwdriver can lift the tab with gentle pressure. Heavier-duty ties, like stainless steel or outdoor-rated ties, need robust tools such as aviation snips or heavy-duty diagonal pliers. For applications near a breaker box, selecting the right tool helps maintain the integrity of the panel cover during tie removal. Always select your tool based on the material; scissors and knives may cut quickly but can risk cable damage unless used in emergencies. Using the right tool can be as important as choosing the best battery tray for your setup. When working near battery terminals, check that your cutting tool does not accidentally bridge connections, similar to how you would extend battery cables without creating a short.
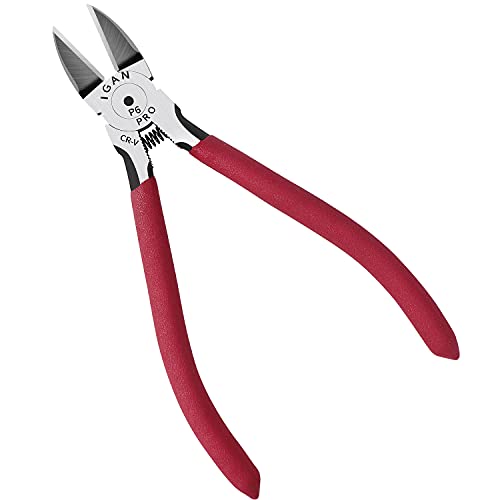
1.Ultra-Sharp Wire Cutters: 13/16'' extra-long cutting edge can easily snips electrical wire up to 12 AWG.

【 Nylon Tie Width】: Designed to handle nylon ties ranging from 2.4mm to 4.8mm (0.09 to 0.19 inches), ensuring compatibility with a variety of tie sizes for diverse applications

【Easy Grip Handle:】Ergonomic and portable design for effortless tightening on diverse tie sizes; ensures lasting durability
Common Mistakes That Damage Cables: and How to Avoid Them
Over-tightening a cable tie can cause damage to your cables. The key is to stop tightening once the bundle feels secure—this is the “snug is enough” rule. Applying too much tension risks crushing the cable jacket, damaging insulation, or deforming twisted-pair geometry in network cabling. Use precise tension adjustment, especially in areas prone to vibration or temperature fluctuations, to avoid these problems. When cutting the tie, ensure you trim flush with the tie head, angling the blades away from the cables to prevent nicks or punctures. Avoid tying across connectors or bending the cable at sharp angles; secure only in straight sections to minimize stress. Match the style of cable ties to your environment—general-purpose nylon ties degrade quickly in sunlight or high heat. Always stabilize bundles before cutting to prevent tugging on conductors, and inspect the cables for damage after removal to ensure integrity.
Reuse or Replace a Cable Tie? Here’s When to Choose
Reuse a cable tie only if it shows no signs of wear, cracks, or deformation. Each reuse reduces its tensile strength by approximately 5-10%, so limit reuse to about two or three cycles. For temporary indoor bundling that isn’t under much stress, reuse can be acceptable. However, for safety-critical, load-bearing, or outdoor applications, always replace the tie immediately. Environmental factors, particularly UV exposure, greatly impact the longevity of nylon ties. Using a solar battery charger designed for your system can help maintain the battery health that powers outdoor tools and lighting. Black UV-stabilized ties can last between five and ten years outdoors, while natural or white ties tend to degrade much faster. For securing generator cables in an outdoor setup, consider an interlock kit to ensure safe and code-compliant connections. Check for chalky residue, elongation, or pawl damage before reusing or reapplying a cable tie. When in doubt, replacing the tie ensures safety and reliability. Selecting a proper charger for your battery setup is a separate but equally important maintenance task, depending on your power needs.

Made with UV resistant industrial strength 6/6 Nylon

Heavy Duty Strength for Tough Jobs: Our 100-pack of 8-inch black zip ties is built to last with a 120-pound tensile strength, making them perfect for both indoor and outdoor projects. Whether you're securing cables, organizing tools, or handling industrial tasks, these durable ties won't break under pressure, ensuring reliable performance every time. Ideal for electricians, landscapers, and DIY enthusiasts.

Made with UV resistant industrial strength 6/6 Nylon
Can’t Reach the Lock? Quick Fixes for Stuck Ties
If you can’t reach the lock, the best approach is to use a thin tool like a safety pin or paperclip tip. Slide it carefully between the tongue and strap inside the head of the tie. While pressing down on the locking tab or pawl, steadily pull back on the strap. If your hand cannot reach the lock, press the tool deeper into the bundle using a firm surface such as a workbench. This stabilizes the tie and allows you to apply controlled pressure for easier removal. For tight spots, a toothpick may help. If these methods fail, using flush-cutters to snip the tie is the practical fallback. Alternatively, if you can access the head, bending the tie backward disengages the lock for a simple, tool-free release. For electrical applications where the tie secures wiring near a disconnect switch, ensure you select fuses with proper ratings to prevent overheating or damage. Choosing a wattmeter instead provides the correct measurement of true power in such circuits. Similar to how AGM batteries provide reliable power for longer periods, careful handling of such components ensures consistent performance.
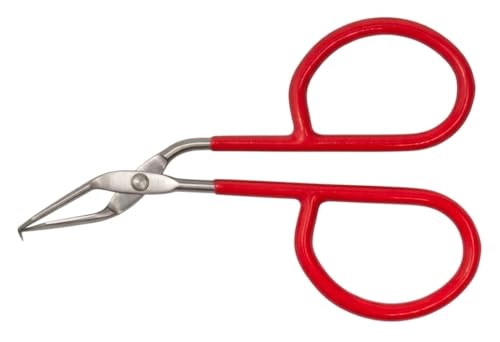
🔴【Original Product – Trusted Brand (Beware of Copies)】 CABTOR designed and introduced the first cable tie opener concept in 2013. Backed by over a decade of product refinement, our genuine tool features trademark protection, durable construction, and proven reliability for long-term professional use.

[Maximum Load Capacity] This trailer stake pocket d ring for stake pockets boasts a remarkable breaking strength of 18,000 lbs and a working load limit of 5,400 lbs. It includes a bolt and hitch combination for secure attachment to your truck or trailer stake pocket.

[Easy Operation] Special release tool for stainless steel insulated locks. Enables you to loosen zip ties in tight spaces easily without cutting. It is convenient and safe.
Why Cable Tie Anatomy Matters for Safe Removal
Understanding the anatomy of a cable tie is crucial for safe removal. Standard cable ties feature a flexible strap with serrations along its length and a rigid head containing a locking pawl. Before attempting removal, you must identify the head—this is where the strap threads through and engages the locking mechanism. To remove a standard tie, you typically cut the strap close to the head using flush-cutting tools, which prevent jagged edges that could cause injury or cable damage. When cutting, ensure your multimeter settings are not confused with tool adjustments, as selecting the wrong range on a meter can lead to inaccurate readings or damage. Releasable ties, on the other hand, have a tab or release mechanism integrated into the head that allows for non-destructive removal; locate and press this tab to release the strap. Material considerations are important: nylon ties can snap suddenly under tension, creating sharp fragments, while stainless steel ties tend to produce sharper edges. A similar principle of locking mechanism engagement applies to devices like generator interlock kits, where proper alignment prevents hazardous backfeed. Always ensure you’re cutting or releasing at the correct point, and inspect the pawl and teeth engagement before pulling the strap free. After removal, verify that all fragments are accounted for and discarded properly. Never reuse a cut standard tie, as these are designed for one-time use only, unlike releasable ties intended for repeated adjustments. Understanding each part’s function helps you avoid mishaps, ensuring both your safety and the quality of your work. For cost-conscious projects, comparing solar panel costs can help you allocate a budget for higher-quality removal tools that reduce the risk of strap damage.