


Wondering how to check if your battery is still good? You can test it at home using a simple digital multimeter to measure its voltage.
This quick check provides a good idea of whether your battery is fully charged or needs replacement.
Keep reading to learn the step-by-step process to get accurate results.
Gather the Right Tools for the Job
To gather the right tools for testing batteries, start by selecting a dedicated battery tester suited to your cell types. It’s crucial to consider the battery chemistry—alkaline, NiMH, or lithium—as universal testers often cover multiple chemistries in one device, minimizing the need for separate tools. Digital testers provide detailed voltage readings, while analog models use color-coded zones to indicate “good” or “replace” status. The ZTS Multi-Battery Tester uses a patented high-accuracy pulse load test to quickly identify weak or failing batteries across more than 30 types. For DIY installations, always use appropriate gauges to match the original cable size and prevent voltage drop. When comparing different testers, it helps to review the best solar panel kit for your home to ensure your power system components are well matched. Power meters measure energy consumption over time to help evaluate the real-world performance of your battery-powered devices.
Ensure your test environment is clean, dry, and organized to prevent contact errors. Sort batteries by size and chemistry beforehand and use the correct slot or test lead for each. This careful setup helps ensure accurate results and avoids false readings. For high-drain devices, prioritize a load-testing tool that applies an internal resistor to simulate real performance, revealing capacity under stress that voltage measurements alone might miss.
Always wear gloves and eye protection if there’s a possibility of leakage. Gather all necessary items thoughtfully before starting the testing process to ensure efficiency and safety.
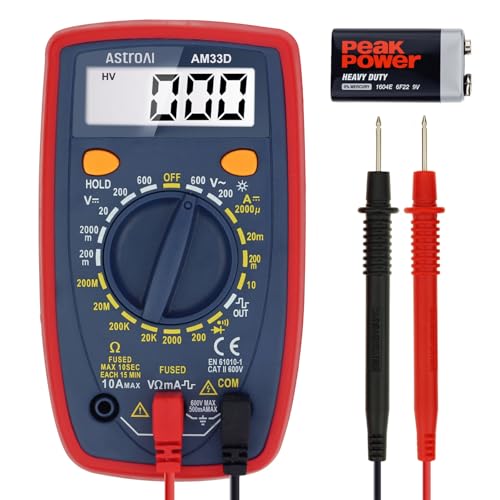
Additional Tips - The following incorrect operations may cause the multimeter not to show results: Firstly, the plugs of test leads are not fully inserted or not inserted into the correct sockets. Secondly, the manual rotary switch is not placed in the correct position. In addition, this meter can not test all AC Current and below 100mV AC Voltage. Please check the user manual carefully before measurement.
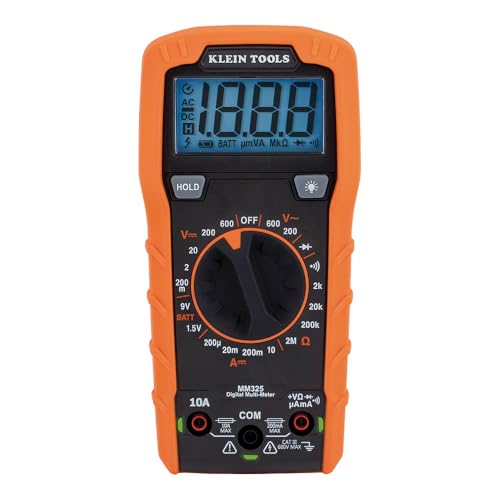
VERSATILE FUNCTIONALITY: Measures AC/DC voltage up to 600V, 10A DC current, 2MΩ resistance; additional features include continuity, diode test and battery test

Accurately Test Full Features: Accurately measures AC/DC voltage, DC current, resistance, continuity test, diode and batteries.
How to Set Your Multimeter to DC Voltage
To set your multimeter to DC voltage mode, locate the DC voltage symbol—usually V⎓, V—, or DCV—on the dial. Turn the selector to this position. For manual-ranging meters, choose a range higher than the battery’s nominal voltage, such as 2V for a 1.5V cell or 20V for 9V or 12V batteries. An auto-ranging meter will adjust the range automatically once set to DC voltage. Always insert the black probe into the COM jack and the red probe into the VΩ jack before testing. Verify the multimeter is properly calibrated by checking that the display shows zero or a steady baseline. Follow safety precautions by avoiding resistance or current modes and never touching the probes to a battery when the dial is set to an incompatible range. When connecting the probes to a battery, the multimeter auto-shifts to the appropriate range for accurate measurement. This automatic ranging relies on the internal ADC to convert the analog voltage signal into a digital reading for display. Ensure all connections are clean and tight before testing, as corroded terminals can cause false low readings. If a battery’s voltage is low due to a short-circuit condition, it may mimic a tripped breaker in a home electrical system.

Customer Service: KAIWEETS provides a lifetime after sale service and technical support. This digital multimeter is included with 2 AAA batteries (pre-installed), comes with a carrying case and 2 decent cable leads.

Important Tips - This CM2K0R clamp meter can not test DC Current. To measure the AC Current you need to clamp the meter around one of the wires and not the whole power cord. Ensure the conductor to betested is in the center of the clamp head. The clamp Jaw is only used to measure current. Do not measure voltage by clamping the conductor being measured.

Versatile Digital Multimeter - Accurately measures AC/DC Current, AC/DC Voltage, Capacitance, Frequency, Duty Cycle, Resistance, Diode, Continuity and Temperature.
Step-By-Step: Test a Battery With a Multimeter
To test a battery with a multimeter, first set the device to measure DC voltage. Ensure the multimeter is calibrated correctly by verifying that the display reads zero when the leads are touched together. Next, place the red probe firmly on the battery’s positive terminal and the black probe on the negative terminal. Keep steady contact to avoid fluctuating readings. The display will show the voltage, which you compare to the battery’s nominal voltage. A reading close to this number indicates the battery still holds a usable charge, while a significantly lower value suggests it is depleted. For a more accurate assessment, measure the voltage again while applying a light load, such as briefly turning on lights or accessories. This method helps reveal if the battery can maintain its power under typical use conditions, not just at rest. Record these readings for an accurate condition evaluation. Use the black lead plugged into the COM terminal to ensure consistent readings. To extend your battery’s service life, avoid allowing it to remain in a partially charged state for extended periods, as this accelerates internal degradation. If the battery shows a low voltage, check the connector or terminal for damage before deciding on a replacement. Selecting a battery with high-quality terminals can improve the reliability of your test connections and overall performance.
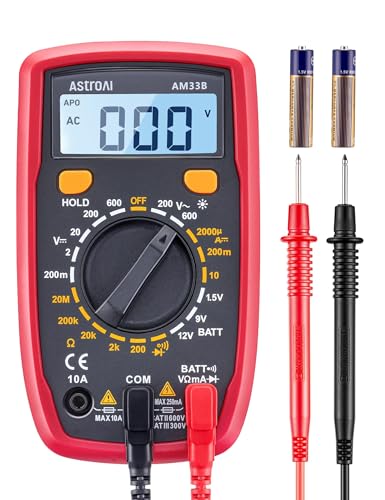
Versatile Digital Multimeter - Accurately measures AC/DC Voltage, DC Current, Resistance, and Diode. This Multimeter is a really useful tool for solving industrial and household electrical issues. Suitable for Household Outlets, Fuses, Batteries (including Vehicles), Automotive Circuit Troubleshooting, Charging Systems, Testing electronics in Cars etc.

Versatility: ANENG multi meter is a highly adaptable electronic tool that can be used to measure a wide range of electrical properties, including AC/DC voltage, current, resistance,continuity,diode and Live wire.This makes it an essential tool for anyone working with electronics or electrical systems,also widely used by hobbyists, students, and professionals in various fields, including engineering, automotive repair, and electricians.
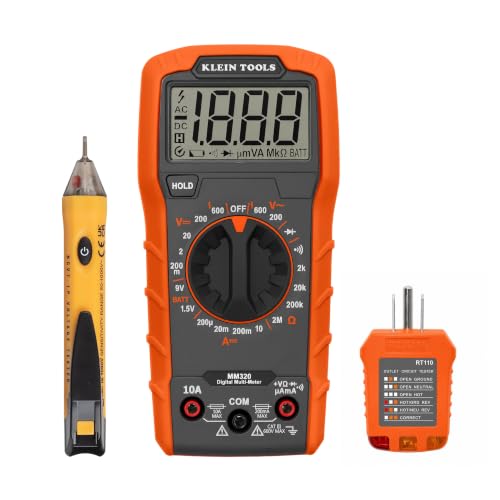
VERSATILE MULTIMETER: Measures up to 600V AC/DC voltage, 10A DC current, and 2MOhms resistance
Why Your Voltage Reading Might Be Wrong
Even if your multimeter is properly set, a voltage reading can still be wrong due to several factors. Surface charge from recent driving can artificially inflate the voltage, pushing a 12V battery into the 12.9–13.2V range. To avoid this, let the battery rest or apply a light load for a few minutes before testing. Temperature also significantly impacts the reading: cold batteries tend to test weaker, while warm ones can hide internal faults. Corroded or loose terminals interrupt current flow, leading to inaccurate results. For six-volt batteries, ensure you use a 6 volt battery charger designed for lower voltage systems to avoid overcharging. Internal issues like battery sulfation change the electrolyte density, which distorts voltage readings further. Testing during active charging or with accessories on introduces load changes that cause fluctuations. To ensure an accurate measurement, always stabilize the battery, clean the terminals, and note the ambient temperature. Always follow easy setup steps for a battery charger to avoid safety hazards during testing. Understanding the differences between AGM and lead acid designs can also help you interpret readings, since AGM batteries often hold a higher resting voltage than their flooded counterparts.
How to Tell if Your Battery Test Shows Good or Dead
After completing the load test, compare the voltage reading to the 9.6V threshold at 70°F. If it stays above 9.6V, your battery is generally good. If it drops below, the battery is weak or dead. A reading below 9.6V indicates the battery cannot deliver current under demand, which often means it has a shortened lifespan, especially if it’s already fully charged. Don’t rely solely on resting voltage because a surface charge near 12.6V can mask internal degradation. For small 1.5V cells, perform the drop test: if the voltage remains stable when dropped, it still has charge; if it bounces, it’s depleted. Also, visually inspect for swelling, corrosion, or leaks—physical damage confirms failure regardless of the voltage reading. If your device cranks slowly or won’t hold a charge, the battery is dead. Always evaluate battery condition under load, not at rest. When testing batteries near an electrical panel, check for the breaker box location to ensure safe disconnection before handling live circuits. For DIY fixes, you can learn to crimp connections securely using pliers as a substitute for a dedicated tool. To measure true power accurately under load, use a wattmeter instead of a standard voltmeter.
Get a More Accurate Reading on Your Car Battery
To get an accurate reading of your car battery, follow a methodical testing process. First, let the battery rest for two to four hours, preferably overnight, to remove any surface charge that can give a false high reading. Before testing, turn off all vehicle accessories and clean the battery posts to ensure good contact.
Use a multimeter set to DC volts and test directly at the clean battery terminals. A fully charged battery will typically read between 12.6 and 12.8 volts. Next, perform a load test by applying a load equivalent to half of your battery’s Cold Cranking Amps (CCA) rating for 10 to 15 seconds. During this test, the voltage should stay above 9.6 volts at a temperature of 70°F to indicate a healthy battery. If testing in colder conditions, the threshold drops slightly—below freezing, a reading above 9.1 volts still suggests a good battery. For a portable alternative that offers similar reliable power on the go, consider a top power bank with built-in wall outlets for charging tools or devices during testing.
Before conducting the load test, confirm that the battery is near full charge for the most accurate assessment of its true capacity and longevity. This approach helps you distinguish surface voltage from internal issues such as sulfation, ensuring you catch potential problems early before the battery fails unexpectedly.

[Car Battery Tester] You can easily test and inspect your 12V lead-acid battery with this TOPDON car battery tester. The SOH (State of Health), SOC (State of Charge), Voltage, Current, Rating, and numerous other understandable analytical data are provided by this battery tester. It is compatible with 100-2000CCA regular flooded, AGM flat plate/spiral, EFB, and GEL for their optimum performance.

Catch Battery Problems Early: Featured in two videos by Project Farm, a popular YouTube channel with millions of subscribers, the ANCEL BA101 helps you quickly spot battery issues before they leave you stranded. It provides easy-to-understand readings for State of Health (SOH), State of Charge (SOC), voltage, current, CCA, plus cranking and charging system tests, so you can better understand your battery and help avoid unexpected breakdowns

【Reliable Automotive Car Battery Tester】 KW208 is the most cost-effective battery load tester compared to other brands, it has all the functions you need and the lowest cost that you can afford. KW208 can test all 12V batteries(100-2000CCA) including regular flooded, AGM flat plate, AGM spiral or gel batteries. Provide overall analysis of batteries’ condition and help you know their status in advance before it dies. KW208 battery analyzer supports cranking and charging system tests also alternator and starter test. Conveniently store this car battery tester for batteries in your glove box or garage, ready for use whenever needed.
Test AA, AAA, 9V, and Car Batteries at Home
To accurately test the batteries around your home, start with your multimeter set to DC volts on a low range. For AA, AAA, and 9V batteries, touch the red probe to the positive terminal and the black probe to the negative terminal. A fresh alkaline AA or AAA battery will typically read around 1.5 volts, while a 9V battery should show close to 9 volts. Make sure to clean any surface corrosion beforehand, as dirt and corrosion can interfere with the contact and give misleading readings. Check terminals for a white-green powder that indicates corrosion, which can hinder current flow and affect readings. A reliable measurement also requires solid metal-to-metal contact between the probes and terminals. Using a clamp meter can also safely measure current without disconnecting wires by clamping around a single conductor. If you are frequently testing batteries for stored power systems, consider using a quality inverter with battery charger to maintain optimal charge levels.
For a quick and simple check, using a dedicated battery tester can identify whether a battery is good or needs replacing, especially for everyday use. When storing batteries, their longevity can be affected; periodically test cells stored for several months to ensure they still hold a charge. Testing should be done more frequently if batteries are used regularly—consider quarterly checks for stored batteries.
For car batteries, park your vehicle on level ground and turn off the engine. Let the battery rest overnight to stabilize its voltage. Before testing, clean the terminals with baking soda and water, then tighten all connections securely. Set your multimeter to the 20V DC range. A healthy car battery should read 12.6 volts or higher. If the reading drops below 12.4 volts, the battery likely needs charging or replacement.

Versatile Settings - The AstroAI Digital Multimeter accurately measures AC/DC Voltage, AC/DC Current, Resistance, Continuity, Capacitance, and Tests Diodes and Batteries (1.5, 9, 12V Battery Settings)

Wide Application - The AstroAI M4K0R Multimeter accurately measures AC/DC voltage to 600V, Current to 10A, Resistance to 40MΩ. You can use it for continuity test, diode test, battery test and live wire test. Includes 1.5V, 9V and 12V battery test modes to easily test a wide variety of batteries. Multimeter light turns red for low voltage and green for enough voltage.

What That Voltage Number Actually Means
A voltage reading provides a snapshot of your battery’s electrical potential, reflecting how much charge is left. For example, a fully charged 12V lead-acid car battery typically registers around 12.7 volts when at rest. However, interpreting this number correctly depends on the battery’s chemistry. A lithium-ion cell for electronics may show a different voltage range even when fully charged. To get an accurate reading, measure the voltage after the battery has been resting for at least a few hours to allow the surface voltage to stabilize. Loading the battery or measuring immediately after use can give a skewed, often lower, reading. Temperature also affects voltage: cold conditions can reduce the measurement, making a healthy battery seem weaker. For a 12V lead-acid system, roughly 12.5 volts indicates about 90% charge, 12.2 volts signals around 50%, and 11.8 volts suggests the battery is nearing deep discharge. Remember, voltage shows only the current state of charge and does not diagnose overall health or capacity. However, understanding why negative battery cables come off first can help prevent sparks and short circuits during testing.
Replace Now or Test Again? How to Decide
Start by fully charging your battery before testing. A charge level below 75% can cause a failed load test without indicating true deterioration. After charging, retake the load test under the same controlled conditions. If it passes, your battery is still good to go. If it fails again, it indicates a capacity problem, and replacing the battery is necessary. Avoid retesting repeatedly, as it won’t change the outcome. Look for supporting signs such as slow cranking or repeated start failures, which suggest the battery is failing. Industry standards recommend replacing the battery when capacity drops below 80%. If it passes the load test, it remains serviceable. Fail it twice, and you should replace it immediately.