


If you’re wondering how to safely charge an AGM battery, the process might seem straightforward but requires some careful steps.
Using the right charger and following the correct procedures can prevent damage and ensure your battery’s longevity.
In this guide, you’ll learn how to do it properly, from inspecting your battery to disconnecting safely.
How to Charge an AGM Battery Safely
To charge an AGM battery safely, use an AGM-compatible smart charger that has a dedicated sealed-battery mode. Avoid using old unregulated “dumb” chargers, as they can cause damage. Choose a multi-stage charger that automatically transitions from bulk to absorption to float charging. Keep the voltage within the range of 14.4V to 14.8V during absorption and 13.2V to 13.8V during float to prevent battery sulfation, which occurs when the battery isn’t fully charged. Control the charging current to 10% to 30% of your battery’s amp-hour capacity—never exceeding 0.3C—to reduce heat buildup. High temperatures accelerate cell drying and electrolyte stratification. Always charge in a well-ventilated area and avoid temperatures above 40°C. Connect the positive terminal first, then select AGM mode on the charger before plugging it in. Let the cycle complete without interruption, and unplug the charger before disconnecting the clamps, starting with the negative terminal. Many modern solar panel systems use MC4 connectors for a secure and efficient power connection. Following similar principles to maximizing solar panel lifespan can help preserve battery performance by avoiding extreme heat and ensuring proper charging habits. A high-quality charger with adjustable voltage settings can also help protect the battery from damage caused by fluctuating household power.
Inspect the Battery Case and Terminals Before Charging
Inspect the battery case and terminals thoroughly before charging. Start by examining the case for any cracks, bulges, or leaks. Damage like this indicates the battery is compromised and should not be charged. Look for stains or residue on the surface that could conceal cracks or other defects. Charging a damaged case can significantly shorten lifespan and create safety hazards. If you are setting up a permanent charging system, consider whether series or parallel wiring best suits your voltage and current needs.
Next, check the terminals carefully. Look for blue-green or white powdery corrosion, which signals corrosion buildup, or discoloration and physical damage. If you see any corrosion, clean the terminals before proceeding. Use a wire brush to scrub away buildup and reveal shiny, clean contact surfaces. You can neutralize light corrosion with a baking soda solution—apply only after disconnecting the cables to prevent electrical shorts.
Ensure everything is completely dry after cleaning. Do not attempt to charge a battery with a cracked case or heavily corroded, loose terminals, and never leave the terminals touching each other during inspection. Always wear safety glasses and gloves for protection. If the battery parts are seriously damaged, replace them; do not force a charge through unsafe hardware. For a reliable alternative, consider using a dedicated lithium charger designed specifically for safe and efficient charging.
Connect the Charger Step by Step
To connect the charger safely, always begin by turning it off or unplugging it to prevent sparks. Verify that the charger is compatible with your battery by selecting the AGM mode and confirming the voltage matches the battery’s specifications. Attach the red positive clamp first, making sure it has a secure metal-to-metal connection. Next, connect the black negative clamp to the battery’s negative terminal if the battery is out of the vehicle. If installing the charger while the battery remains in the vehicle, connect the black clamp to a clean, unpainted chassis ground away from the battery. Ensure that the clamps do not touch each other during setup. Once both clamps are securely attached, plug in the charger and turn it on. Avoid changing any settings once charging has started. Always double-check that the red clamp is on the positive terminal and the black clamp on the negative terminal for safety. While charging, monitor for signs of heat, odor, or sparking. For enhanced safety, consider using high-quality connectors that ensure reliable, corrosion-resistant connections. When charging is complete, unplug the charger before removing the negative clamp first, then the positive, following the same reverse order used for disconnecting a battery to minimize spark risk. Using quality cable materials prevents voltage drop and overheating during the charging process.

PREVENT BATTERY FAILURE: Ensure reliable starts after storage with this 4-in-1 device that charges, maintains, tests, and restores batteries for cars, motorcycles, ATVs, trucks, SUVs, and boats.

UNLEASH PEAK POWER: A 50-amp engine start and 10-amp boost charge bring dead batteries back to life fast, so your daily driver, truck, or weekend ride fires up the second you need it.

Charger, Maintainer & Desulfator - An all-weather battery charger, battery maintainer, trickle charger, and battery desulfator. Perfect for charging and maintaining all 12-volt lead-acid, flooded or sealed maintenance free batteries (AGM and gel cell).
Bulk, Absorption, and Float Charging Stages
The three main AGM charging stages are bulk, absorption, and float. During bulk charging, your charger supplies a constant, high current—typically about 10 to 30 percent of the battery’s capacity (C-rate)—until the voltage reaches approximately 14.4 to 14.7 volts. This stage quickly restores about 80 percent of the battery’s capacity, but it is crucial to follow your battery manufacturer’s specifications to prevent electrode damage. Respecting the voltage and current limits ensures the chemistry remains intact and prolongs the battery’s lifespan. For optimal results, use a charger with robust terminals that ensure consistent current delivery.
In the absorption stage, the charger maintains a steady voltage around 14.4 to 14.7 volts while the current gradually decreases. This process pushes the battery from roughly 80 percent to full charge. You should conclude absorption once the current drops to a low threshold, typically between 0.5 and 2 amperes, which indicates the battery is nearing full capacity. Monitoring current levels rather than voltage alone ensures a more accurate and safe completion of the charging cycle.
The float stage involves maintaining a voltage of about 13.2 to 13.8 volts. This low, stable voltage compensates for self-discharge, keeping the battery fully ready without overcharging. The float mode can continue indefinitely, but it’s important to verify that the float voltage does not exceed recommended limits to prevent excess gassing or electrolyte loss. Proper float charging sustains peak performance and readiness over long periods.

Stay Charged: Battery Tender battery chargers and maintainers provide a full charge to your powersport vehicle’s battery before switching to float mode to maintain proper voltage levels for safe, long-term storage
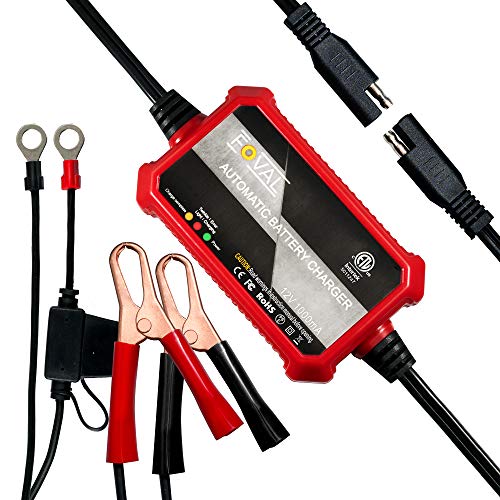
Automatic Battery Charger & Maintainer: 1A 12V smart battery charger perfect for SLA / VRLA / GEL CELL / AGM / WET lead acid batteries. It is a battery maintainer, trickle charger, float charger, and battery desulfator, also complete 4-step charging program (Initialization, Bulk Charge, Absorption Mode, Float Mode).

Wide Battery Compatibility: Converts standard 120V AC into a stable 12V DC power supply. This RV power converter is ideal for charging batteries or powering 12V RV devices. Supports both lead-acid and LiFePO4 batteries (Battery not included)
Best Voltage and Current Settings for AGM Batteries
For optimal performance, set your AGM battery’s absorption voltage between 14.4V and 14.6V. This range minimizes stress and ensures proper charging without forcing gassing, which can damage the battery. Never exceed 14.8V during absorption because higher voltages cause excessive gassing and potential damage. During the float stage, maintain a voltage of 13.5V to 13.8V to prevent overcharging and water loss. Limiting your charger’s current to between 10% and 25% of your battery’s capacity—so, for a 100Ah battery, choose a current of 10 to 25A—is ideal for longevity. Using a current of 0.1C (10A for a 100Ah battery) strikes a good balance between fast charging and battery health. Higher currents up to 0.3C are acceptable but may generate heat and reduce battery lifespan. Always follow your manufacturer’s recommended voltage and current settings to ensure safe and optimal operation. Avoid equalization procedures, as AGM batteries are sensitive to overcharging and do not require this process. For an efficient setup, pair your battery with a high-quality solar converter to precisely regulate these voltage and current levels. A secure battery tray helps prevent vibration and movement during charging, protecting your AGM battery from physical damage.

【High Conversion Rate】This 20W solar panel with monocrystalline A+ solar cell has an excellent cell efficiency of 21%-30%. Designed to charge and maintain 12V rechargeable batteries like LiFePO₄, Lithium Ion, AGM, SLA, GEL, EFB, MF, etc. Keep batteries in charged for trailer, tractor, truck, boat, motorcycle, RV, car, lawn mower, water pump, gate opener, electric fence, etc

Compatibility Guide: Engineered to efficiently manage all solar panels below 300W, this 20 amp solar charge controller is your system's reliable core. For complete safety and compatibility, it is designed solely for 12V batteries and is not compatible with 24V or 36V battery packs. Please note: This unit does not include a polarity converter and must be connected with correct positive/negative polarity

High-Efficiency MPPT Solar Charger - Advanced tracking technology delivers 20-30% faster charging for 12V batteries. A+ monocrystalline panels maximize power conversion. Perfect 20W solar trickle charger for cars, RVs, boats, and trailers. More sun captured, less time waiting.
Monitor Charging Progress the Right Way
To monitor your charging progress accurately, rely on your charger’s indicators but always verify them at the battery terminals. Smart chargers typically display voltage or charging percentage, while multi-stage chargers use LEDs to show progress. However, a blinking 100% light indicates charging is ongoing, not that the process is complete. Watch the current: during the bulk stage, it remains high; in the absorption stage, it gradually drops as the voltage stabilizes. A decreasing current trend signals the battery is nearing full charge and confirms good charging efficiency. For a reliable charging setup, consider top power inverters that integrate quality and performance. Understanding how a solar charge controller regulates voltage and current can further improve the safety and efficiency of your charging process. Following simple habits that add years can also help you extend your battery’s real-world lifespan.
Use a multimeter to verify the terminal voltage while charging because charger displays can sometimes be misleading or inaccurate. For sealed AGM batteries, hydrometers are not practical due to their design; instead, check the open-circuit voltage after allowing the battery to rest. Combining terminal voltage checks with current monitoring gives the clearest picture of your charging progress, ensuring you don’t rely solely on indicator lights.
When to Stop Charging and Check for Full Charge
Once your charger shifts to float mode and stabilizes between 13.5V and 13.8V, your AGM battery is fully charged. Keep an eye on the current taper—when it drops to around 3A for a 100Ah battery, it’s time to stop charging. Do not rely solely on voltage readings during charging, as temperature fluctuations can skew the results. Instead, let the battery rest for 10 to 24 hours after charging to obtain an accurate resting voltage measurement. A stable resting voltage between 12.6V and 12.8V confirms the battery is fully charged. If the voltage falls below this range, the battery may not be completely charged or has settled. Watch out for abnormally high heat during charging; it is a sign to stop immediately, as excessive heat indicates potential damage or safety risks. For long-term performance, choose a charger that matches the power inverter for battery specifications to ensure efficient energy conversion. Using a smart plug with energy monitoring can help track the charger’s power draw to confirm it has entered float mode. An inverter with a built-in charger can also simplify the process by automatically managing the transition to float mode.
Don’t Make These AGM Charging Mistakes
Never use a charger without an AGM-specific profile. AGM batteries do not have free liquid to absorb overcharge stress, so using a universal flooded-battery charger can cause damage. These chargers can push voltage above 15V, which overheats plates and dries out the absorbed glass mats. Your battery chemistry requires a precise voltage range of 14.4 to 14.7 volts at 77°F to charge safely and effectively. Additionally, do not exceed 10% of your battery’s amp-hour (Ah) rating in charging current; high amperage can generate excessive heat, permanently reducing capacity. Always monitor for warmth during charging—excessive heat indicates overcharging and can lead to swelling or rupture. If the battery feels hot, stop charging immediately. For safety, ensure proper ventilation during charging and verify that your charger is set for 12V AGM systems. Avoid using gel or flooded battery modes, don’t fast-charge deeply discharged batteries, and never rely on unregulated trickle chargers. For professional-grade protection, consider a panel cover that helps shield your breaker box from dust and accidental contact near charging equipment. Maintaining proper temperature compensation, especially during extreme conditions, is crucial to prevent irreversible damage. For off-grid or backup scenarios, pairing your AGM bank with a reliable power backup source ensures consistent charging voltage even when grid power fluctuates.

🔋【3-in-1 Battery Charger, Desulfator, Maintainer】The 12V 24V battery charger is designed to charge and maintain 12 volts or 24 volts batteries, it can works as 12Amp quick battery charger. Compatible with all 12.6V Lithium-ion batteries,12V and 24V lead-acid automotive,marine, deep-cycle batteries: flooded,gel,AGM,maintenance-free,WET,CAL,EFB batteries in Car,motorcycle,lawn mower,ATV,truck,tractor,SUV,boat marine, etc.🎁Nice holiday gifts for Christmas day,New year,etc.
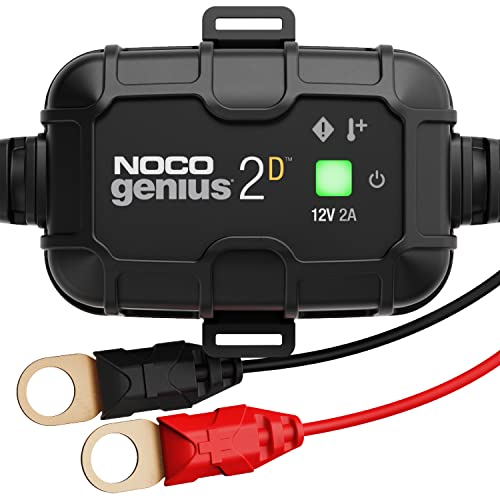
MEET THE GENIUS2D — The all-new direct-mount onboard battery charger for an under-the-hood battery charging system and year-round battery maintenance.

LiFePO4 LEAD-ACID SMART BATTERY CHARGER - 12V 15-Amp and 24V 8-Amp 9-stage quick battery charger, significantly faster than standard 10-Amp or 8-Amp chargers. Perfect for charging or repairing all 12V and 24V LiFePO4 and lead-acid batteries, including AGM, GEL, SLA, and Flooded types. Ideal for cars, trucks, SUVs, motorcycles, lawn mowers, boats, and marine applications. Note:(This is a battery charger not battery jump starter).
Disconnect and Store a Fully Charged AGM Battery
To disconnect and store a fully charged AGM battery safely, follow these steps. First, ensure the battery is fully charged, aiming for an open-circuit voltage of 12.6 to 12.8 volts. This helps prevent sulfation and freezing during storage. Then, disconnect the negative terminal first to avoid short circuits. Before storing, clean the terminals to prevent corrosion and choose a cool, dry place between 10°C and 25°C, away from concrete floors.
If you’re not using a maintainer, recharge the battery every three to six months, making sure the voltage remains above 12.5 volts. When storing a damaged or unusable battery, do not dispose of it in the trash. Instead, arrange for proper recycling at a facility that handles lead-acid batteries. Never rely on emergency jump-starts to revive a poorly stored battery, as this can mask deeper issues. Keep the battery upright, well-ventilated, and free from parasitic loads until you are ready to reconnect it.
Diagnose an AGM Battery That Won’t Hold a Charge
When an AGM battery won’t hold a charge, start by verifying your charging settings and charger compatibility. Ensure the charger’s profile matches AGM chemistry because incorrect parameters can prevent the battery from accepting a proper charge. Confirm that the charger completes a full charging cycle; if it switches to float mode prematurely, the battery is not reaching a full charge.
Measure the resting voltage after the battery has sat idle for at least 12 hours. A healthy AGM battery typically reads 12.6 volts or higher. If the voltage drops quickly after charging, you are losing capacity, indicating internal issues. Persistent low standing voltage suggests internal damage or severe sulfation.
Look for signs of electrode degradation from repeated deep discharges or electrolyte imbalance caused by overcharging. Inspect the battery for bulging, cracks, or terminal corrosion—these are physical signs of damage. If the voltage remains below 12 volts even after recovery attempts, replacement becomes the practical choice. Always rule out poor connections or incorrect temperature compensation before concluding the battery is dead.

【Battery Charger, Maintainer】A compact size portable 2 in 1 battery charger and battery maintainer. Ideal for 6A and 12V lead-acid automotive, RV, and powersport, including AGM, LiFePO4, and maintenance-free batteries, suitable for cars, golf carts, motorcycles(max 2A), boats, lawn mowers, ATVs, UTVs etc.(NO floating charge for AGM batteries).

All-in-One Charging Solution for 12V Battery: This 12V 8-Amp smart battery charger fully works with LiFePO4, AGM, GEL, EFB, VRLA and flooded lead-acid batteries, functioning as a charger, maintainer, trickle charger, and desulfator for your car, truck, motorcycle, boat and lawn equipment. Note: Only applicable to 12V car or motorcycle batteries, not compatible with 24V batteries. (Do not charge LiFePO4 (14.6V 0.2V) batteries without a BMS system)

PREVENT BATTERY FAILURE: Ensure reliable starts after storage with this 3-in-1 device that charges, maintains, and reconditions batteries for cars, motorcycles, ATVs, trucks, SUVs, and boats.