

Ever wondered if your car battery is really healthy or just going through a rough patch? A battery load tester can give you a clear picture by applying a quick, high-current test that reveals the true condition of your battery.
In this article, you’ll learn how it works and how to interpret the results to keep your vehicle reliable.
Why Your Car Battery Fails Without Warning
Your car battery can fail suddenly even if it initially passes a basic voltage check. Aging, temperature extremes, parasitic drains, or a malfunctioning charging system can push a healthy battery past its limit unexpectedly. As batteries age over three to five years, internal plates degrade, and chemical stability declines, making abrupt failure under starter load inevitable. High heat accelerates fluid loss and corrosion, while cold temperatures reduce the battery’s cranking power. Parasitic drains above 100 milliamps from modules or accessories can slowly drain the battery overnight. If the alternator fails to replenish this loss, you risk being stranded. Regular maintenance is essential: inspect terminals regularly, test charge cycles, and keep an eye on warning signs. Unlike a solar generator’s steady DC charging cycle, a car battery’s abrupt failure is best caught with a specialized load tester. For prolonged storage, a battery maintainer is far more suitable than a standard charger for preserving battery health. When replacement is needed, prioritize proper recycling to dispose of lead and acid safely. Remember, only a load test can accurately determine your battery’s true reserve capacity and reliability. For top performance and longevity, choosing battery picks with terminals that emphasize quality and value is essential for reliable vehicle starts.

Catch Battery Problems Early: Featured in two videos by Project Farm, a popular YouTube channel with millions of subscribers, the ANCEL BA101 helps you quickly spot battery issues before they leave you stranded. It provides easy-to-understand readings for State of Health (SOH), State of Charge (SOC), voltage, current, CCA, plus cranking and charging system tests, so you can better understand your battery and help avoid unexpected breakdowns

[Car Battery Tester] You can easily test and inspect your 12V lead-acid battery with this TOPDON car battery tester. The SOH (State of Health), SOC (State of Charge), Voltage, Current, Rating, and numerous other understandable analytical data are provided by this battery tester. It is compatible with 100-2000CCA regular flooded, AGM flat plate/spiral, EFB, and GEL for their optimum performance.

【Reliable Automotive Car Battery Tester】 KW208 is the most cost-effective battery load tester compared to other brands, it has all the functions you need and the lowest cost that you can afford. KW208 can test all 12V batteries(100-2000CCA) including regular flooded, AGM flat plate, AGM spiral or gel batteries. Provide overall analysis of batteries’ condition and help you know their status in advance before it dies. KW208 battery analyzer supports cranking and charging system tests also alternator and starter test. Conveniently store this car battery tester for batteries in your glove box or garage, ready for use whenever needed.
How a Load Tester Diagnoses Your Battery’s Real Health
A load tester diagnoses your battery’s true health by applying a controlled electrical demand that simulates engine starting. To use it, connect the tester and activate the load at 50% of your battery’s Cold Cranking Amps rating for 10 to 15 seconds. This test assesses how well your battery retains voltage under stress. A healthy 12V battery should maintain above 9.6 volts during the test. If the voltage drops sharply, it indicates high internal resistance or failing cells, revealing whether your battery is truly deteriorated or simply discharged. To ensure accurate results, your battery should be at least 75% charged, and connections must be clean and tight. Just as terminal blocks ensure secure and reliable wire connections in home electrical setups, clean and tight tester connections are critical for accurate battery diagnosis. Interestingly, choosing the right battery for your application can be as nuanced as selecting between bifacial and monocrystalline panels, each offering different performance characteristics under varying conditions. For additional safety, it is wise to first turn off power at the main meter before working on any high-current electrical connections. Using a load tester provides insights into your battery’s lifespan and helps optimize your charging routine, preventing unexpected failures.
How a Battery Load Tester Differs From a Multimeter?
A battery load tester differs from a multimeter primarily in purpose. While both tools can measure voltage, the load tester simulates real-world conditions by applying a controlled high current to the battery, revealing its true performance. A multimeter, on the other hand, measures static voltage with minimal current, giving you a quick snapshot of the battery’s charge but not its ability to deliver power under load. For safe home charging, correct charger settings and voltage limits are essential to avoid overcharging.
The load tester assesses how your battery responds when starting an engine or under similar stress, exposing weaknesses like internal resistance or insulation problems that might not show up in a resting voltage reading. These issues can cause slow starts or cold-weather failures. Conversely, a multimeter is best suited for quick checks of charge level, continuity, or basic electrical troubleshooting, but it cannot reveal how the battery behaves during actual engine cranking. For a side-by-side comparison of cost and lifespan, the load tester generally offers greater durability for heavy-duty use. Understanding insulation problems is similar to understanding why materials like heat shrink tubing are used to protect electrical connections from moisture and short circuits.
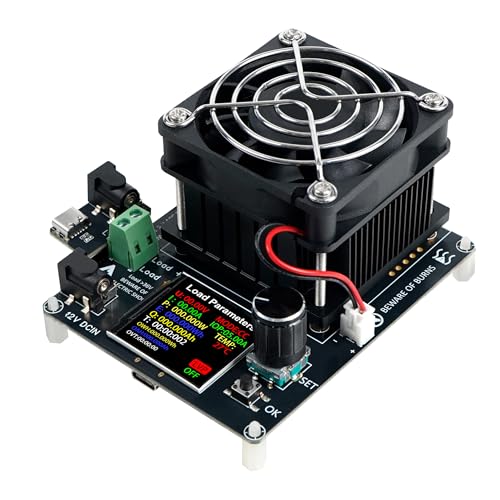
【Multi-functional Load Tester】The tester supports operation at 50V voltage, 15A large current, and 120W high power. It provides comprehensive parameter setting and operational functions for voltage, current, power, energy, capacity, discharge time, temperature, etc., ensuring accurate and reliable test results.

RUN 3 TESTS WITH 1 DEVICE: Diagnose battery health, charging system performance, and starter motor draw all from one automotive battery tester—no need for separate tools cluttering your bench.

2.4" Large Screen Battery Load Tester: Featuring a high-definition color screen, this electronic load tester provides clear and precise readings. It offers comprehensive parameter, settings and operations, including voltage, current, power, capacity, electricity, temperature, discharge resistance, time-limited discharge and stop voltage, etc., to ensure accurate and reliable results.
What Are the 4 Main Types of Battery Load Tester Tests?
There are four main types of battery load tests: constant current, pulse, capacity, and cranking. The constant current test applies a steady, predefined load to monitor voltage decay, revealing issues like electrode degradation and overall performance under sustained demand. The pulse test delivers short, high-current bursts to evaluate the battery’s transient response and uncover weaknesses that might not show under continuous load. This approach is similar to evaluating a solar panel’s ability to handle variable power spikes. The capacity test discharges the battery until a specific cutoff voltage, measuring how much energy it can store and providing insights into electrolyte health and overall usability. The cranking test simulates engine starting by applying a heavy load for approximately 15 seconds, verifying the battery’s ability to deliver high current when needed. Each test provides different insights: constant current for endurance, pulse for response spikes, capacity for runtime potential, and cranking for starting power, allowing you to choose the right test based on the battery’s intended role. Understanding these tests helps ensure safe handling, such as knowing why negative battery cables come off first when disconnecting.

ACCURATE MEASUREMENT: Patented high accuracy Pulse Load Technology measures the charge and life of your batteries under a load; more reliable than just a voltage readout
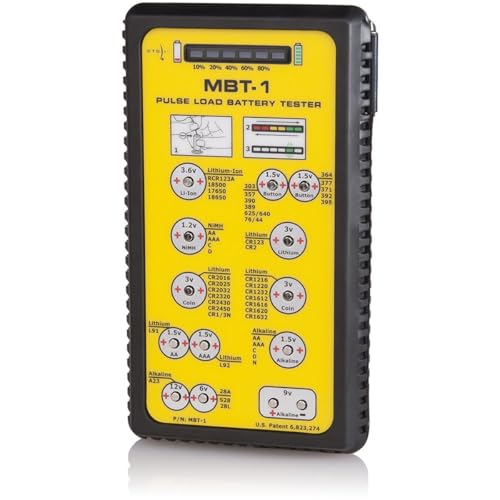
Easy to use - no switches or settings
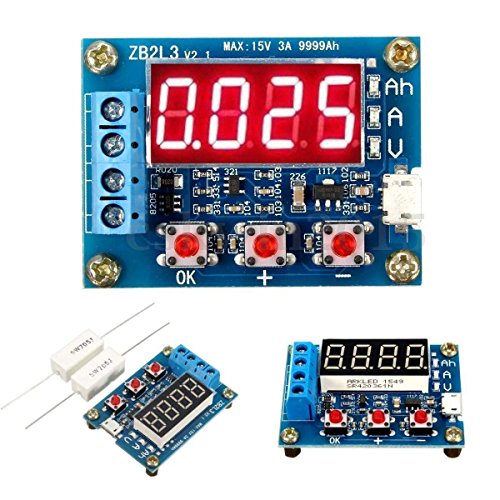
Power supply voltage: DC4.5-6V (micro USB interface) ; Working current: less than 70mA. Supported by current: the maximum 3.000A resolution 0.001A.
Load Test Results: Good vs. Weak vs. Bad
After a 10 to 15 second load test, you can interpret your battery’s health by checking its minimum sustained voltage. A good result is at or above 9.6 volts, indicating the battery can handle typical load demands for reliable starting. While it doesn’t confirm a full charge, it shows the battery chemistry is sound and capable of performing well. Similar to how series and parallel solar panel setups weigh performance trade-offs, this voltage threshold indicates adequate capacity. Using a digital multimeter to check a capacitor requires a different approach, as it tests for capacitance and leakage rather than load voltage. A load tester can also help identify if a battery is suitable for use with power inverters by simulating real-world discharge conditions.
A weak reading falls between 9.0 and 9.5 volts. This suggests reduced reserve capacity and the potential for insufficient cranking power, even if the battery initially starts. Common causes include partial discharge or sulfation buildup. It’s advisable to recharge the battery before considering replacement.
A bad result is below 9.6 volts, often under 9.0 volts. This indicates severe battery degradation, such as a bad cell or significant active material loss. If the voltage recovers quickly after the test, it indicates a deep discharge rather than internal failure. Slow recovery points to a more serious internal problem. After charging, retest to confirm, and if the result remains poor, replacement is necessary.
How to Use a Load Tester in 5 Simple Steps
First, confirm the battery is fully charged and ensure the tester matches its type and voltage. Clean the terminals to ensure a solid contact with the clamps. Use the tester’s voltmeter to measure the standing voltage; a 12V battery should read at least 12.6 volts. Ensure you are using a tester with load test functionality to mimic real-world starting conditions. This process is similar to how a breaker box protects a home’s electrical circuits from damage during surges. For a clean and reliable connection, use a proper cutting tool to remove any corroded cable ties securing the terminals.
Connect the red clamp to the positive terminal and the black clamp to the negative terminal. Make sure the clamps are tight and not touching each other. Turn off all accessories to prevent any additional load during testing.
Set the load tester to half the battery’s cold cranking amps (CCA) rating. For example, if you have a 600 CCA battery, set the load to 300 amps. Engage the load switch for 10 to 15 seconds to test the battery’s response under stress. Immediately after removing the load, read the voltage again at the end of the test.
This testing routine helps assess the battery’s health when subjected to a load, revealing potential weaknesses. Following these steps ensures accurate, consistent results and avoids misinterpreting the battery’s condition.

Fast Battery Testing: Get accurate results in just 10 seconds with our battery and alternator tester, making it easy to diagnose battery condition on or off the vehicle.

Versatile Battery Load Tester & Voltage Tester: Effectively check the battery and voltage of various vehicles including cars, trucks, RVs, and golf carts. This powerful diagnostic tool ensures accurate results for both 6V and 12V batteries.

🔥【A MUST HAVE TOOL IN YOUR GARAGE】 - With up-to-date testing technology, it provides a quick reading to determine whether a vehicle battery needs a jump or replacement and also the output status of the alternator. All you have to do is log in and play. Save your time and money.
Don’t Make These Load Testing Mistakes
To ensure accurate load testing results, follow these key steps and avoid common pitfalls. First, never test a partially charged battery. Always confirm the battery is fully charged and allow a settling period to dissipate surface charge, which can temporarily inflate voltage readings. Testing immediately after charging can mask the battery’s true condition and lead to inaccurate conclusions. As an alternative, you can use a simple multimeter to check resting voltage before proceeding with the load test. For consistent power during testing, always ensure your inverter is as reliable as top-rated models reviewed in expert comparisons.
Second, verify all connections before testing. Corroded terminals or loose clamps introduce resistance that can distort voltage drop readings, so clean and tighten all connections thoroughly.
Third, apply the correct load for the test. For automotive batteries, this typically means using a load equal to 50% of the Cold Cranking Amps (CCA). Using a full CCA load or mismatched settings for AGM versus flooded batteries will skew the results. For similar electrical accuracy, choosing a quality breaker box ensures your system handles the load correctly.
Finally, consider the ambient temperature. Cold batteries below 50°F are more likely to fail a load test falsely if temperature effects are not accounted for. Ignoring these critical factors can make your load testing seem useless or misleading.
How Often Should You Use a Battery Load Tester?
You should perform a battery load test at least once a year for standard automotive batteries. If your vehicle’s battery experiences heavy loads or is exposed to extreme temperatures, increase the testing frequency to every six months. For batteries in daily-use RV or marine systems, testing quarterly helps ensure reliable performance. Battery chemistry also influences testing intervals; flooded lead-acid cells tend to degrade faster under deep cycling compared to AGM types. Before harsh seasonal conditions like winter or summer, conduct a load test to identify any potential performance issues caused by temperature variations. For critical systems such as healthcare devices or data centers, monthly or semi-annual load testing aligned with industry standards ensures continued reliability. Additionally, if you notice symptoms like slow cranking or dimming lights, test your battery immediately—waiting for the scheduled interval could leave you stranded. Adjust your testing frequency based on observable decline rather than sticking strictly to a calendar schedule.

Easy To Use - The battery load tester is easy to use and read of 6V and 12V batteries for cars, trucks, RVs, motorcycle, boats and so on. Portable and quick to operate at home or garage instead of going to the shop for battery reading.

【Battery Test】Battery load tester helps you test battery condition and load, check starter motor consumption and complete charging system diagnostics. Ideal for efficient discharging and determining good or bad battery condition.

Professional Battery Diagnostic: BT500 car battery tester is all-in-one diagnostic solution, engineered for wide compatibility. It accurately tests 6V, 12V, 24V battery, supporting regular flooded, AGM flat plate, AGM spiral, GEL and EFB battery. Whether you're checking a car before a long commute, or a truck battery on job site, this battery load tester provides reliable data on voltage, resistance, State of Health (SOH) and State of Charge (SOC). Not available for lithium battery、deep-cycle battery、golf cart
When Load Testing Won’t Work for AGM or Lithium Batteries
Load testing is generally unreliable for AGM and lithium batteries because their internal resistance and chemistry differ significantly from flooded lead-acid models. Traditional load testers, such as carbon-pile testers, may falsely diagnose a healthy AGM battery as bad due to its lower internal resistance. For AGM batteries, it is essential to use electronic testers with a specific AGM mode that accounts for its unique chemistry. Allow at least four hours after charging before testing an AGM battery to prevent false readings caused by surface charge. Lithium batteries require firmware-based voltage-profile algorithms to accurately estimate their state of charge; generic testers lack this capability. Using a smart charger during maintenance can help, but a modern conductance tester programmed for your battery type is necessary for correct diagnosis. Applying standard load tests to these batteries risks misdiagnosis, leading to unnecessary replacements.
What to Do If a Load Test Isn’t Possible
If a load test isn’t possible, you can still assess your battery’s condition using alternative methods. Start with a multimeter to check the open-circuit voltage. Ensure the battery is at rest and fully stabilized before taking the reading. Compare this voltage against the rated voltage—significant deviations indicate potential issues. Next, create a simple load using a light bulb or resistor. Connect it across the terminals and observe the voltage. A noticeable drop under load suggests poor capacity or internal problems. You can also measure the internal resistance or conductance with an electronic tester; higher resistance points to reduced performance. Finally, fully charge the battery, allow it to recover, and recheck the voltage. If the voltage does not rebound or remains low, the battery likely has limited capacity. For a thorough assessment, professional testing at a service center combines voltage, resistance, and load diagnostics to give a more accurate picture of your battery’s health.