


Are you wondering if your car battery might be on its way out? You don’t always need a fancy tester to get an idea of its health.
A few simple checks can tell you whether it’s still good or time for a replacement.
By the end of this, you’ll know how to do quick, reliable tests right at home to spot potential battery issues early.
Look First: Your Eyes Catch Battery Damage Before Any Tester
A visual inspection can often reveal dangerous battery damage before using any testing device. Begin by examining the battery’s shape. Look for bulging, swelling, or warped sides, which indicate internal gas buildup and a high risk of failure. A healthy battery remains flat and even, without deformities. For inverters, one of the best 12V batteries maintains a sturdy, flat casing to ensure reliable power delivery.
Next, inspect the case for cracks, dents, or other damage. Any breaches in the case can expose internal materials and create safety hazards. Pay close attention to seams and edges, especially after being dropped, since stress often shows up there. Minor scuffs are less concerning, but deep cracks or punctures require immediate attention.
Finally, check for signs of leakage. Wet spots, crusty residue, or powdery deposits at the terminals suggest electrolyte escape. White, gray, or colored buildup indicates seal failure. Any leakage means the battery must be discarded right away—do not attempt to test or recharge it further. Even if the casing appears intact, inspect the terminal connections for signs of poor contact that could affect performance and value.
Healthy Battery Checklist: What to Look For (and What to Avoid)
A healthy battery will have a resting open-circuit voltage of at least 12.4 volts, with 12.6 volts being ideal. To check this, use a digital multimeter set to DC volts, connect the red lead to the positive terminal and the black lead to the negative terminal. Measure with the vehicle off and the battery fully rested for at least a few hours to ensure an accurate reading. If the voltage drops quickly or falls below 12.4 volts, the battery may be weak or nearing the end of its lifespan. For users drawing power from a battery, pairing it with a top power inverter can help avoid deep discharges that further degrade its condition. A power inverter converts direct current from the battery into alternating current for your devices, but it will drain the battery if not monitored. Avoid batteries that require frequent recharging or show inconsistencies in voltage, as these signs point to internal issues. Deep discharges, high heat exposure, or overcharging can also shorten the battery’s life, so preventing these conditions is crucial. An overloaded circuit can cause similar power failures and requires checking the breaker panel to identify the issue. Never attempt to jump-start a frozen battery because it poses a risk of explosion.
No Tester Needed: How Headlights Reveal a Weak Battery
Turning on your headlights before starting the engine can reveal a weak battery. If the lights look dull, flicker, or are unstable, your battery may not be delivering enough voltage. During engine startup, a slight dimming of the headlights is normal, but if they dim significantly or nearly go out, that indicates a struggling battery. Flickering lights at idle are also a sign of low voltage supply. When the headlights brighten sharply after starting, it usually points to the alternator charging the battery, not the battery’s health. Persistent dimness at idle suggests your battery isn’t providing sufficient power. Check for corrosion on the battery terminals because it can reduce light output and mimic a weak battery. Remember, this quick test only indicates potential issues; a voltage measurement offers a more definitive diagnosis. However, if your solar panel uses MC4 connectors, ensure the connections are secure to avoid similar voltage drops in your system. For power inverters, using a deep-cycle battery ensures reliable performance during extended use. Using a wire loom to organize and protect cables can also prevent voltage drops caused by damaged wiring.
Test a Battery Without a Tester Using Nothing but a Light Bulb
You can test a battery without a specialized tester by using a light bulb and two wires. This method applies a real load to the battery, allowing you to see how it performs under typical current draw, which a voltmeter alone cannot do. Use a light bulb with a voltage rating matching your battery; for example, a 12V bulb for a 12V battery. Connect one wire from the bulb’s base to the positive terminal of the battery, and connect the other wire to the negative terminal. When you do this, a bright and steady light indicates the battery is sufficiently charged. A dim glow suggests the battery’s capacity is reduced, while no light points to a dead cell or a poor connection. A healthy 9V battery tested this way would typically power a compatible bulb brightly, while a reading of 7.4 volts from a voltmeter confirms it is dead. This process demands secure connections similar to crimping without a tool, relying on tight twists or pressure to avoid false results. Knowing where to perform this test is like finding your breaker box in an apartment, as both require checking typical locations for the best access. Choosing the right bulb for the test is as important as selecting compatible solar panels for a high-draw appliance like an air conditioner.
Make sure to remove the wires quickly after testing to avoid unnecessary drain on the battery. Keep in mind that the safety limits depend on the battery’s chemistry, so select a bulb size appropriate for your specific battery. This quick test follows basic testing principles and offers a qualitative assessment of your battery’s health, not an exact measurement of capacity.

【PRECISE READOUTS & CLEAR DIGITAL DISPLAY】Bright LED display shows highly clear readings in any lighting condition, 0.1V resolution gives you reliable indication and shows you the voltage number easily & quickly. Bidirectional light emitting diode on the circuit board for easy battery load testing, red light indicates positive polarity, green light indicates negative polarity.

SAFE & STURDY: This automotive test light features an ergonomic, non-slip handle for a comfortable and secure grip. It offers transparency, durability and resistance to drops, ensuring stable performance with long-term tough use. 39 inch PU wire is both flexible and lightweight, yet more robust than standard cables, significantly enhancing your work efficiency.
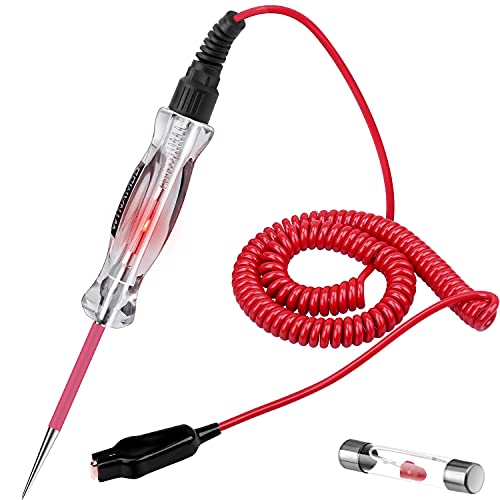
[Wide Application], professional automotive circuit tester/circuit test light with 6-24V DC voltage testing range, ideal for checking various vehicles electrical circuits, quickly check automotive headlights, taillights, turn signal circuits, faulty sockets, fuse connections, also for testing other 6-24v DC wirings and circuits.
Hearing Trouble? The Cranking Sound Test Every Driver Should Know
Your car’s cranking sound provides a more reliable diagnostic than a simple light bulb test when assessing your battery’s health under load. A slow, labored turn indicates weak power delivery, often caused by a discharged battery or corroded connections. If you hear rapid clicking, it suggests voltage collapse: the solenoid is engaging but not enough current is reaching the starter to turn the engine. A single, solid click without actual cranking usually points to starter or solenoid issues rather than the battery.
Be careful not to confuse these sounds with starter grinding. Grinding or whirring noises typically mean mechanical damage in the starter drive or flywheel, not just insufficient charge. To troubleshoot, start by listening to the crank sound: slow or rapid clicks indicate battery problems. If jump-starting the vehicle makes no difference in the noise pattern, the culprit is likely the starter itself rather than the battery terminals. A dirty or worn gear inside the starter can cause scraping sounds that mimic a failing battery.
Got a Multimeter? Decode Your Battery’s Voltage in 60 Seconds
You can decode your battery’s voltage in just 60 seconds with a multimeter. Set the dial to DC voltage (V with a straight line). Pick a range above your battery’s rating—most 12V batteries work well with 15–20V. Connect the black lead to COM and the red lead to V/Ω. Touch the red probe to the positive terminal and the black probe to the negative terminal, holding both steady.
The multimeter will display the open-circuit voltage almost instantly. For a 12V lead-acid battery, a full charge shows about 12.6V. A 9V battery reading above 7V still indicates it’s usable. The key is understanding that lower voltage readings mean less charge left. To get the most accurate reading, briefly turn on your headlights to discharge any surface charge, then wait a few seconds before testing again. Following the correct cable removal sequence when disconnecting helps prevent accidental shorts during testing. Just as with solar roofing shingles, routine testing helps you catch performance drops before they become failures.
This quick check allows you to monitor your battery’s state without guesswork. Consistent stable readings are more telling than occasional spikes. Remember, voltage gives you the charge level but not the overall health of the battery. Clean probe contacts for precise measurements and complete the test within a minute, making it an easy maintenance step. Just like solar panels, batteries lose capacity as they age, so routine voltage tests help you spot early signs of degradation before failure occurs. Selecting the correct range prevents overload errors and ensures safety.
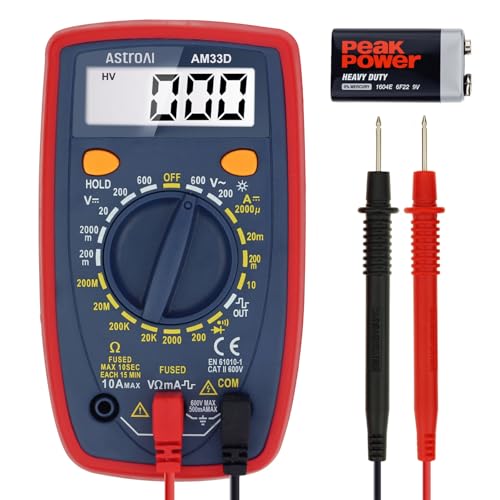
Additional Tips - The following incorrect operations may cause the multimeter not to show results: Firstly, the plugs of test leads are not fully inserted or not inserted into the correct sockets. Secondly, the manual rotary switch is not placed in the correct position. In addition, this meter can not test all AC Current and below 100mV AC Voltage. Please check the user manual carefully before measurement.
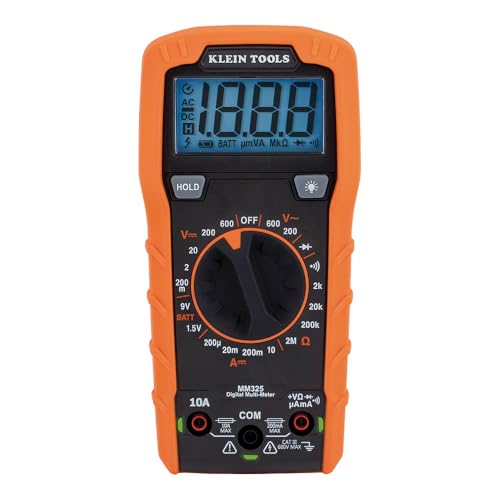
VERSATILE FUNCTIONALITY: Measures AC/DC voltage up to 600V, 10A DC current, 2MΩ resistance; additional features include continuity, diode test and battery test

Accurately Test Full Features: Accurately measures AC/DC voltage, DC current, resistance, continuity test, diode and batteries.
Voltage Decoder: What 12.6V vs. 12.0V Means for Your Battery
A voltage reading of 12.6V indicates a fully charged, healthy battery at approximately 100 percent charge. When your battery is at rest, this voltage reflects its maximum storage capacity. Conversely, a reading of around 12.0V suggests only about 25 percent charge remains, signaling a critically low level. The 0.6V difference is significant; it marks the boundary between a healthy, ready-to-use battery and one that needs immediate recharging to prevent further capacity loss. Ignoring a 12.0V reading can accelerate battery wear by deep discharging it regularly. To preserve its lifespan, recharge promptly and employ proper techniques—bring the voltage back to 12.6V or higher, not just a quick top-off. Keep in mind, voltage indicates the current charge state but does not fully reveal the overall health of the battery. A voltage of 12.6V can mask underlying issues, so always consider other factors like load capacity and physical condition.
Crank Voltage: What the Meter Should Show While Starting
To determine if your battery can handle starting your engine, you need to perform a cranking-voltage test, not just check the resting voltage. Attach your meter probes directly to the battery posts, avoiding the clamps to prevent false readings caused by corrosion or cable resistance. Have a helper turn the ignition key to crank the engine, and watch for the lowest voltage reading during this process. A healthy 12V system typically stays at or above 9.6V during engine turnover. If your reading drops to between 9.0V and 9.5V, it’s borderline, especially in cold weather. A reading below 9.0V indicates a weak battery, sulfation, or an excessive starter load. Even if the resting voltage appears normal, a low cranking voltage shows the battery cannot handle the load under real start conditions. Record the lowest voltage dip during cranking rather than the recovery voltage, as it reflects the battery’s capacity to deliver power during engine start. The voltage should only momentarily drop before bouncing back once the engine begins running. Unlike flooded batteries, gel batteries are more sensitive to deep discharge and require careful voltage monitoring to avoid damage. For a more comprehensive check, consider pairing this test with a review of top-rated solar panels to ensure your charging system is paired with reliable energy sources. Using reliable crimper tools ensures secure terminal connections that minimize resistance and false voltage drops during this test.
Stop Testing: Three Signs You Should Replace Immediately
If a battery shows physical damage, do not attempt to test it. Swelling, bulging, or cracks in the case indicate internal failure and the risk of electrolyte leakage. These signs mean the battery is unsafe and could leak harmful chemicals or even cause a fire. If you notice wet residue or colored crust around the terminals, the internal chemical process has gone beyond repair, and testing will not help. Also, a burning smell or excessive heat during handling suggests internal short circuits or thermal runaway. These three signs—swelling, leakage, and overheating—are clear indicators that the battery must be replaced immediately. Never try to test a battery with visible deformation or strong odors; doing so can expose you to chemical hazards or ignite a fire. Always follow proper disposal procedures for damaged batteries to ensure safety and environmental protection. Physically damaged batteries are a safety hazard that testing won’t mitigate—you should replace them right away. For reliable monitoring of these conditions in your home or industrial setup, consider using RS485 cable to connect safety sensors to a central control system. For transfer switches, a reliable transfer switch ensures safe power transition during an outage.

【Watch Battery Replacement Kit】 This professional watch repair tool set makes it effortless to open watch cases, remove case backs, and carry out cleaning and maintenance tasks. Designed for Precision Luxury Timepieces. While enjoying the fun of repairing, you no longer have to worry about spending extra time and money on costly repair services

Higher Battery Capacity : 4550mAh HAC-003 Battery Li-ion replacement battery; Upgraded hac-003 Battery voltage: 3.7V/16.8Wh, 25% higher than most batteries on the market.

Same As Original : NYI Nintendo Switch Lite battery is a powerful and reliable power source for your gaming needs. Capacity is the same as the original battery.It has a capacity of up to 13 hours of battery life, depending on the game and usage. With the Nintendo Switch Lite battery, you can enjoy your gaming experience without worrying about running out of power.
Failed the Test? When Testing Says Replace, Recharge, or Retry
If your tester prompts “charge and retest,” do not jump straight to replacing the battery. Often, the issue is a discharged battery, not a dead one. A low-voltage reading usually means the battery just needs a full charge cycle. Safety standards require you to recharge the battery completely before retesting; a partial charge can give a false failure. After fully charging, retest the battery. If the same “charge and retest” message appears, the battery isn’t recovering properly and should be replaced. To ensure accurate power assessment, consider using a true power meter for precise load testing. A “good—recharge” message indicates the battery is healthy but undercharged. If retesting results in “bad—replace,” it confirms the battery is worn out and cannot hold a load. Always check voltage thresholds; if it drops below 9.6 volts under load after charging, replace the battery. Multiple failed tests mean the battery’s capacity is gone, and retrying is unnecessary.

Battery Charger: 4-bay rapid battery charger (ONLY for NiMH batteries), with AC flip-down plug. Slim profile and switching power ability for worldwide use (100 AC to 240 AC; requires AC plug converted for non-American regions)

Individual charging status for each slot, can freely charge 1,2,3,4 Ni-MH Ni-CD AA/AAA rechargeable battery.

Independent Battery Charger - EBL recchargeable LCD AA AAA C D battery charger, independent charging channels, 8 bays for 1/2/3...7/8 pieces AA/AAA Ni-Mh rechargeable batteries or 4 slots for 1/2/3/4 pieces C/D Ni-MH rechargeable batteries.(Attention: Not compatible for flat top batteries and non-rechargable batteries)