
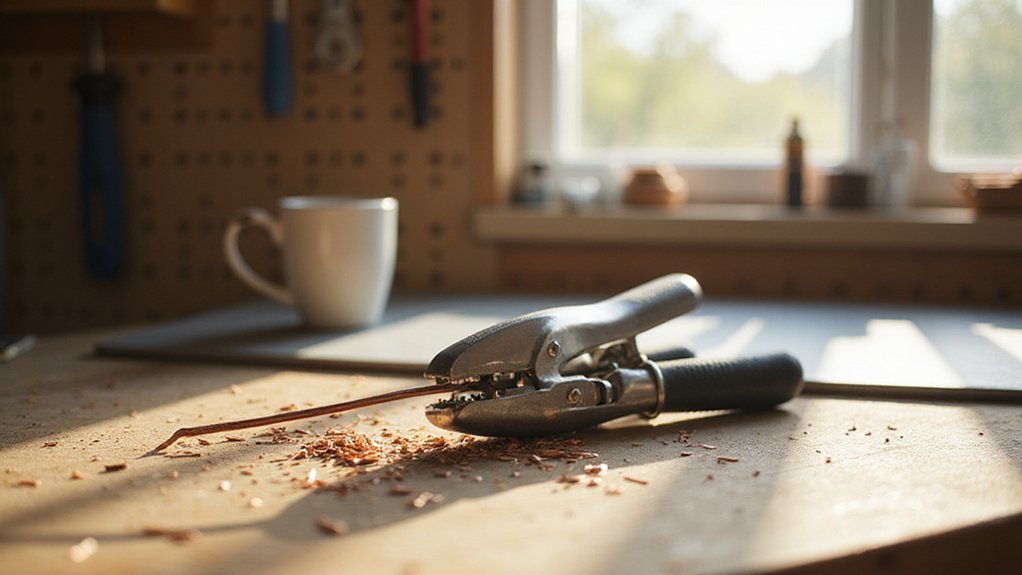

Ever wonder how to remove insulation from a wire without damaging the delicate metal inside? A wire stripper is your go-to tool, designed to do just that cleanly and efficiently.
It works by matching the size of the notch to your wire gauge, then squeezing, rotating, and pulling off the sheath smoothly.
In the sections below, you’ll learn everything you need to choose and use the right wire stripper for your project.
What Is a Wire Stripper, and How Does It Work?
A wire stripper’s main job is to remove insulation without damaging the metal conductor inside. It accomplishes this by using precisely sized cutting slots that match standard wire gauges. When you squeeze the handles, the blades close around the insulation, cutting through the outer coating cleanly while leaving the copper or aluminum wire intact. You then pull off the severed sheath to expose a clean, insulated wire end.
The tool features gauge markings that help you select the correct opening corresponding to your wire’s size. This precision is vital for electrical safety because nicking or damaging the conductor can lead to hot spots, brittle points, or faulty connections. To maintain optimal performance, keep the blades free of debris and lightly oiled. Dull blades can tear the insulation instead of slicing it, which compromises connection quality and slows down your workflow. For similar precision, diagnosing the problem before cutting can prevent damage to components.
Just as a wire stripper’s blades must stay sharp to avoid harming the conductor, regular maintenance habits can significantly extend the lifespan of sensitive tools and equipment. A final safety point to remember is to always pull the insulation away from your body to prevent accidental cuts or stabs.
How to Strip Wire Cleanly Without Damaging the Conductor
To strip wire cleanly without damaging the conductor, you must match the stripper notch precisely to the wire’s gauge. Use a controlled, two-step motion: first, score the insulation with a light squeeze and a 90-degree rotation, then pull the sheath off smoothly rather than yanking it. Keep the stripped length exactly as your connector requires—usually 5 to 8 millimeters for screw terminals—to prevent stray strands. Never force the jaws shut; applying too much pressure can nick strands or crush solid wire, which compromises conductor safety. For high-current setups, AGM battery technology often pairs well with cleanly stripped wiring to ensure minimal resistance at connections. Selecting a battery with top terminals ensures consistent contact for such high-current applications. After stripping, inspect the conductor immediately for bright, unblemished metal. If there are scratches or severed strands, cut the damaged section off and start anew on clean wire. For applications involving shrink wrap tubing, a heat gun ensures the tubing tightens evenly without scorching the wire. This precise technique ensures reliable electrical contact and minimizes the risk of failure at the termination point.

Romex: Registered trademark of Southwire Company

✅ 8 inch Professional Wire Stripper: Cuts, strips wire and loops 10-22 AWG Solid copper wire or aluminum cables.high carbon alloy steel with accurate stripping.

This wire stripper is compact and light, great for stripping insulation
Manual vs. Self-Adjusting vs. Automatic: Which Type Fits Your Job?
Self-adjusting and automatic wire strippers are often your best choices when speed and versatility matter. Self-adjusting models automatically sense the cable diameter and conform to it, eliminating the need to select a notch for each wire size. This ensures consistent cuts across mixed-gauge wiring and reduces the risk of damaging conductors. Automatic variants typically include preset strip-length stops, which are especially helpful for repetitive tasks, allowing you to strip insulation quickly with a single squeeze. For protecting your entire home, consider pairing these tools with top surge protectors installed at your breaker box. When hiding the breaker box, always ensure quick safety tips like leaving clear access for emergencies are followed to avoid hazards. Understanding how these tools convert mechanical force into action is similar to grasping power inverter technology, which transforms DC to AC electricity for whole-house backup.
Manual strippers, on the other hand, are suitable for low-volume or predictable jobs where you regularly work with the same wire gauge. They require you to match the wire to a fixed notch, which demands attention and can slow down work if you switch gauges frequently.
If your work involves switching between different wire sizes often or you need to maximize speed and efficiency, going for self-adjusting or automatic models makes sense. Just check the catalog or product descriptions carefully because brands sometimes use these terms interchangeably or differently. Matching the tool’s actual mechanism to your workflow ensures you get the right fit for your needs.

SELF-ADJUSTING: Strip wire from 10 to 24 AWG with our self-adjusting mechanism. Jaw Width: 2 inches

MULTIFUNCTIONAL DESIGN: The 2-in-1 quick strip wire stripper tool allows for precise and clean stripping of 14-24AWG solid core or stranded wires wires. Especially suitable for stripping speaker wires or flat ribbon cables

WIRE STRIPPING: EASY Quickly remove the protective coating from electrical wires with this self adjusting wire stripper, ideal for both DIYers and electricians.
When to Use Each Wire Stripper Type for Best Results
Choosing the right wire stripper depends on your specific task and the type of cable you’re working with. For general residential wiring, combination strippers are ideal because they handle a range of 10 to 22 AWG copper wire and crimp terminals in a single pass. This makes them versatile for screw or push-in connections. If you’re working on large jobs with repetitive stripping, compound-action models are a smart choice—they reduce hand fatigue by requiring less force, which is helpful when dealing with the same wire gauge repeatedly. Self-adjusting strippers are best for panel work with mixed gauges; they automatically adapt to conductors between 10 and 24 AWG, eliminating the need for manual adjustments. Look for color-coded dials to quickly verify wire sizes, but always follow safety precautions—never strip beyond the insulation length to avoid damaging the conductor or weakening the wire. For delicate or specialized work such as low-voltage cables or coaxial wiring, choose adjustable precision strippers that provide controlled, clean cuts without nicking the conductor. Use specialized tools designed for Romex or fiber-optic cables to prevent damage, as general-purpose strippers may not accommodate their unique insulation geometries. When assembling DIY solar electric panels, using self-adjusting strippers helps efficiently handle the mixed wire gauges common in photovoltaic systems. Understanding the root causes of breaker trips ensures you pair the right tool with safe electrical practices. For photovoltaic systems, ensure your stripper’s jaws are compatible with the solar connector types to avoid crushing MC4 terminals during preparation.
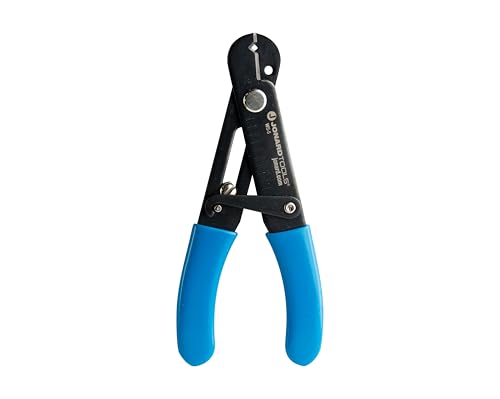
PRECISION STRIPPING: Equipped with a precision-ground "V" notch blade and adjustable blade stop, this wire stripper and cutter ensures superior stripping performance for 10-30 AWG (2.6-0.25 mm) solid and stranded wires

UNIQUE DESIGN: Strips 20-30 AWG wires using its uniquely designed stripping mechanism
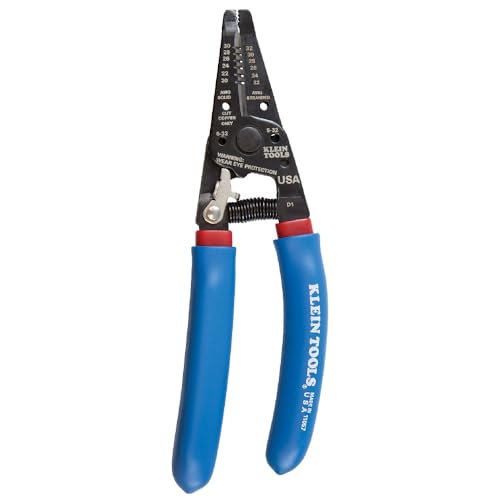
Cuts, strips and loops 20-30 AWG Solid and 22-32 AWG Stranded wire and cleanly shears 6-32 and 8-32 screws
What to Look for When Buying a Wire Stripper
The most important factor when choosing a wire stripper is selecting the correct wire size range. Focus on the gauges you most frequently work with. Manual wire strippers typically cover 10–22 AWG, while precision models can handle from 8–30 AWG. Matching the tool to your common wire sizes ensures clean stripping without damaging the conductor or insulation. Clearly marked slots or adjustable settings help you select the right gauge easily and avoid accidental damage. For agricultural applications, consider top solar panels for farming that integrate well with your wiring needs. When connecting those panels, ensure your wire stripper correctly fits the MC4 connector gauge requirements to prevent poor electrical connections.
Stripping accuracy is also critical. Look for tools with precision-ground holes that remove insulation cleanly without nicking the copper wire, which can cause rework. Material quality matters too—tools made from high-carbon or hardened steel keep their sharp edges longer, providing cleaner cuts over time. A well-built, durable tool maintains its performance and protects your wire integrity during repeated use. To ensure long-term reliability of your electrical systems, it is wise to pair high-quality tools with maximizing solar panel lifespan through regular maintenance and inspection.
Comfort should not be overlooked. Choose wire strippers with cushioned, non-slip handles that reduce hand fatigue during longer projects. Spring-loaded designs make repetitive tasks easier and more comfortable. Additionally, some models come with built-in cutters or crimping stations, adding versatility to your toolkit. Always consider safety features like lock mechanisms that prevent accidental blade exposure when not in use, and ensure gauge markings are clear to facilitate quick, accurate work.

3-IN-1 MULTI-PURPOSE TOOL: Cuts and strips wire from 8 to 26 AWG without any manual adjustments needed, crimper portion of the tool works on non-insulated terminals from 10 to 22 AWG, additional crimper works on crimping 7 mm to 8 mm ignition wires

MULTI-FUNCTION 3 IN 1 : Use this wire stripper and crimping tool to quickly and effectively strip, cut, and crimp, saving time and effort. It provides Cutting Range between 30-10 AWG, strips wires from 30 to 8 AWG, crimps 22-10 AWG insulated terminals and non-insulated terminals

【Convenience】This wire strippers can quickly and easily remove the insulation from wires, making them ready to use. It has a range of 22-30 AWG, making it suitable for different wire sizes.