
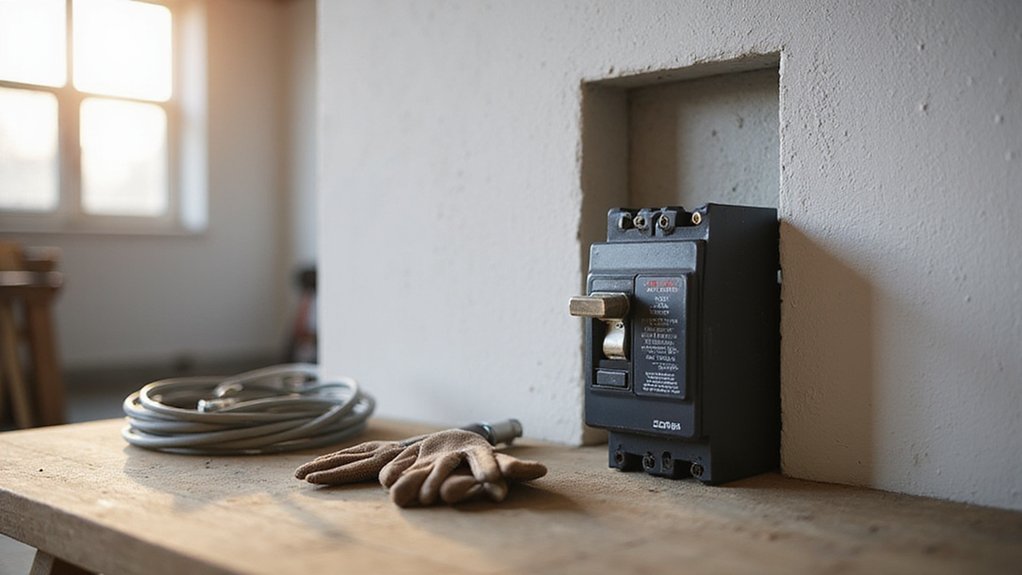

Replacing a breaker in your breaker box might seem daunting, but with the right steps, you can do it safely and confidently. You’ll need to turn off the main power, remove the old breaker, and install a new compatible one, ensuring everything is properly connected.
By the end, you’ll know how to swap out a breaker correctly without risking your safety. Keep reading for a straightforward guide to get the job done right.
Is It Safe to Swap a Breaker? Key Warnings First
Swapping a breaker is not inherently safe without proper precautions. Turning off the breaker alone does not make the electrical system safe to work on because the incoming service lugs remain energized and pose a lethal shock risk. To ensure safety, you must first de-energize the panel by shutting off the main power supply. Then, apply lockout and tagout procedures to prevent accidental re-energization. Use a voltage tester or meter to verify that the panel is de-energized before touching any components. Failing to do so keeps arc flash and shock hazards present, risking serious injury or death. Similarly, when disconnecting a car battery, the negative cable comes off first to prevent short circuits against the chassis. For solar-powered air conditioners, selecting high-efficiency panels ensures the system can handle the startup surge and sustained load.
Signs of internal failure, such as burning odors, scorch marks, buzzing, or crackling sounds, indicate deeper issues and should be a red flag against DIY repairs. If a breaker trips immediately or you suspect internal damage, do not attempt a swap—stop and call a licensed electrician. Without following a structured energized-work process, you expose yourself to severe electrical injury. To find a reliable replacement, it helps to compare top battery picks with terminals based on quality, performance, and value. Treat any uncertainty or obvious deterioration in the breaker or panel as a warning to seek professional help rather than risking a dangerous DIY repair.
What You’ll Need: Tools and the Correct Replacement Breaker
To replace a breaker safely, you’ll need several tools and safety equipment. First, use a non-contact voltage tester to verify that the circuit is de-energized. Insulated screwdrivers, both flathead and Phillips, are essential for removing and installing breaker screws without risking electrical shock. A torque screwdriver is important to tighten terminal screws to the manufacturer’s specified torque, preventing loose connections or damage. Needle-nose pliers help with handling wires, while a flashlight ensures good visibility inside the panel.
Safety precautions should never be overlooked. Wear rubber-soled shoes and insulated gloves to reduce shock risk. Always verify the circuit status with a multimeter before starting work, even if the voltage tester shows the circuit is off. Consult the panel label for the exact torque specifications for your new breaker to ensure a secure and proper installation.

SAFETY FIRST: It will send out multiple alarms through sound and light. When the voltage is detected, the tip will send out red light and beep. When the higher the sensed voltage is, or the closer it is to the voltage source, it beeps at a higher frequency and the percentage value will be larger. At the same time, the screen will be red or green, red means high voltage and live wire are detected, green means low voltage and null wire are detected

NON-CONTACT DETECTION of AC voltage in cables, cords, circuit breakers, lighting fixtures, switches, non-tamper-resistant outlets, and wires

VERSATILE VOLTAGE DETECTION: This Voltage Tester offers non-contact detection of low voltage in security, entertainment, communications, environmental control, and irrigation systems
De-Energize and Remove the Old Breaker
To de-energize and remove the old breaker, start by switching off all individual branch breakers to reduce the load on the panel. Then, flip the main breaker to the OFF position. Use a non-contact voltage tester on the breaker’s terminals and bus bars to verify de-energization. Always test the tool first on a known live source to ensure it works accurately. Carefully remove the dead front cover, avoiding contact with service lugs to prevent electrical shock. It is also critical to confirm all wiring connections are properly tightened to manufacturer specifications to prevent arcing and overheating. If you are unsure about any step, call an electrician to avoid serious safety risks.
Identify the circuit conductor associated with the breaker by checking your panel labeling. Disconnect this conductor from the old breaker’s terminal carefully. To release the breaker, unhook it from the bus bar by applying steady pressure—never pry. Inspect the breaker slot for scorch marks or pitting; don’t proceed if you notice damage. Before buying a replacement, confirm that the breaker is compatible with your panel. Use a flat-head screwdriver to gently pry the breaker from the panel if it is stuck, rather than forcing it. Keep the conductor controlled at all times to prevent accidental contact with live parts. For the replacement, consider a LiFePO4 battery if you are integrating backup power into your solar system.
Stand to the side and use one hand when handling the parts. Always wear appropriate personal protective equipment, including safety glasses and insulated gloves. Treat the service lugs as still energized until you confirm complete de-energization.
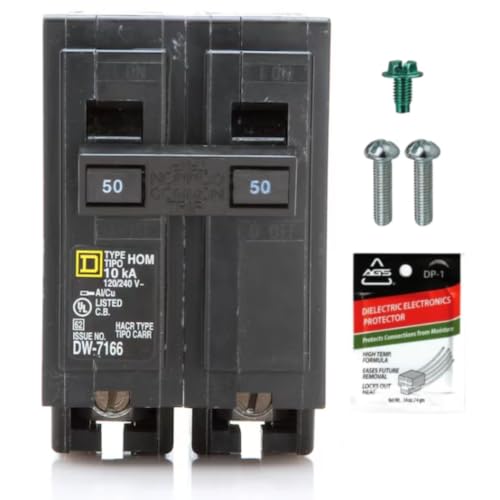
GENUINE OEM BREAKER — This offer includes one (1) authentic HOM250 50-Amp double-pole circuit breaker from Square D's trusted Homeline series. The robust thermal-magnetic mechanism is engineered for reliable dual-action protection, responding to both sustained low-level overcurrents and instantaneous high-current short-circuit events. This component is a factory-new, unused Original Equipment Manufacturer (OEM) part, ensuring full compatibility and performance for high-power 240V branch circuits.

GENUINE OEM BREAKER — This offer includes two (2) authentic HOM120 20-Amp single-pole circuit breakers from Square D's trusted Homeline series. The robust thermal-magnetic mechanism is engineered for reliable dual-action protection, responding to both sustained low-level overcurrents and instantaneous high-current short-circuit events. This component is a factory-new, unused Original Equipment Manufacturer (OEM) part, ensuring full compatibility for 120VAC branch circuits.

Install the New Breaker and Reconnect the Wiring
Remove the old breaker and ensure the panel is de-energized before proceeding. Verify that the new breaker is compatible with your panel by matching the manufacturer, model number, amperage rating, and type—such as single-pole, double-pole, AFCI, or GFCI. Confirm the breaker is in the OFF position before installation. When wiring, strip about 1/2 inch of insulation from each wire, taking care not to nick the strands, to ensure a secure connection. A breaker box acts as the central hub for distributing electricity safely throughout your home.
Route the cables neatly through approved strain relief clamps to prevent movement or damage. Connect the bare copper ground wire to the ground bus bar’s designated terminal and tighten it securely. Attach the neutral wire to the neutral bus bar, making sure it is fully inserted before tightening. Then, connect the hot conductor to the load terminal of the new breaker, tightening the screw firmly. Carefully press the breaker onto the bus bar clip until it seats fully. Double-check all connections for tightness and security before restoring power or proceeding with further work. Use a voltage tester to ensure no power is present before touching any wires inside the panel.

AUTHENTIC OEM COMPONENT — This kit is built around one (1) factory-new, unused, and authentic Original Equipment Manufacturer (OEM) Square D HOM125 circuit breaker. The Homeline series is Square D's industry-standard line for residential circuit protection, engineered for reliability and precise performance. Ideal for new construction or as direct replacement parts for existing systems.

AUTHENTIC OEM COMPONENT — This kit is built around one (1) factory-new, unused, and authentic Original Equipment Manufacturer (OEM) Square D HOM130 circuit breaker. The Homeline series is Square D's industry-standard line for residential circuit protection, engineered for reliability and precise performance. Ideal for new construction or as direct replacement parts for existing systems.
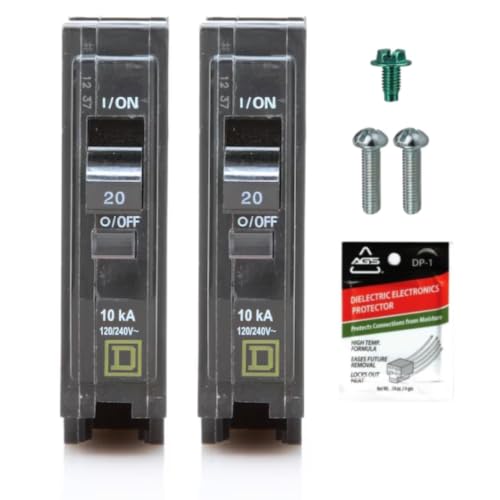
AUTHENTIC OEM COMPONENT — This kit is built around two (2) factory-new, unused, and authentic Original Equipment Manufacturer (OEM) Square D QO120 circuit breakers. The QO series is Square D's premium, professional-grade line of circuit protection. These components are sourced to deliver genuine Square D technology, known for its benchmark reliability and precise performance. Ideal for new construction, electrical system upgrades, or as direct replacement parts for existing Square D QO electrical systems, ensuring a perfect fit and function.
Power Up and Test the Replaced Breaker
Yes, you should always turn the main power off before working on the panel. Once the area is clear and the panel cover is securely in place, flip the main breaker to the ON position. Stand on a dry surface, wear insulated gloves, and safety glasses to ensure safety. After energizing the panel, set the new breaker to OFF, then firmly switch it to ON. Ensure that the breaker is properly seated on the bus bar with its screw tightened, as this secure connection is critical for preventing faults. Using quality battery cable materials can help ensure reliable connections in similar extension projects. For added safety, always verify that your DIY solar wiring layout follows proper polarity and gauge requirements to avoid overheating.
Next, perform voltage testing to confirm proper wiring. Set your multimeter to AC voltage. Place the black probe on the neutral bus and the red probe on the breaker terminal screw. A single-pole breaker should read approximately 120 volts; a double-pole breaker should read around 240 volts. To verify zero voltage, switch the breaker OFF and observe that the reading drops to zero. Regular maintenance habits like keeping connections clean prevent voltage drops and overheating, which can shorten component life.
Finally, test the circuit under load. Turn on connected lights or appliances and monitor for stable operation. Press the test button on the breaker; it should trip immediately. Reset the breaker to ON and check that everything functions normally. If the breaker trips repeatedly or feels hot, de-energize the panel and investigate further to identify any underlying issues.