
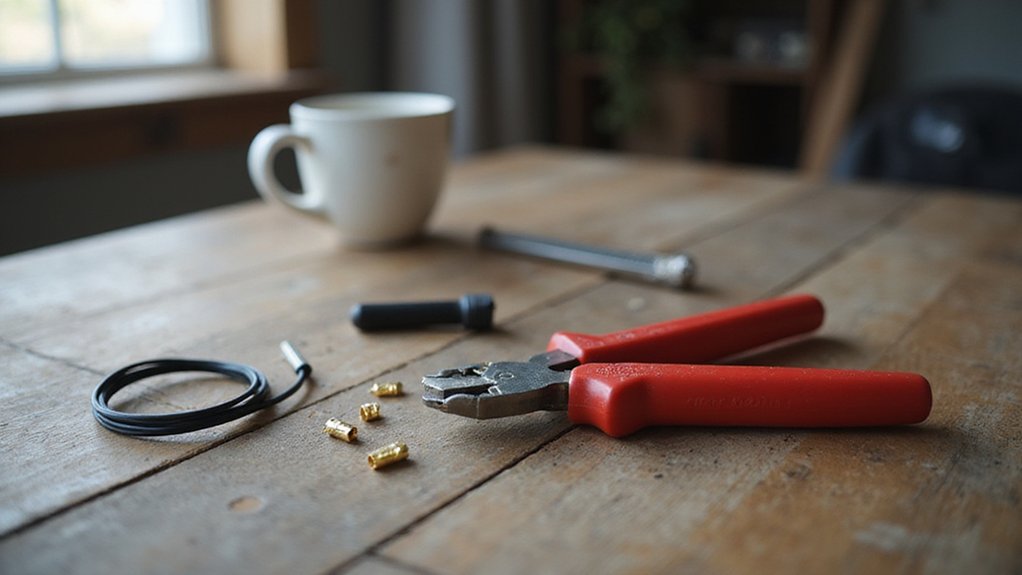

Ever wonder how to create a secure, reliable connection between a wire and a metal connector? A crimping tool is your go-to device for doing just that, forming tight, gas-proof joints without heat or solder.
Choosing the right tool helps ensure your connection is strong, durable, and safe. Keep reading to learn everything you need to know about selecting and using the perfect crimping tool for your projects.
What Is a Crimping Tool and When Should You Use It?
A crimping tool is used to attach a metal connector to a wire by compressing it to create a secure, gas-tight connection. You should reach for one whenever you need a low-resistance, vibration-proof electrical joint without heat. Before crimping, verify that the connector matches your wire’s gauge and type to ensure a strong, reliable bond. Unlike soldering, crimping requires no heat, but it does demand the correct multimeter settings to check for continuity and ensure the connection’s resistance is low. Maintaining your tool is essential—keep the dies clean and calibrated so the compression force remains consistent. Avoid using a crimper for temporary connections or with terminals not designed for crimping. Properly applied, crimping provides a mechanically strong, solderless connection that resists moisture ingress and movement. For solar panel installations, MC4 connectors are commonly used and require a compatible crimping tool for a weatherproof and durable connection. For protecting sensitive equipment from power surges, consider pairing your crimped wiring with a surge protection device for your breaker box.

Design of accurate crimping moulds and complete locking ensure high of crimping quality when crimping repeatedly

SOLAR CRIMPER: Designed to crimp MC4 style pins onto 10-14 AWG stranded copper wire
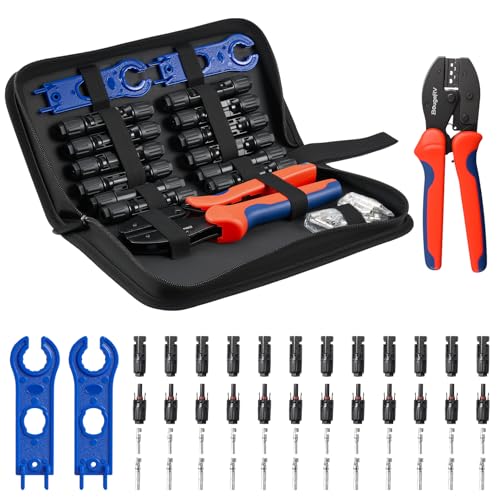
Complete Tool Kit: This complete BougeRV solar crimping tool kit includes a wire crimper, 2 spanners, a convenient carrying case and 12 pairs of standard pv connectors. Great for beginners and experienced installers
4 Common Jobs That Depend on a Crimping Tool
A crimping tool creates secure, gas-tight connections between metal components by compressing connectors onto wires or cables. For electrical wiring, you start by accurately stripping insulation to a specified length, ensuring the wire is clean and undamaged. Match the connector size to the wire gauge, which is crucial for a reliable connection. In automotive work, you use the tool to attach battery lugs or weather-resistant terminals, always disconnecting power beforehand to avoid shorts. When working with network cables, you rely on modular plug crimpers to produce consistent, repeatable terminations—making sure the wire is stripped to the correct length for proper insertion. For audio or low-voltage connectors, precision is key to ensure proper signal transfer without causing damage or weak connections. For example, a standard 400-watt inverter can reliably power small appliances like a laptop charger or a mini-fridge for several hours. In each case, this means fully inserting the conductor into the connector and applying consistent, firm pressure to achieve a compression that won’t loosen or fail under load. Selecting a tool with sufficient wattage capacity ensures it can handle the power demands of the connected battery system without overheating or voltage drops. For lithium battery systems, choosing a charger that matches the battery voltage and chemistry is equally critical to prevent damage and ensure safe operation.
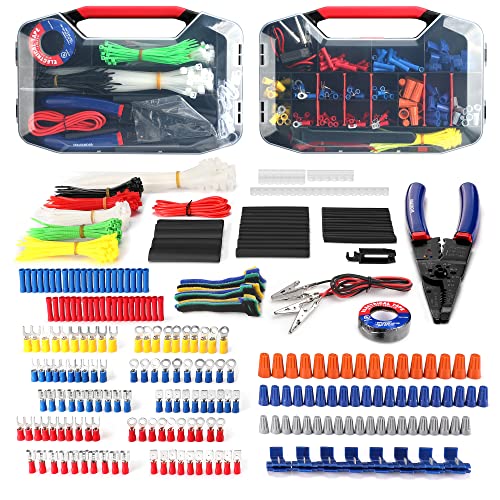
Assorted 582 electrical wire terminals and other accessories with transparent box for easy access

Say goodbye to the struggle of multiple tools - this multifunctional stripping crim does it all! Strip, crimp, and cut wires effortlessly with just one tool(No connector included)

✅ 8 inch Professional Wire Stripper: Cuts, strips wire and loops 10-22 AWG Solid copper wire or aluminum cables.high carbon alloy steel with accurate stripping.
Handheld vs. Ratcheting Crimping Tools: Which Should You Choose?
Choosing between a handheld and a ratcheting crimping tool depends on your volume and quality needs. Handheld tools rely entirely on your manual force and feel, meaning crimp consistency depends on your judgment and hand strength. This makes them suitable for low-volume tasks, typically under 20 connections per day, where speed and simplicity are more important than uniformity. In contrast, ratcheting crimping tools lock until the full compression cycle is complete. They produce a more uniform crimp by reducing the chance of under-crimping and ensuring a consistent connection every time. Their internal mechanism amplifies your input, decreasing operator fatigue and requiring less skill to achieve reliable results. For best results with any tool, always select the correct die size for your connector and wire gauge. For professional or repetitive wiring tasks, a ratcheting tool is generally the better choice because it guarantees a more consistent and dependable crimp, eliminating the possibility of stopping mid-cycle and compromising the connection quality. A similar principle applies to generator maintenance, where a simple working fix can bypass a failed pull cord mechanism. Improper connection order can damage sensitive electronics by causing a spark or short circuit.
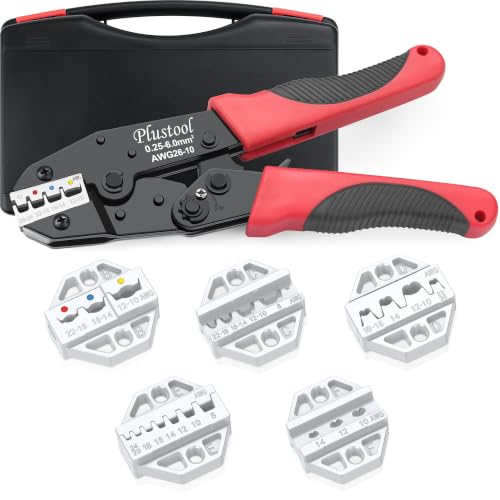
STRONG CRIMP: The main job of the tool is to make perfect crimps! The hand-replacement crimping tool jaws is tightened securely, which also means that there is no jaw drop, especially in ocean and specific scenarios. The Plustool crimp tool jaws forged with 40CR precision technology can complete a firm crimp at one time. Besides, crimping plier will not damage the connector

【Pro Terminal Crimper】 Our wire crimping tool, equipped with precision-engineered jaws,ensures a secure and tight crimp for non-Insulated Open Barrel Terminals Receptacles.Each crimper tool is marked with AWG20-18/18-14/12-10 for easy identification.

COMPLETE SET - Includes 1 crimping tool, 5 interchangeable jaws, and 194 terminals - everything needed for professional-grade electrical connections in automotive, marine, and DIY projects
When to Upgrade to a Hydraulic or Battery-Powered Crimper
For cables above 25 mm² or 4 AWG, a hydraulic crimper becomes essential. Hand tools like ratcheting crimpers often lack the force needed for these thicker cables. Hydraulic models deliver consistent, high-pressure crimps that ensure gas-tight, reliable connections on large power lugs and thick insulation, especially on generator outputs or distribution boards. They also minimize the risk of damaging plastic insulators during the process. Using a hydraulic crimper reduces physical effort, making it safer and more efficient for heavy-duty tasks. For additional context, choosing between monocrystalline and polycrystalline panels involves similar trade-offs in cost and performance for solar installations. When selecting a tool, it helps to compare the top options reviewed for battery terminals. For marine applications, a deep cycle battery provides sustained power for trolling motors without voltage drop.
If you work in the field and portability is a priority, a battery-powered crimper offers a clear advantage. It is especially useful for series crimping in environments where air-powered tools aren’t practical, such as railway sites or solar inverter installations. Battery options eliminate the need for manual pumping, enabling faster work on high-current connectors like EV terminals or control cabinets. Both hydraulic and battery-powered crimpers are designed to control pressure precisely, ensuring your electrical connections stay secure and reliable under demanding conditions.

Hydraulic Crimping Tool Specifications: Hydraulic crimping tool with 10 ton crimping force, 0.45 inch stroke and 12AWG-2/0AWG crimping range, is a professional tool to crimp copper, aluminum and stainless steel
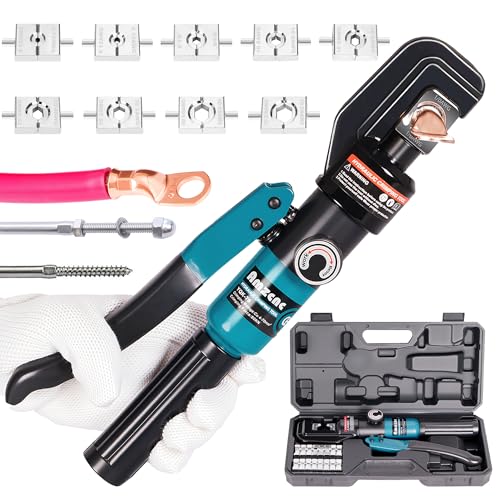
Hydraulic crimping tool specification: Crimping range 12 AWG-2/0 AWG, Stroke 0.55 Inch

Powerful Hydraulic Performance: 6 Ton hydraulic pressure effectively crimps 12 AWG to 2/0 AWG copper and aluminum cable lugs with hexagonal compression
How to Match the Crimping Tool Die to Your Connector
To match the crimping tool die to your connector, start by identifying the connector’s family—such as butt splice, ring terminal, ferrule, or open-barrel—because each requires a specific die shape that cannot be interchanged. Once you know the family, verify the wire gauge listed on the connector and ensure it falls within the die’s AWG range. Using a mismatched gauge can result in a crimp that is either too tight or too loose, compromising the connection’s strength. For a more demanding application, consider the lifespan and safety differences between AGM and lead-acid batteries when powering your crimping tools in the field. Additionally, the battery chemistry you choose directly impacts runtime and reliability for portable solar-powered crimping stations. Next, check the connector’s index number or color coding and find the corresponding marking on your die set. Confirm that the crimp profile—hex, oval, or indent—matches the barrel design of the connector, since a solid-barrel lug, for example, needs a profile-specific die rather than a universal one. For outdoor installations, also verify that the die material is compatible with corrosion-resistant coatings commonly found on solar panel connectors. Finally, consult the manufacturer’s chart to verify that the die code aligns exactly with your connector part number. Never guess—always verify each matching step to ensure a secure and safe crimp.
Step-by-Step: How to Crimp a Connector Correctly
To crimp a connector correctly, follow these steps precisely. First, prepare your wire by cutting it cleanly with wire cutters, then strip just enough insulation to match the barrel depth of the connector—usually around one-quarter to one-half inch—being careful not to nick or damage the conductor. Insert the stripped wire into the connector barrel until it seats fully, ensuring no strands are left outside or frayed. For insulated connectors, the conductor must be visible while the insulation covers the barrel appropriately. Note that a poor crimp can accelerate corrosion and resistance inside the joint, similar to how deep cycle batteries degrade when connections are loose. Selecting a reliable transfer switch can prevent similar degradation in power distribution systems. Maintaining proper voltage limits during crimping ensures the connection does not overheat over time.
Next, select the appropriate die in your crimping tool that matches the connector size. Place the connector into the die cavity, lining it up so the barrel is centered and square in the compression zone. Use the correct slot for your connector type. Hold the connector steady in place and squeeze the handles with full, even pressure until the ratchet mechanism releases prematurely, indicating a secure crimp. For insulated connectors, position the crimper slightly behind the edge of the terminal’s barrel before pressing down.
Finally, verify the quality of the crimp. Check for uniform compression around the barrel, ensuring the copper strands are tightly held without any exposed strands or damage to the insulation. Test the connection by pulling firmly on the wire; it should not slip out of the crimp. An electrical continuity test can confirm that your connection is solid and functional.
How Does a Crimping Tool Make a Gas-Tight Connection?
A crimp makes a gas-tight connection by compressing the connector barrel so tightly around the conductor that no gaps remain. During the crimping process, you deform the barrel plastically, which compacts the wire strands into a dense mass. This compression eliminates air pockets and ensures metal-to-metal contact similar to a cold weld. Such a tight seal prevents oxygen and moisture from entering the connection, thereby avoiding oxidation at the interface. This long-lasting connection is similar to the performance of high-quality solar panels that rely on durable, oxidation-resistant electrical joints. The sealed barrier provided by a proper crimp offers environmental sealing that blocks corrosive agents from reaching the conductor. As a result, you maintain consistent contact resistance and electrical conductivity throughout the connection’s lifespan. Achieving this requires uniform deformation, which depends on using the correct die and terminal size. A high-quality crimp displays minimal internal voids and evenly distributed compression. Cross-section inspection confirms gas-tightness, as relying solely on pull-force does not guarantee it. Overall, controlled compression—not just force—ensures a long-lasting, gas-tight seal.
3 Risks of Using the Wrong Crimping Tool?
Using the wrong crimping tool introduces three critical risks that can compromise both electrical and mechanical performance. First, selecting a die that doesn’t match the connector size results in high electrical resistance. This creates heat during operation, which can degrade the connection over time and increase the chance of failure. Second, poor crimp geometry often occurs with incorrect tool settings, leading to weak bonds that are susceptible to mechanical pullout and vibration failure. When the tool’s ergonomics cause inconsistent force application, the connection becomes unreliable, especially under stress. Additionally, improper crimping may void the battery safety limits of your system, as a faulty connection can bypass protective measures and lead to thermal runaway.
Third, overheating due to high resistance can cause arcing and damage to insulation materials. These hot spots may produce smoke, degrade insulation integrity, and signal loose connections through increased noise levels. All these issues significantly elevate the risk of fire, corrosion from trapped moisture, and the need for costly rework. To prevent these dangers, it’s essential to always select a crimping tool with die sizes and settings precisely matched to your connector specifications.
Crimping vs. Soldering: Which Connection Wins?
Crimping is generally the more reliable termination method compared to soldering, especially for cable harnesses. Its gas-tight mechanical compression limits oxidation, resulting in a stable, low-resistance connection that lasts longer. When correctly matched with dies, terminals, and conductors, crimping produces a permanent, vibration-resistant joint that maintains wire flexibility—making it essential in demanding environments like automotive and aerospace applications.
Soldered joints, although initially conductive, are vulnerable to solder corrosion and wicking, which can create stress points over time. These issues can lead to increased resistance and potential failure, especially with repeated bending and movement. While soldering may be suitable for solder cups or PCB terminations, crimping offers superior consistency, speed, and repeatability for most cable harness work. You avoid heating steps and ensure standardized quality, making crimping the preferred choice for reliable, long-lasting electrical connections.

Versatile Design: The waterproof automotive electrical connectors kit ncludes crimping pliers, two-in-one extractor tools, 1/2/3/4 pin automotive connectors plugs and sockets, compatible with 24-14 AWG wires for versatile automotive electrical applications

【Comprehensive Kit with 969 Pieces】: This automotive connector kit includes 969 pieces, featuring 550 pin connectors, 400 wire terminals, 18 depinning tools, and 1 tweezers. Perfect for various automotive wiring projects, ensuring you have all the necessary tools at hand to complete your tasks efficiently.

COMPLETE KIT - This 1188-piece ferrule crimping and stripping tool kit includes a quadrilateral ratchet crimper, automatic wire stripper, 1156 insulated and non-insulated ferrules, two-wire ferrules, terminals, flat connectors, and tie tape, providing a comprehensive solution for organized electrical wiring projects
Critical Safety Checks Before You Crimp
Before crimping a terminal, you must perform a thorough pre-use inspection of your tool. Verify that every component—die set, applicator, and connector family—matches your wire gauge and terminal style. Mismatched or worn tooling is the most common cause of crimp failure and safety risks.
Inspect the tool for cracks, deformation, or missing parts, and remove any damaged tools immediately. Ensure that moving parts operate smoothly and that die closure is correct by using gauge checks. Proper tool calibration is essential for consistent, high-quality crimps.
Next, clear your workspace and ensure good lighting. Always wear safety glasses and gloves for protection. When preparing the wire, strip insulation to the specified length without nicking strands, and insert the wire fully into an undamaged terminal.
After crimping, inspect the connection carefully. Check that the crimp is centered, with no bellmouth or brush features. Perform a pull test to confirm the crimp’s security. Reject any crimp showing cracks, splits, or improper insertion depth to ensure safety and reliability.