
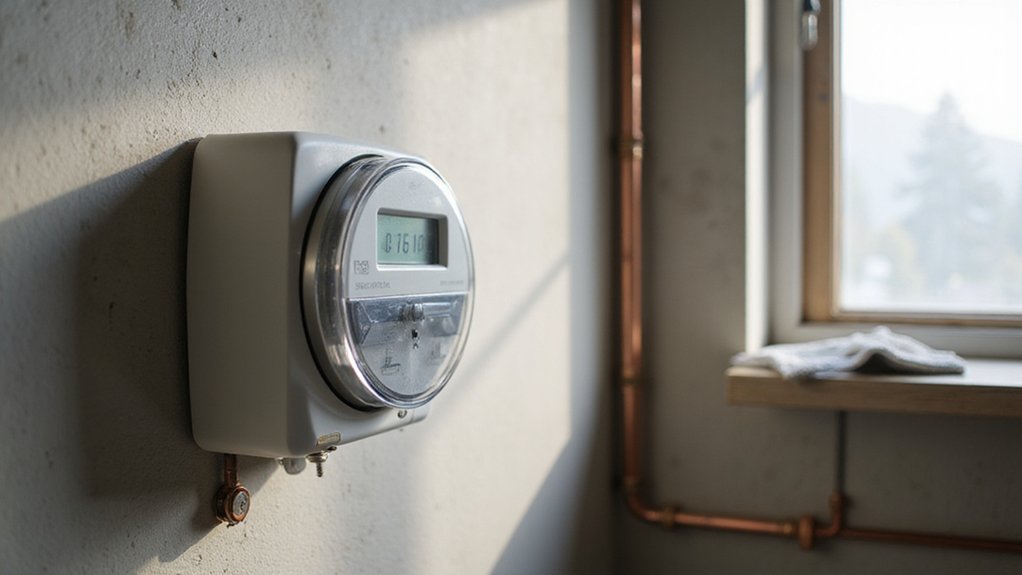

Are you trying to figure out how much electricity you’re actually using? Reading your kWh meter accurately helps you understand your energy consumption and control your bills.
Whether you have a digital or an analog meter, I’ll walk you through simple steps to check your readings and even calculate costs.
Keep reading to get all the details you need.
What’s a kWh Meter and Why Should You Care?
A kWh meter shows how much energy you use in kilowatt-hours, giving you practical control over your electricity consumption. By tracking this data, you can perform ongoing usage analysis to identify which appliances or habits are driving your utility bills higher. For example, running a 1,000-watt heater for one hour consumes 1 kWh, while a 40-watt bulb left on for five hours uses just 0.2 kWh. This level of transparency allows you to adjust your usage habits, cut unnecessary waste, and ultimately lower your energy costs. Your meter isn’t just a utility device—it’s a powerful tool for managing your energy more efficiently. For safe integration with your home’s electrical system, the meter should be wired with proper torque specifications to prevent loose connections and fire hazards. When selecting components for your energy system, look for top battery picks that combine quality, performance, and value to store the power your meter tracks. To ensure your energy storage setup is reliable, also consider consulting top battery tray reviews for a secure fit that protects your investment.
How to Read a kWh Meter (Digital or Smart) in Seconds
When reading a digital or smart meter, look at the main screen for the total kWh reading, which is usually labeled kWh, IMP KWH, or TOTAL ACT IMPORT. This number shows the cumulative energy consumption. Read the whole number from left to right and ignore any digits after the decimal point, since billing is based on full integers. If you see other data on the screen, press the A button or 9 key until IMP KWH or TOTAL ACT IMPORT appears—this ensures you’re viewing the meter’s primary billing register. Be careful not to confuse VARh or kVAh with kWh; only record the readings labeled as such. For meters with time-of-use rates, verify that the correct tariff register (T1, T2, etc.) is displayed according to your rate plan. Do not round or include digits after the decimal point—the number shown before the decimal is your exact meter reading in seconds. This careful approach prevents errors just like understanding why negative battery cables come off first prevents electrical shorts. If your meter is stuck on a display you cannot navigate, a safe reset or breaking the cable tie might free the access panel for easier reading. Choosing high-efficiency solar panels can further reduce your long-term energy costs.

Intuitive Electric Usage Monitoring: Measure power (W), volts, amps, frequency, power factor, max/min power (W), cumulative time, and energy (kWh) with this watt meter; Automatically calculate costs based on set prices and track home energy usage for efficient electricity savings; This watt hour meter makes managing your energy consumption easy

Multi-function power monitor: Our electric usage monitor can monitor the power (W), electricity(kWh), voltage(V), frequency(Hz), current(A), power factor(PF), unit price($/kWh), total cost($) of your appliances. By switching 8 display modes, you can easily know the various parameters while the appliance is working. The “electricity” mode can calculate and display how much power your appliance uses. And the “total cost” mode will show how much electricity bill it cost in cumulative time
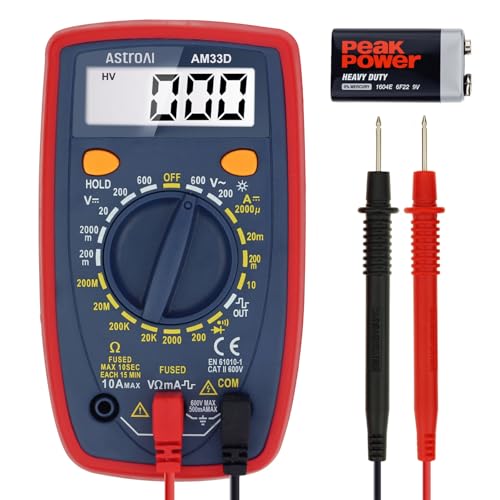
Additional Tips - The following incorrect operations may cause the multimeter not to show results: Firstly, the plugs of test leads are not fully inserted or not inserted into the correct sockets. Secondly, the manual rotary switch is not placed in the correct position. In addition, this meter can not test all AC Current and below 100mV AC Voltage. Please check the user manual carefully before measurement.
Step-by-Step Guide to Reading an Analog kWh Meter
To read an analog kWh meter correctly, follow the dials from left to right across the meter face. Start with the leftmost dial and move sequentially to the right, skipping any test dial. Each dial’s pointer indicates a digit; record the number just passed by each pointer, not the one it’s approaching. If a pointer sits directly on a whole number, check the adjacent dial to the right. If that dial has not yet passed zero, decrease the current digit by one to account for the uncompleted cycle.
When a pointer is between 9 and 0, record 9 to avoid overcounting. Because the dials alternate direction—clockwise then counterclockwise—you should read each dial based on the printed numbers, not the direction of rotation. The rightmost dial represents the units place, and moving left, each dial increases by a power of ten. Combining the digits from left to right gives you a five- or six-digit number that reflects the total energy consumption. Always check the neighboring dials to ensure the readings are precise, as calibration ensures each dial’s place value is correct. Record your readings immediately to prevent errors and ensure accuracy. For reliable equipment maintenance, consider the best battery straps to secure components in place. For issues with connectors, knowing how to perform a proper disconnection and repair is essential for maintaining system integrity. For optimal electrical connections, also consider top post battery terminals for quality and performance.

Accurate Single-Phase Energy Meter – Class 1.0 accuracy kWh meter designed for precise power consumption measurement in 110V/220V split-phase systems (L1-L2 = 220V, L1-N/L2-N = 110V). Ideal for residential and light commercial sub-metering.

Single Phase 120/240V 3-Wire (2 hots, 1 neutral)

★ 9 Measurement Functions.One interface displays nine parameters including Voltage(0-200V), Current(0-100A), Power(0-60000W), Impedance(0-1000Ω), Internal Resistance(0-999mΩ), Capacity(0-1000AH), SOC, Energy (0-9999kWh) and Running time(0-999h).
How to Record a Baseline Reading for a 24-Hour Test
To record a baseline reading for a 24-hour test, start immediately at the precise moment you note the meter’s cumulative kilowatt-hour (kWh) reading. Record the date and time accurately, then take a clear photo of the display for backup verification. If you have a digital meter, write down the full kWh value, excluding any red digits or decimals. For analog meters, follow the approved reading method, estimating to the nearest whole number without guessing unclear digits. If any digits are unclear, don’t make assumptions—later compare your written reading with the photo to confirm accuracy. Always prioritize safety when accessing the meter. Begin the test during typical electrical activity, avoiding any unusual or extreme loads. Note appliances that are running at the start to document the context, as this can influence interpretation later. Mark the exact end time on your calendar to ensure precise measurement of the 24-hour period. Store your baseline reading securely in a notebook or digital app, untouched until the test concludes, enabling direct and accurate comparison with the follow-up reading. For reliable backup reading verification, consider a standalone solar charger from top-reviewed models if the meter location has limited lighting. Ensure your setup includes a compatible battery charger that can efficiently handle the load from the solar panel for accurate data recording. Understanding the wiring layout of your system helps prevent electrical faults during the test.
The Simple Subtraction That Tells You Your kWh Usage
To find your kilowatt-hour (kWh) usage, subtract the previous meter reading from the current reading. For example, if your current reading is 45,892 and your previous reading was 45,280, your usage over that period is 612 kWh. Make sure to record the digits exactly as shown on the meter display, ignoring any red-framed or decimal digits. The basic formula is Usage (kWh) equals Current Reading minus Previous Reading. For most residential meters, this number directly represents your energy consumption. To verify the meter is working, you can check a battery connection with a multimeter to ensure a stable reference voltage. If your meter has multiple registers, perform the subtraction separately for each one, and check if a conversion factor applies before calculating your total usage. When choosing a battery for a recreational vehicle, a deep cycle battery provides sustained power for long-term off-grid use. When using this power with a 12V system, a top 12V battery ensures your inverter runs efficiently.
Test a Specific Appliance in Under 10 Minutes
To test a specific appliance in under 10 minutes, use a plug-in power meter. First, unplug the appliance and connect the meter to the wall socket. Then plug your appliance into the meter. Reset the meter to a zero or fresh kilowatt-hour (kWh) reading. Turn on the appliance and run it on a steady setting, such as high for a heater or full brightness for a lamp, for exactly 10 minutes.
After 10 minutes, note the final kWh reading. Since the meter measures energy used over time, multiply this number by six to estimate hourly consumption. Next, multiply that figure by your local electricity rate to determine the cost of running the appliance for an hour. This approach is most accurate for constant-load devices because power fluctuation during the test period can affect readings. Unlike a solar generator that stores DC power in a battery and inverts it to AC, this test measures real-time grid consumption. For a different diagnostic approach, a battery tester can assess the condition of backup batteries in such appliances.
Make sure your meter is properly calibrated and rated for at least 15 amps to avoid inaccurate results. For safety, always verify the meter’s grounding and wiring before connecting high-power appliances. This quick test works best for appliances like space heaters or lamps that maintain a steady power draw. For devices that cycle on and off, such as refrigerators, this short test will not capture average usage accurately.

Electricity Usage Monitor:Meter Plug monitors the power,voltage,amperage, frequency,power factor,energy,cost,minimum and maximum power of an appliance.With 7 display modes,you can easily understand the various parameters of the appliance while it is working.This monitor is a killer appliance for high cost energy consuming appliances and helps you to reduce energy consumption and save money

Real-Time Energy Monitoring: Smart plugs track the real-time power, current, and voltage of your plug-in devices on Govee Home App. Supports reviewing data daily / weekly / monthly and up to 1 year to effectively save energy and reduce waste.

Various Monitoring Parameters: The power energy meter can monitor the power (W), energy (kWh), volts, amps, hertz, power factor, cost, minimum and maximum power (W), cumulative days and time of your appliances. By switching 7 display modes, you can easily know the various parameters while the appliance is working. The home energy monitor can also calculate and display how much power your appliance uses and how much electricity bill it cost in cumulative time
Is Your Meter Accurate? Here’s How to Check It Fast
To check your meter’s accuracy quickly, compare its impulse rate against a known load. First, note the meter constant on the nameplate, usually listed as imp/kWh. Then, operate a steady load—such as a dedicated appliance or a resistor—and count the impulses over a set time period, like one minute. Record the impulse count and calculate the energy registered by the meter. To determine accuracy, use the percentage error formula: subtract the true energy from the registered energy, divide by the true energy, and multiply by 100. Keep in mind that meter calibration is evaluated at specific load points, not just a single reading. Testing at a power factor of one provides a clean baseline, as accuracy can shift with different power factors. If you suspect your meter is misreading, request an independent utility test—they will verify the meter in place and may remove it for official laboratory calibration if needed.

【35mm standard DIN rail】This electric meter can be installed by 35mm standard DIN rail , complying with standard DIN EN50022, easy installation. The KWh meter can be quickly mounted and installed on a Din Rail. This eliminates the hassle of needing complex all-in-one power monitoring systems, making it accessible for small-scale use.

Easy Installation: This digital energy meter is designed for simple installation in standard form 2S socket bases, making it ideal for RV, garage, and workshop electrical upgrades. The single-phase 120/240V design fits common power systems, allowing fast wiring into a breaker panel, meter box, or sub-panel without special tool. Its labeled terminals simplify connecting line, load, and neutral so you can begin monitoring kWh usage immediately through the bright LCD. Perfect for DIY users and professionals seeking reliable electric setup. The ANSI 2S 4-jaw fit ensures a quick snap-in install, while the Pulse and Reverse LEDs give instant confirmation of correct wiring & active meter operation.

Accurate Single-Phase Energy Meter – Class 1.0 accuracy kWh meter designed for precise power consumption measurement in 220V split-phase systems, Ideal for residential and light commercial use
Common Mistakes That Ruin Your kWh Meter Reading
To ensure accurate kWh meter readings, avoid common mistakes that can lead to billing errors. For analog dials, always read from right to left, as reversing the order can completely skew the total. When a pointer sits between two numbers, record the lower digit; rounding up can overstate your usage. If a pointer is exactly on a digit, check the dial to its right—if that dial hasn’t advanced enough, use the lower value. Ignore red or “1/10” test dials, which are often designed for calibration rather than usage measurement. Also, note each dial’s rotation direction because assuming uniform movement in all dials can cause errors. Proper technique involves verifying the meter’s accuracy by cross-referencing with a known load, ensuring your reading method remains precise. Remember, you’re tracking cumulative lifetime usage, so subtract the previous reading to determine your current monthly consumption. For digital meters, cycle through screens to find the actual kWh reading, as it may not be on the main display at first glance.
When to Call Your Utility About a Faulty Meter Reading
Call your utility immediately if your meter display is blank, frozen, or showing erratic behavior, such as continuing to count despite all appliances being turned off. Also, contact them if you notice any physical damage to the meter, burning smells, or signs of tampering. When your bill significantly mismatches the actual meter reading, or if it appears to be estimated rather than measured, gather your meter serial number, a photo of the display, and bill details before making the call. If you’re unsure about the accuracy after repeated mismatches, request a meter calibration test, and ask whether there is a fee involved and if it is refundable. Effective communication starts with having a reference number for your complaint and, if the utility stalls or dismisses evident issues, escalating the matter to a regulatory authority is advisable. For a different but related application, truckers often rely on power inverters that convert DC to AC to run their appliances on the road.
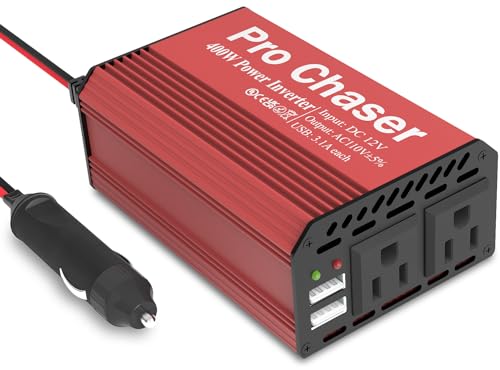
【Pro Chaser Power Inverter Basics】: This inverter provides a steady 400W of DC to AC power with a peak output of 800W. Equipped with dual 110V AC sockets and two high-speed 3.1A USB ports, it's perfect for powering your devices on the go.

Powerful Output & Versatile Charging:400W car power for clean and stable electricity to safely run small appliances and electronics. Features 2 standard US AC outlets, 1x 30W PD fast-charging Type-C, 1x 15W Type-C, and 2x 15W USB-A ports, enabling simultaneous charging/powering of multiple devices like phones, tablets, laptops, cameras, gaming consoles, and small fans.

POWERFUL OUTPUT: Convert power of DC 12V to AC 110V/120V 60Hz. Provides 3000 Watts continuous modified sine wave power and 6000 Watts surge power. Featuring 4 AC outlets and 4 USB ports for multi-purpose charging. Great High efficiency: conversion efficiency > 90%.