
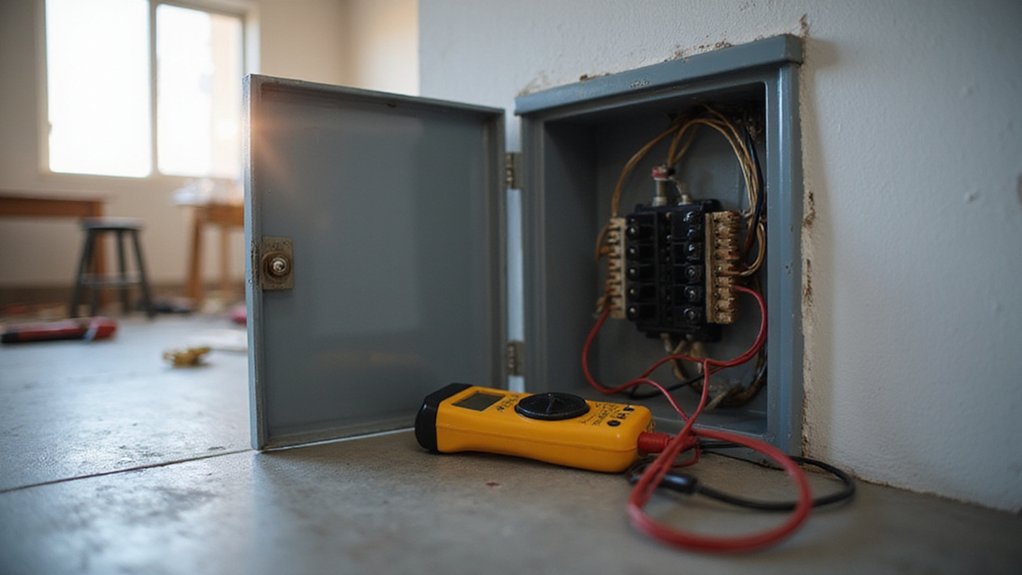

Ever wonder how to safely check if your breaker box is working properly? Knowing how to test your breakers can help you troubleshoot electrical issues quickly and safely.
With a few simple steps, you’ll be able to identify problems and understand your breaker panel better. Keep reading for easy-to-follow instructions that will guide you through the process.
Recognize Main Breaker, Circuits, and Labels
Locate the main breaker first, as it controls power to the entire home. It is typically a larger double-pole switch at the top of the panel and is often labeled “Main” or “Service Disconnect.” The breaker’s amperage rating, such as 100A, 150A, or 200A, indicates the panel’s total capacity. Below the main breaker, individual circuit breakers are arranged in rows, usually numbered from top to bottom, with odd numbers on the left and even numbers on the right. Securing cables with tightened cable ties near the panel prevents loose wires from interfering with breakers. For portable setups like RVs, similar solar panel installations often use durable connectors to ensure secure wiring. For those seeking deep-cycle reliability in such off-grid systems, AGM battery disadvantages include higher cost and sensitivity to overcharging.
Use breaker labels for quick identification. Check inside the panel door for a directory or look for labels next to each switch; these specify the room or appliance connected to that circuit. If labels are missing or unclear, you can identify circuits by turning off one breaker at a time and noting which areas or appliances lose power. Creating accurate labels and circuit maps makes the panel easier to understand, troubleshoot, and maintain. For clear identification, the 170 vinyl decal labels in a 100 AMP set offer bright colors that improve readability on breaker panels.
Check for Warning Signs Before Touching the Panel
Checking for warning signs before touching the panel is crucial to prevent electrical hazards. Look for burning odors, smoke, or a melting smell—these indicate arcing or damaged wiring that could cause a fire or shock. Feel the dead front cover; if it’s warm or hot, high-resistance connections might be converting current into heat, increasing risk. Listen for buzzing, sizzling, or crackling sounds, which signal arcing or loose connections that could lead to failure or fire. Inspect for scorch marks, brown discoloration, or melted plastic on circuit breakers; these signs point to previous overheating episodes that compromise safety. Check for cracked breakers or corrosion on conductors, as damaged insulation can increase the chance of short circuits or shocks. Also, verify your circuit labeling is accurate—poor labels waste time during troubleshooting. Finally, notice if the panel trips frequently, flickers, or if handles feel loose; these symptoms indicate the panel needs professional inspection. Stop immediately if you observe any of these warning signs—ignoring them increases the risk of electrocution or fire. For additional protection, ensure any connected battery system uses a high-quality power inverter to prevent dangerous voltage fluctuations. When working with shrink wrap tubing on wires, a heat gun with adjustable temperature control ensures consistent, safe results without damaging nearby insulation. For large-scale farming electrical setups, consider solar panels with high efficiency ratings to reduce overall wiring and breaker load.
How to Reset a Tripped Breaker Safely
To reset a tripped breaker safely, start by identifying the breaker that is stuck between the ON and OFF positions. Before touching it, ensure that the panel has no warning signs of danger, such as burning smells, sparks, or exposed wires. Confirm that the area around the panel is dry and clear of obstacles. Choosing reliable battery picks with terminals can help avoid similar electrical issues in your home. A similar principle applies when working on a car battery, where removing the negative cable first prevents accidental shorts.
Next, turn off or unplug all devices connected to that circuit to prevent power surges. Stand to the side of the panel with your face turned away, and only hold the plastic switch—avoid touching metal parts. Keep one hand away from the panel to minimize risk in case of a short circuit, and remove jewelry to prevent accidental contact with live components.
Perform the reset by moving the breaker firmly to the full OFF position, then wait a few seconds. After that, push it back to the ON position with a smooth, deliberate motion. Never nudge it from the middle or “tripped” position, as this can damage the mechanism. Once the breaker clicks into the ON position, gradually restore power to the circuit, allowing any devices to turn on slowly.
If the breaker trips immediately after resetting, stop and do not attempt to override it by taping it on or removing internal covers. Repeated trips indicate a potential wiring issue or appliance fault that requires professional inspection. Always prioritize safety over convenience when handling electrical panel components.

SECURE ELECTRICAL PANEL ACCESS – The PS1 electrical panel lockout device helps prevent unauthorized access to circuit breaker panels, breaker boxes, and electric panel doors when safety control is required.

【Compatible Models】Generator Interlock Kit Compatible with Square D QO or Homeline 150 or 200 amp panels.
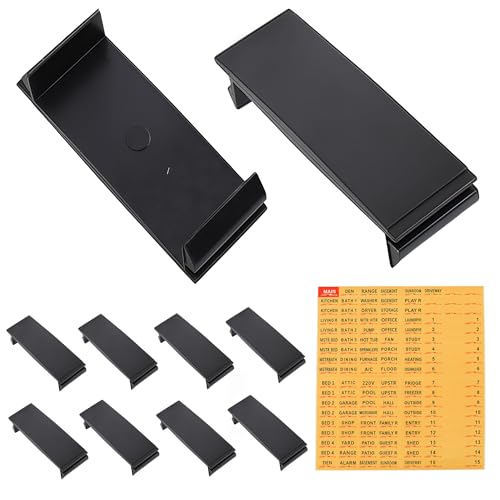
Circuit Breaker Blank Filler Plate 1-Inch breaker panel cover plate safety measure prevents accidental contact with live electrical components, protects against dust and debris, and helps your electrical system comply with standard safety regulations
Why Your Breaker Keeps Tripping (and What to Do)
A breaker keeps tripping primarily due to three common issues: circuit overload, short circuits, and ground faults. The most frequent cause is overload, which happens when too many appliances or devices draw power from the same circuit, exceeding the breaker’s amperage capacity. To fix this, redistribute high-wattage devices across different circuits or install dedicated circuits for large appliances. Older homes may lack enough dedicated circuits, which is a common underlying cause of frequent overloads. For extended outages, a portable power station can serve as a temporary home backup to reduce strain on overloaded circuits. Using a heavy-duty extension cord rated for the generator’s wattage ensures safe power distribution during outages.
Short circuits occur when hot and neutral wires touch, often because of damaged insulation or pinched wiring. Signs include scorch marks, a burnt smell, or popping sounds. To address this, visually inspect wiring and damaged components, and avoid using damaged outlets or cords.
Ground faults happen when electricity leaks to the ground, frequently caused by moisture in areas like basements or garages. These faults trip the breaker to prevent shock hazards. Isolate wet equipment and dry the area thoroughly before resetting the breaker. If you suspect a faulty breaker, it is critical to use the correct removal and fitting order to avoid injury.
If unplugging devices and reducing loads doesn’t stop the trips, the breaker itself may be faulty, or connections inside your panel could be loose or corroded. In such cases, scheduling a professional inspection is crucial to ensure safety and proper function.

Up to 1875W Applications: Outdoor extension cord waterproof 12 gauge, 15 amp, 125 volts, 1875 watts, NEMA 5-15P to NEMA 5-15R, SJTW power cord, ETL/cETL listed, heavy duty extension cord 50 ft is perfect for heavy duty use or powering major appliances

High quality: 10 Gauge extension cord 50 foot, 15 amp, 125 volt, 1875 watt, NEMA 5-15P to NEMA 5-15R; ETL/cETL listed; The 3 outlet extension cord outdoor has 3 way plug outdoor; Heavy duty extension cord with multiple outlets can power multiple appliances at the same time; Making maximum use of existing resources

【50 Feet POWER CORD】- Extending the power cord up to 50ft away so as to protect your and others from standing too close to the hazardous exhaust.
Test Voltage and Continuity With a Multimeter
To test voltage and continuity with a multimeter, start by verifying the panel is live. Set your multimeter to AC voltage, using the COM and VΩ jacks. Place one probe on a breaker terminal screw and the other on the neutral bar or ground. A normal reading indicates power is present. To safely proceed, turn off the main breaker and use lockout/tagout procedures to de-energize the circuit. Switch your multimeter to continuity mode. Confirm the functionality by touching the probes together; you should hear a beep. Next, place one probe on the breaker’s input terminal and the other on its output terminal. A good breaker shows near-zero ohms when it is ON, indicating a proper internal path. An open circuit suggests the breaker has failed. Remember to keep your hands dry and never perform continuity testing on a live circuit, as this can damage your meter and pose a shock risk. As noted in the beginner’s guide, always set correct settings on your multimeter before testing to avoid inaccurate readings or damage. For those building a DIY breaker box cover, the same safety steps apply when working near live wires. A solar charge controller uses a similar concept to regulate the flow of power and prevent overcharging the battery.
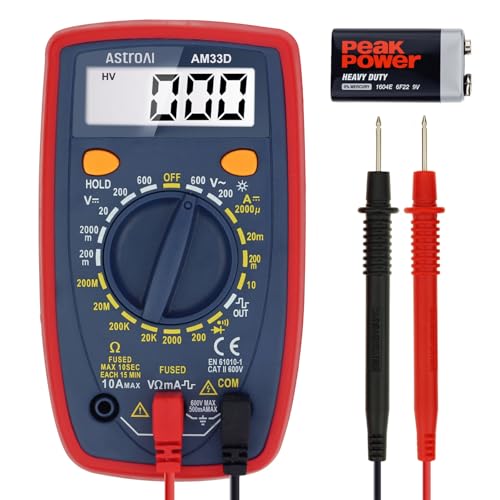
Additional Tips - The following incorrect operations may cause the multimeter not to show results: Firstly, the plugs of test leads are not fully inserted or not inserted into the correct sockets. Secondly, the manual rotary switch is not placed in the correct position. In addition, this meter can not test all AC Current and below 100mV AC Voltage. Please check the user manual carefully before measurement.

Accurately Test Full Features: Accurately measures AC/DC voltage, DC current, resistance, continuity test, diode and batteries.
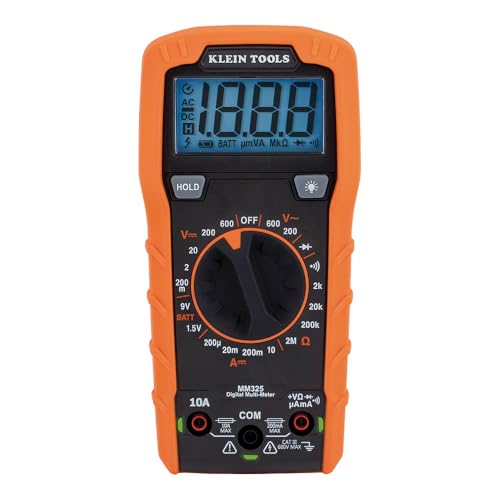
VERSATILE FUNCTIONALITY: Measures AC/DC voltage up to 600V, 10A DC current, 2MΩ resistance; additional features include continuity, diode test and battery test
Map Every Circuit in Your Breaker Box
Start by creating a numbered directory that corresponds to each slot in your breaker panel, using a fixed top-to-bottom sequence. Number every position, including tandem and double-pole breakers, and clearly mark any spare slots. Before flipping any breaker, switch off one at a time and observe which devices lose power—check outlets, lights, and fixed wiring. Enlist a helper to call out the results so you don’t miss anything. Restore power to that circuit before moving on to the next. Record the specific load for each breaker, like “Kitchen counter outlets, north wall,” rather than room names, to keep your map precise. Pay special attention to GFCI outlets in each circuit; test them to ensure they trip correctly. When replacing any breaker, verify compatibility to avoid mismatched brands, which can lead to unsafe connections. If you later add a manual transfer switch, you will need to know which circuits are essential for backup power. After testing each circuit, immediately add its number to the directory. Transfer all your notes into a master list that pairs breaker numbers with areas served, load types, and amperage ratings. For a polished result, use labeling tools and materials to produce a clean, durable directory that is easy to read at a glance. Keep this map nearby for faster troubleshooting in the future.

ULTIMATE PANEL KIT LABELS: Kit includes 48 circuit directory, 53 Circuit Identification labels with colored icons, 48 Round breaker markers, 3 breaker marker strips for each 1/2", 3/4" and 1" wide breakers, 4 ON/OFF Breaker Position Labels, 10 GFCI/AFCI Protected Labels, 3 Danger/Warning Electrical Panel labels & Electrician Info/Contact Label.

Complete Kit for up to 48 Circuits – Directory sheet, numbered tabs (1–48) with extra blanks, round number dots, panel/room markers, ON/OFF & safety labels plus a microfiber cleaning cloth to prep surfaces for better adhesion.

Complete 48-Circuit Coverage – Directory sheet, numbered tabs (1–48) with blanks, round number dots, panel/position markers, ON/OFF & safety labels plus a microfiber cleaning cloth.
When to Call an Electrician for Breaker Problems
If your breaker keeps tripping repeatedly, it is a clear sign that professional help is needed. This issue can indicate overloads, wiring faults, or a failing breaker. If the breaker trips instantly or on multiple circuits, do not attempt to reset it yourself. Heat, burning smells, or scorch marks near the electrical panel signal internal damage, and you should stop using the system immediately. Buzzing, crackling sounds, or sparks suggest arcing or loose connections that require urgent inspection. A properly installed fuse block can also provide organized circuit protection for multiple devices, but it must be sized correctly to avoid overheating. For those exploring off-grid options, choosing a system without energy storage can reduce upfront costs, but always prioritize safe panel selection based on verified electrical ratings.
Partial power loss or shocks from outlets are also warning signs that require professional diagnosis. Additionally, situations involving smoke, flames, or moisture near the panel are emergencies that need immediate expert service. Don’t ignore these signs because they could indicate serious hazards. It’s also wise to verify that your panel labeling is correct and that ground-fault circuit interrupter (GFCI) protection is working properly. If you’re unsure about any of these issues, an electrician can assess and confirm the problem. Until help arrives, avoid resetting tripping breakers, touching a hot or sparking panel, or using circuits that shock or flicker.
Easy Maintenance to Keep Your Panel Safe
Quarterly, press the test buttons on your GFCI and AFCI breakers. They should trip immediately when pressed and then reset without issue. Use a flashlight to visually inspect the exterior for signs of corrosion, heat marks, or missing faceplates. Avoid opening the breaker box during these visual checks; only open the cover during maintenance. Keep the cover closed at all other times to protect the components inside. Maintain a detailed log of all test dates and any changes or observations to ensure reliable records for future reference and troubleshooting. Similarly, if you have a solar system, you can check for a sustained inverter shutdown by verifying the breaker remains off for a full five minutes before resetting it. For solar setups, selecting a pure sine wave inverter is crucial for safely powering sensitive electronics and ensuring reliable system performance.

Designed to improve immunity for reduced High Frequency (HF) nuisance tripping. providing increased compatibility with appliances and other electronics

COMPREHENSIVE WIRING FAULT DETECTION: GFCI Tester detects common wiring faults in standard, AFCI, and GFCI electrical outlets, ensuring thorough testing

APPLICATIONS & COMPATABILITY - This breaker is ideal for residential and commercial use. This is a plug-on neutral breaker that can only be used with ABB ReliaHome P-Series or P-Series+ load center models. The trip indicator shows the circuit status and can be easily reset.