


Struggling to find a battery strap that fits tightly in awkward spots? Making your own can give you a custom, secure, and adjustable solution. With the right materials and simple steps, you can create a durable strap that keeps your battery safe and snug.
Keep reading, and you’ll learn how to build one from scratch easily.
Why Build Your Own Battery Strap Instead of Buying One
Building your own battery strap offers tailored solutions that off-the-shelf options can’t match. With a custom strap, you control the design and choose durable materials that suit your specific application. This flexibility means you can create a snug fit for unusual battery shapes or tight spaces where pre-made brackets would fail.
A DIY strap is also cost-effective. Instead of purchasing multiple sizes of ready-made mounts, you can reuse components across different projects, saving money over time. The adjustable aspect allows you to tighten or loosen the strap easily, reducing vibration and lateral movement that can stress connections or cause internal damage. For solar storage setups, you can check the best battery for solar charger guides to pair your strap with compatible power cells, and by referencing top battery picks with terminals you can ensure your build matches high-quality cells. You can integrate your strap with pre-wired MC4 connectors to simplify clean power routing.
Additionally, building your own strap facilitates tool-free maintenance. You can quickly remove or reposition the battery for inspection, seasonal storage, or repairs without hassle. Using a combination of heavy-duty cam buckle straps and steel or aluminum angle bars, you can construct a secure holder that accommodates any battery size or type. On top of that, a custom strap absorbs vibrations better and prevents wires from shifting, which enhances safety and extends your battery’s lifespan in rough-road or marine environments.
Materials and Hardware for a DIY Battery Strap
Selecting the right materials and hardware is crucial for a durable and reliable DIY battery strap. For environmental resistance, heavy-duty polypropylene provides excellent water resistance, making it suitable for outdoor or wet conditions. Nylon offers a compact and lightweight option, ideal for smaller packs or where space is limited. Rubber grips are excellent if you need a non-slip hold, especially in humid environments.
For high-strength compression, stainless steel strap bands are the best choice due to their durability and ability to withstand significant tension without breaking. When choosing hardware, stainless steel fasteners and end fittings are essential—these resist corrosion far better than plated steel, ensuring your strap lasts longer, especially in challenging conditions. For those using a solar battery setup, a solar battery charger can help maintain optimal charge levels without relying on the grid.
Match your closure mechanism to the load. Ratchet mechanisms with 304 stainless steel bodies are suitable for tight and secure clamping, providing precise tension control. Footman’s loops can securely anchor straps, ideal for fixed or adjustable positions. Always verify that the buckle’s metal width aligns with your strap width to prevent webbing distortion. In some cases, a temporary reviving dead batteries technique can restore enough charge to test your strap’s fit before final installation.
Prioritize corrosion resistance and insulation layers that can handle DC voltages up to 3500 V, especially if your setup is outdoors or exposed to humidity. Multiple insulation layers can enhance safety by reducing electrical contact risks. Your choice of materials and hardware directly impacts the stability and safety of your battery system. For those using a generator, an interlock kit ensures safe and compliant transfer switching between utility and backup power.

STAINLESS STEEL RATCHET. This ratchet tie down straps use stainless steel ratchet system. Never get rusty any more even use it under water. Load Capacity is 900lbs. Breaking strength is 2500lbs

STAINLESS STEEL RATCHET. This ratchet tie down straps use stainless steel ratchet system to prevent rust even use it outdoor in rain
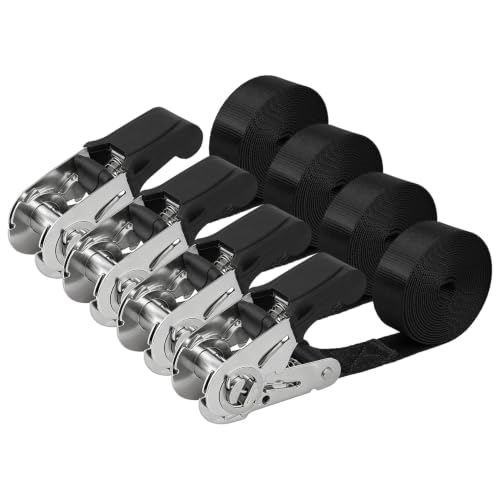
STAINLESS STEEL RATCHET. Rustproof 304 stainless steel stands up to rain, snow, and saltwater environments—ideal for marine use, coastal trips, and wet road conditions. Smooth operation, won't seize or strip.
How to Measure and Cut Your Webbing for the Perfect Fit
To achieve the perfect fit, measure your webbing length carefully and include allowances for the hardware at both ends. Start by determining your finished strap length, then add about 1/2 inch to 1 inch for each hardware piece to ensure proper installation. Fully unroll the webbing to prevent curl errors, and mark your cut point clearly with a fabric marker or tape. Measure twice to confirm your mark before cutting to avoid mistakes. Remember, the webbing length for buckle placement should account for the wrap-through of the hardware rather than just the final size you want. Proper tension depends on getting this length right; too short will strain the connections, while too long can cause your battery or item to loosen. Use a hot knife to cut the webbing for a clean edge, which seals the fibers and prevents fraying. After sealing, double-check the length again before installing. Ensuring your cut is straight is crucial for a consistent and professional fit. For the best results, consider the principles of a transfer switch when planning how your hardware connects to ensure reliable electrical performance. For adjustments later, always ensure 4 cm of webbing remains between the buckle edge and the webbing stopper center to maintain safety compliance.

[CLEAN AND SMOOTH CUT, NO MESS] ROMECH hot knives cut fabrics and rope smooth and fast, seal the edges clean, and leave no debris

MILITARY-GRADE EXTRACTION TOOL Emergency Rescue Belt Strap Paracord Net Cutter Ontario Knife Model 4 with Foliage Green Belt Sheath Lanyard Hole Made in The USA
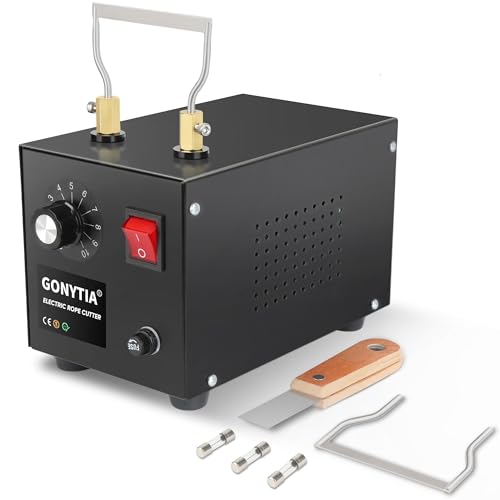
【Adjustable Temperature & Overheat Protection】10 temperature settings allow precise adjustment for different materials and thicknesses. Equipped with a safety switch for overheating protection to prevent blade overheating during prolonged use.
Step-By-Step: Assembling the Strap With Buckles or Hooks
To attach the hardware properly, first verify that the webbing width matches your buckle or hook. For example, a 1-inch cam buckle is designed for webbing of exactly 1 inch wide; using wider webbing won’t fit properly. Next, feed the webbing through the buckle following the specified slot order—don’t thread at random. For common cam buckles, insert the webbing through the first slot, then loop it back and pass through the next slot to lock the webbing in place. Check the buckle’s diagram to confirm the correct threading path. If you encounter a generator that won’t start, you can explore easy pull cord alternatives to bypass the recoil starter. Before starting any electrical work, ensure your system uses a perfect battery isolator to prevent drainage and protect the battery. For an off-grid setup, consider choosing a model with top performance and high-quality solar panels for reliable energy storage.
If you’re using hooks like S-hooks or J-hooks, attach them at the strap ends, ensuring the hooks engage fully. Make sure the hooks keep the load centered to avoid side-loading, which can weaken the strap over time. After threading the webbing through the hardware, pull until it feels snug but not overstretched. Release the cam lever or clamp to secure the webbing tightly. Confirm that the strap remains flat, untwisted, and that any locking tabs are fully closed. Before applying load or tension, inspect all hardware for signs of wear or damage and tighten everything securely.

Package Included: 10Pack cam buckles, enough quantity for you to use and replace

Quantity : 2 piece . No Webbing .

10 pcs cam buckle
How to Route and Tighten Your Strap for a Secure Hold
To route and tighten your strap securely, start by routing it in a straight, direct line from the anchor point to the load. Keep the webbing centered over the battery mass to prevent side-to-side shifting. Avoid twists, kinks, or figure-eight routes because they weaken the holding power. Ensure the webbing lies flat against contact surfaces so the force is evenly distributed. If you later need to wrap the excess tail, consider using creative cable wrapping tricks to keep it neat and secure. For whole-house battery systems, a secure hold is critical to match the reliability of top solar generators.
Before tightening, pull out enough slack by hand to make the strap snug but not tight. Confirm both ends are firmly seated at their anchors. Gradually tighten the strap with steady, repeated strokes until the load stops shifting. When the strap is taut and there is no visible sag, stop tightening. Do not over-crank, as excessive force can damage the hardware.
Once tight, close the ratchet completely into its locked position. Check that the webbing is flat and lying without crossing or bunching. Secure any excess tail to prevent it from flapping. After your first few miles, recheck the tension because loads settle. Retighten just enough to restore tautness, avoiding any excessive tightening beyond the initial secure point.

VERSATILE FOR MULTIPLE APPLICATIONS: These endless ratchet straps excel where traditional ratchet tie downs just won't work. Excellent for securing kayaks, bikes, ladders, furniture, battery boxes, camping gear, and other cargo. The continuous loop design works brilliantly as motorcycle tie downs, boat tie down straps, and situations where standard hooks would damage vehicles or cargo.

Extended Playtime: With a high-capacity 12000mAh battery, our VR Head Strap for Oculus Ouest 2 allows you to extend your Meta Quest 2 playtime by up to 8 hours. Enjoy your favorite VR games and apps without worrying about running out of battery.

VERSATILE FOR MULTIPLE APPLICATIONS: These endless ratchet straps excel where traditional ratchet tie downs just won't work. Excellent for securing kayaks, bikes, ladders, furniture, battery boxes, camping gear, and other cargo. The continuous loop design works brilliantly as motorcycle tie downs, boat tie down straps, and situations where standard hooks would damage vehicles or cargo.
Padding and Protection Tips to Avoid Battery Case Damage
To protect your battery case from damage, focus on vibration damping and edge protection. Use EVA, rubber, or silicone pads to isolate the case from vibrations and movement, reducing resonance and preventing abrasion. These soft layers absorb shocks and keep the case stable. For portable setups, consider that top solar chargers emphasize lightweight, direct-energy designs without onboard storage. When working on a battery, always disconnect the negative cable first to reduce the risk of short circuits and sparks. Always follow the safest fix order by tightening the positive terminal before the negative to avoid accidental grounding.
Corners are the most vulnerable area; apply fiberglass tape around sharp PVC edges or fit corner protectors to prevent dents and fractures caused by strap rubbing or impacts. When securing the pack with straps, opt for padded or rubberized surfaces to distribute pressure evenly. Wide, flexible straps help prevent concentrated force that can deform or damage the case.
Never over-tighten straps, as excessive compression can deform or stress the case material. Padding allows you to secure the pack firmly without risking damage. Finally, smooth any sharp frame edges and add friction tape at contact points to prevent rubbing and scratching. Your aim should be to keep the battery case free of scratches, dents, and stress fractures through these simple protective measures.

【Reliable Material】:The car battery strap is made of high-quality PP webbing and plastic buckles, sturdy, sunproof and wear-resistant, and not easy to deformed or broken, for long-term use.

Great For Securing Batteries And Electronics

Designed for RC battery,perfect size about 10 x 1 inch,not too long and not too short for your battery.
When to Inspect, Replace, or Upgrade Your Homemade Strap
Inspect your homemade strap every two months if it’s used for load-bearing purposes. If your strap is subjected to frequent vibration or transportation, check it weekly or monthly. Always re-inspect immediately after any trip to identify loosening or shifting. Look for signs of wear such as fraying, cracks, or loose hardware. If you notice any of these issues, replace the strap immediately for safety. Loose threads or surface damage are clear stop-use signals and must be addressed. When choosing a replacement, consider monocrystalline solar panels for their high efficiency and durability.
Maintain a regular inspection schedule and avoid stretching maintenance beyond two years without replacement, even if no damage is visible. Fiber fatigue can develop internally and reduce strength unnoticed. Upgrade your strap when your load profile changes—such as adding a heavier battery or encountering higher vibration— or if you find yourself repeatedly adjusting it. Persistent loosening or overheating, discoloration, or battery movement suggest it’s time for an upgrade.
Track the service life of your homemade strap with recorded inspection dates. Don’t rely solely on age or unknown history, as safety depends on proactive, consistent checks and timely replacements.