


Wondering how to build a DIY solar panel that actually works? It’s all about sizing your system correctly based on your power needs and sun exposure. Then assembling components like monocrystalline cells and sealing them under tempered glass.
By the end, you’ll have the know-how to create a reliable, self-made solar panel tailored to your home. The full details are right below.
What You’ll Need: Tools and Materials for Your DIY Solar Panel
To assemble your DIY solar panel, you need a specific set of tools and materials to ensure safe, efficient, and code-compliant construction. Start with photovoltaic cells, with monocrystalline types recommended for higher efficiency. These cells are fragile, so handle them carefully. Use a rigid backing board, such as plywood or a composite material, to provide structural support. Cover the panel with weatherproofing in the form of tempered glass or acrylic sheet to protect against the elements. Frame the assembly with aluminum angles to add durability and ease installation.
Electrical safety components are essential. Incorporate a junction box with output wires for connecting to your battery system or inverter. Use cable glands to secure and waterproof wiring entries. Include blocking diodes to prevent reverse current flow, which can drain your batteries when sunlight isn’t available. Connect the cells using tabbing wire, and join multiple strings with bus wire. Solder the connections with a soldering iron and flux, ensuring clean, reliable joints. When wiring your battery bank, always disconnect the negative terminal first to prevent short circuits, following the safety protocol for disconnecting cables. Reviewing options for top battery picks can ensure your system uses quality terminals that deliver reliable performance and value. When trimming and insulating wire connections, you should never cut heat shrink tubing lengthwise, as this compromises its waterproofing and protective seal.
Your toolkit should include a multimeter to check continuity and measure voltage output during assembly. Use a cordless drill and a hole saw for creating mounting holes or attaching components. A torque wrench is helpful to tighten fasteners to the correct specifications, avoiding damage. Safety should never be overlooked: wear safety glasses and gloves throughout the process. Finish by sealing module edges and connections with UV-resistant sealant to prevent water ingress and prolong durability.

【Accurate power】All data are actually measured under the condition that the solar light is sufficient. In full sunlight, the voltage will be higher than 2V.

🏞️【Build Small Solar Projects】: This 10-pack of mini solar panels gives makers and students compact 2V 160mA cells for DIY lights, STEM models, and small photovoltaic experiments.
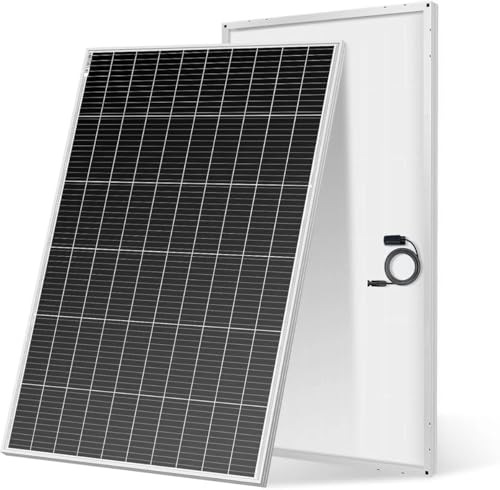
【Power for Every Off-Grid Life】 Use on rooftops, RVs, boats, cabins, or farms to enjoy clean solar energy anywhere. A simple way to cut energy costs and stay independent from the grid.
Calculate Your DIY Solar System Size Based on Daily Energy Use
To size your DIY solar system, start by calculating your daily energy use in watt-hours. Add up each appliance’s wattage multiplied by its daily hours of operation. This total energy consumption in watt-hours forms the basis for your system size. Convert this value to kilowatt-hours by dividing by 1,000. Then, determine your local peak sun hours—Southern Africa, for example, typically receives between 4.5 and 6 hours per day. Use the core formula: Solar kilowatts = Daily kilowatt-hours divided by peak sun hours. To account for real-world efficiency losses, apply a derate factor between 0.75 and 0.85, or multiply your result by 1.15 for a more conservative estimate. For those seeking a pre-assembled solution, consider top solar generators that integrate batteries for reliable power backup. Round up your system size to match available panel wattages and verify that your roof and inverter can support the setup. Keep in mind, this calculation addresses your daily energy needs only—peak load and battery autonomy will require separate planning. For storing that energy, ensure you choose a compatible charger that matches your battery type. To prevent loose connections, tighten cable ties securely around all wiring to maintain system stability.
Assemble Your DIY Solar Panel: Solder the Cell String
Soldering the cell string involves creating a series connection where the front of one cell connects to the back of the next. First, cut tabbing wire to about twice the length of each cell to ensure sufficient length for proper connections, leaving some extra for handling. Apply flux to the contact areas to improve solder flow and adhesion. Use a temperature-controlled soldering iron and gently place it on the tabbing strip, moving carefully along the contact point. Keep the soldering time brief to prevent stressing or cracking the fragile cells. Connect multiple cells in series by soldering positive to negative terminals for a continuous electrical path. Repeat this process for each cell, forming a straight string with consistent spacing. Once assembled, use a multimeter to check for continuity across the entire string, ensuring all connections are solid. This direct current output requires careful matching to your system’s power inverter for proper voltage conversion. Avoid misaligning the tabbing strips, which can cause mechanical stress, and trim any excess wire ends for a tidy layout. To verify panel safety before installation, you should also test your breaker box using a multimeter to confirm correct voltage levels. Proper technique and attention to detail are essential to ensure reliable electrical connections and long-term durability of your DIY solar panel. For optimal value, consider using high-efficiency monocrystalline cells that perform well without a battery backup system, as reviewed in top solar panel comparisons.


20M Tab Wire + 2M DIY Solar Bus Bar Wire Ribbon + 1Pcs 10ml Soldering Tools Flux Pen DIY Connect Circuit Board Solar Cell Panels
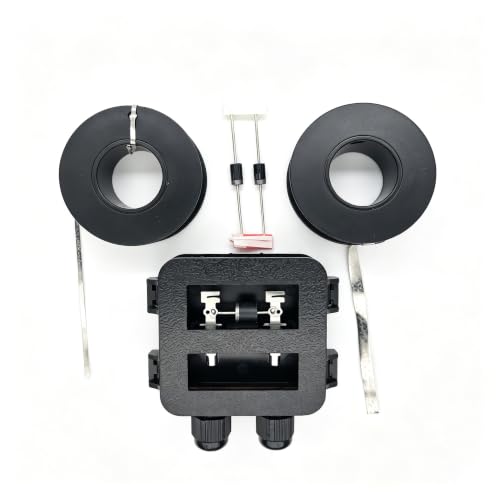
COMPLETE MATCHED 60W PV KIT — 5m 5×0.2mm busbar ribbon, 15m 1.8×0.15mm tab ribbon, bypass diode junction box, blocking diode. All-in-one for welding & circuit protection.
Seal Your Solar Cells With Glass and Weatherproof Frame
Sealing your solar cell assembly with glass and a weatherproof frame is essential to prevent moisture ingress over the long term. Use a transparent glass frontsheet paired with an impermeable backsheet or a second layer of glass, as these create strong barriers against moisture. However, the primary ingress path remains at the edges, making edge sealing critical. For buyers choosing a standalone unit, top solar chargers reviewed in the knowledge base also offer durable weatherproof designs without integrated batteries. A polyisobutylene edge seal mimics the low water-vapor permeability essential for maximizing your solar inverter’s lifespan when applied to the cell assembly. When securing the assembly, verify that no battery isolator components create stress on the glass edge.
Apply a continuous polyisobutylene-based edge seal with a width of at least 12 millimeters. This seal’s low water-vapor permeability ensures moisture cannot penetrate, providing reliable protection for up to 20 years. The frame supporting the glass must prevent pinch points that could compromise the edge seal’s integrity. It should support the glass evenly and allow complete perimeter coverage without voids, ensuring proper alignment.
A continuous frame seal acts as a barrier against rainwater reaching the laminate. Carefully inspect the bond continuity and gap control along the entire perimeter; any failure here risks delamination and long-term damage. Proper sealing and frame support are fundamental for durable, weather-resistant solar modules.
![3M Clear Edge Sealer - Liquid 8 oz Can - 82018 [PRICE is per CAN]](https://m.media-amazon.com/images/I/31PB1P07+7L._SL500_.jpg)

【Product Structure and Size】This car door rubber seal strip is 10ft. U Shape PVC Trim adopts the high-quality internal metal clips structure provides excellent grip retention to promise a stable and strong grip, and the EPDM rubber top bulb provides a secure seal for a variety of applications. The trim bulb seal fits 1/16"-2/25" edge, bulb diameter is 0.55"

【Product Structure and Size】This car door rubber seal strip is 20ft. U Shape PVC Trim adopts the high-quality internal metal clips structure provides excellent grip retention to promise a stable and strong grip, and the EPDM rubber top bulb provides a secure seal for a variety of applications. The trim bulb seal fits 1/16"-2/25" edge, bulb diameter is 0.55"
Wire Diodes, Charge Controllers, and Inverters to Your Panel
Start by installing diodes correctly. Place blocking diodes in series with your panel wires to prevent current from flowing back into the panel at night. Ensure the diode’s orientation allows current to flow toward the charge controller. Bypass diodes should be installed across each cell string or module to protect against shading and uneven illumination; these allow current to bypass shaded sections safely. Always verify that current flows from the panel to the controller, never in reverse, with a multimeter. When wiring, connect the panel’s positive lead to the controller’s PV positive terminal and the negative lead to the PV negative terminal. Next, connect the controller to the battery bank, making sure to match polarity exactly—reversing connections can damage the controller. Use a surge protection device to ground voltage surges for protecting your equipment. When wiring the inverter, decide whether you need a pure sine wave unit for sensitive electronics or a modified sine wave model for simpler loads. When wiring the inverter, connect it directly to the battery terminals using heavy-gauge cables designed for high current loads. Include fuses or circuit breakers on both the PV and battery circuits as overcurrent protection. Throughout all connections, keep the positive and negative conductors consistent to avoid shorts and equipment failure. For maximum system efficiency, choose panels equipped with MC4 connectors to ensure reliable, waterproof connections that simplify wiring. Selecting the proper wire gauge for your breaker box connections is critical to handle high current loads without overheating.

[High quality material]: imported glass passivated chip welding, high power cycle, electrical isolation between chip and lower board.
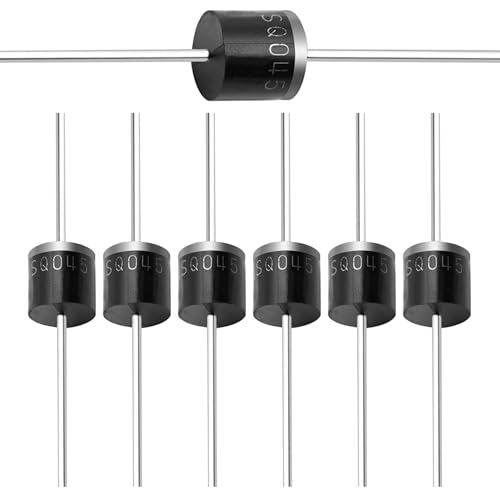
Part Number: 15SQ045 / Forward Current : 15 A / Maxixum Repetitive Peak Reverse Voltage : 45 V

1.PPO INSULATION FLAME RETARDANT MATERIAL with excellent aging resistance and UV endurance, can resist severe weather such as heavy rain,snowstorm or heat for a long time; WATERPROOF RING on connection is perfect to seal out water and dust to prevent corrosion.
Weatherproof and Mount Your Panel Safely (Permits Included)
Mount the solar panel arrays flush against the roof surface to prevent overhanging ridges, valleys, or eaves from obstructing airflow or creating gaps. Use only manufacturer-approved flashing and sealant for every roof penetration, ensuring they match your roofing material for a seamless, waterproof finish. Proper weatherproofing involves creating a water-tight seal around all penetrations; inspectors will verify this before approving your installation. Ensure there is adequate ventilation beneath the panels to reduce overheating, which can impact performance. All hardware must be fastened securely to withstand wind loads and storm exposure, with torque specifications followed meticulously. Use high-quality battery terminals to ensure a reliable connection between the panels and your power storage system. Complete these mounting steps before proceeding with any electrical testing to ensure a safe, durable installation. For connecting the system to a generator, you must use heavy-duty extension cords rated for the full amperage load to prevent voltage drop and fire hazards.
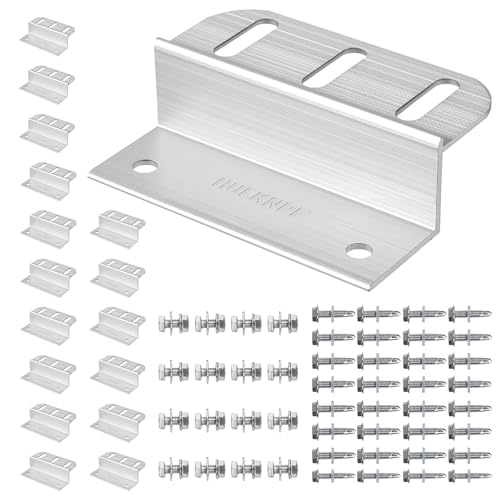
Durable & Wind-Resistant Build: Crafted from corrosion-resistant aluminum alloy, these heavy-duty Z brackets provide long-lasting, stable performance and withstand high winds for outdoor solar installations.

【SUPERIOR QUALITY】 Anodized Aluminum Z brackets, Stainless Steel Hex Bolts and Screws, service life up to 25 years, perfectly supporting solar panels in off-grid installations.

Premium Material, Durable & Long Lasting: Anbte solar panel mounting bracket are made of aluminum alloy, which with light weight, large load capacity and strong corrosion resistance, suitable for a variety of outdoor environments. And the mounting screws are made of 304 stainless steel, which has the advantages of rust resistance
Test Your DIY Solar Panel and Troubleshoot Common Problems
To determine if your DIY solar panel is working properly, you need to run tests rather than guess. Disconnect the panel from the charge controller, inverter, or battery, and perform measurements on a clear, sunny day near midday when sunlight is strongest. Ensure the panel is facing directly toward the sun and is free of dirt and debris. Understanding how a power inverter works in your home setup can help you interpret these test results more effectively because the inverter converts the DC power from your solar panel into usable AC power, and testing the panel’s output directly affects inverter performance. Heat shrink tubing is often used to insulate and protect the electrical connections in your solar panel wiring, ensuring safe and durable connections. Before testing, it is also wise to review best circuit breakers for your fuse box to ensure proper protection and safety.
Use a digital multimeter set to DC voltage to measure the open-circuit voltage (Voc). Record this value and compare it to the specifications listed in the panel’s datasheet. Confirm that the circuit is open to ensure an accurate reading of the open-circuit voltage. Next, switch the multimeter to measure current in DC mode to check the short-circuit current (Isc). Again, compare your readings to the specified values. Significant deviations may indicate wiring issues, shading, or faults within the module.
For troubleshooting, carefully examine MC4 connectors and junction boxes for looseness, corrosion, or dirt. Check all breakers and fuses to ensure none are tripped, as this cuts off output. Look for partial shading from nearby objects or dirt buildup that can reduce performance. Inspect the panel for physical damage such as cracks or hot spots, which can impair efficiency. Test the bypass diodes if certain parts of the panel underperform. Finally, verify that your charge controller’s settings match your battery chemistry to prevent improper charging. Following a systematic approach helps identify the root cause quickly.