
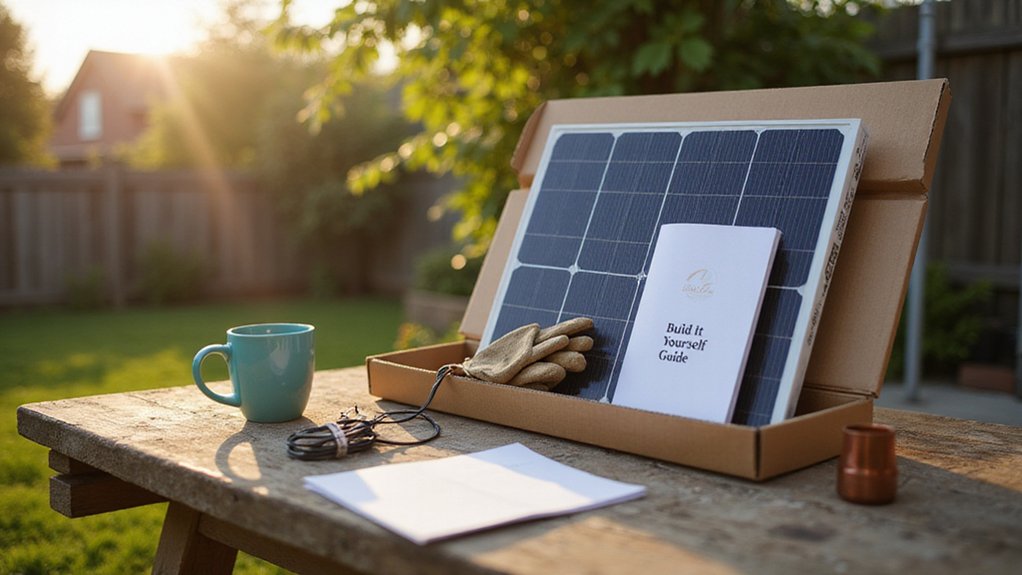

Ever wondered how to turn sunlight into your own power? Building a DIY solar panel kit can be a rewarding project, and doing it right ensures long-term performance.
By understanding key steps like sizing your system, selecting components, and proper installation, you’ll be ready to create your own reliable solar setup.
The full process is detailed below to guide you every step of the way.
How to Size a DIY Solar Panel Kit for Your Home
To size a DIY solar panel kit for your home, start by determining your household’s annual electricity usage. Review 12 months of utility bills to find your total kWh consumption for the year. Then, convert that number into a system size by dividing your annual kWh by the product of peak sun hours for your location, the days in a year, and an efficiency factor between 0.78 and 0.83. Peak sun hours vary by location and represent the average hours of full sunlight received each day, accounting for weather and seasons. When comparing options, prioritize monocrystalline panels** for their higher efficiency and longer lifespan. This calculation considers real-world losses such as shading, dirt, and inverter inefficiencies, ensuring your system size reflects actual performance. For the best results, consider reviewing top battery picks to ensure you choose high-quality storage with terminals that match your system’s performance needs. To verify the health of these batteries, you can use a digital multimeter** to check capacitance and ensure reliable energy storage.
To account for seasonal variation and future growth—including electric vehicle charging or heat pumps—size your system to 100 to 110 percent of your annual usage when planning for net metering. This buffer helps avoid needing an immediate system expansion and ensures your energy needs remain covered throughout the year. Once you have your system size in watts, determine the number of panels by dividing this total wattage by each panel’s wattage, rounding up to ensure you have enough capacity. For example, if your system requires 3,000 watts and each panel is 400W, you will need at least eight panels.
Lastly, verify your roof space before purchasing panels. Each 400W panel typically requires about 22 square feet, including space for mounting and gaps. Confirm that your roof can accommodate the necessary panels comfortably to ensure proper installation and maximize energy production.
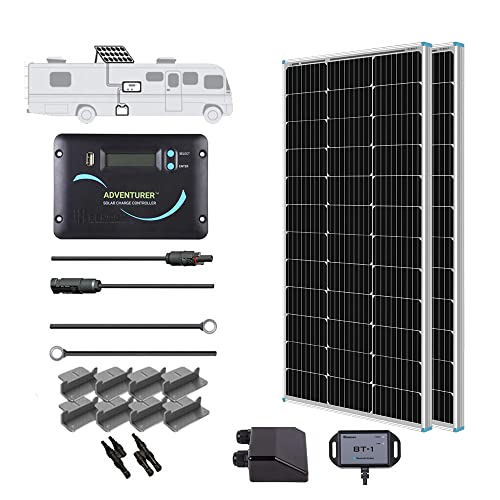
[Wide Application] 800Wh daily output depends on the 4 hours sunlight availability. This panel is suited for applications that require a smaller footprint, making it a favorite for those with RVs, campers, caravan, boat, Green house and more.
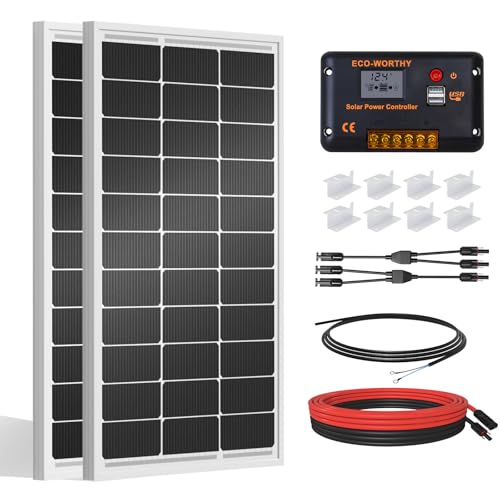
[Wide Application]: Daily Output 800wh/day under 4 hours full sunshine condition. Perfect for RV, Caravan, Marine, Camper, Electric scooter, Golf Carts, Power wheels, Trolling motor, Tool trailer, Backup power supply for cabin shed home etc.

【Efficient Performance】The 200W Solar Panel Starter Kit will produce an average of 1000Wh of electricity per day (Based on 5 hours of direct sunlight condition). The Cell Efficiency can reach 22%. The bypass diodes can ensure the panel has an excellent performance in a low-light environment and the TPT back sheet dissipates excess heat to ensure smooth output performance.
What Components Are in a Complete DIY Solar Panel Kit?
A complete DIY solar panel kit includes several key components beyond the panels themselves. The inverter is essential for converting the DC electricity generated by your panels into usable AC power for your home. For grid-tie systems, you typically receive a string inverter or microinverters, which are designed to synchronize with the grid’s voltage and frequency. Off-grid kits, on the other hand, usually bundle a charge controller that manages the flow of electricity to batteries, preventing overcharging and damage. Battery storage is optional but common in off-grid setups, providing backup power and increasing self-sufficiency. Additional parts include cables, mounting hardware like rails, clamps, and flashing to secure panels against weather, and wiring such as PV wire and MC4 connectors to facilitate connections. Safety components like breakers and disconnect switches are also included to ensure compliance with electrical codes and to allow safe maintenance. Matching the inverter to your specific system type guarantees compatibility and optimal performance, making your solar setup both efficient and reliable. For those seeking reliable power backup, a high-quality solar generator with an integrated inverter and battery can serve as a complete off-grid solution.

【Advanced MPPT & Grid‑Tie Efficiency – Boosts Yield by Up to 25%】: This grid tie solar inverter integrates high‑precision MPPT technology to continuously track and lock the maximum power point of your solar panels, improving energy harvest by up to 25%. With a 99.9% reverse power transmission rate, surplus electricity flows back to the utility grid efficiently – making this micro inverter an ideal choice for plug‑in solar systems and residential solar kits.

High-Efficiency Solar Power Conversion: Designed for grid-connected solar systems, this 800W micro inverter delivers up to 96% peak efficiency with a power factor above 0.99. Converts DC power from compatible solar panels into 120V AC power for residential grid-tie applications

1200W High Power Output & 96% Efficiency – Delivers up to 1200W output with 96% conversion efficiency and dual MPPT tracking for stable, efficient solar energy conversion. Supports 16-60V DC input, 60V max input voltage, and 22V start voltage for reliable performance.
Where to Install Your DIY Solar Kit for Maximum Sunlight
To achieve maximum sunlight exposure, start by choosing a location with minimal shading. Even small shadows from trees, vents, or nearby structures can significantly reduce your panel output. Conduct a thorough shade analysis using a sun-path tool or by observing the site at different times throughout the year. Pay special attention to winter months when the sun is lower in the sky, as shadows from trees and buildings can extend much further and have a greater impact on performance. Similar to how an inverter generator uses clean power to protect sensitive electronics, your solar setup benefits from precise energy management for peak efficiency.
The optimal orientation in the Northern Hemisphere is a south-facing position, providing direct sunlight from sunrise to sunset. Southeast or southwest orientations are acceptable alternatives but are not as efficient. Avoid north-facing placements altogether, since they receive the least amount of sunlight. Set your panels at a tilt close to your latitude to balance year-round energy production. Adjust the tilt steeper in winter if your power needs peak then.
Prioritize installing panels on large, unobstructed roof or ground areas. Keep panels away from vents, HVAC units, pipes, and poles that could cast shadows or cause shading. Ground mounts offer flexibility in tilt adjustment and can be positioned for maximum sun exposure. A south-facing roof with no shading generally provides a better option than a slightly tilted site with partial shading.

【Compatible with】ONLY designed for Ring and Arlo Solar Panel with standard 1/4 threaded hole. (Note: Solar Panel NOT Included.)

Renogy mounting Z brackets are very easy to use, unique designed, and perfect for irregular surfaces

【SUPERIOR QUALITY】 Anodized Aluminum Z brackets, Stainless Steel Hex Bolts and Screws, service life up to 25 years, perfectly supporting solar panels in off-grid installations.
How to Mount and Wire Your DIY Solar Panel Kit Step-by-Step
To mount and wire your DIY solar panel kit correctly, start by selecting a sturdy, stable location with maximum sun exposure. For mounting, locate roof rafters or a solid ground foundation to ensure panels stay secure. Attach the roof mounts first, then secure the racking rails, using a level to keep everything flat and aligned. Position each panel on the hardware, fastening them securely with lock washers and bolts to withstand wind and weather. Using a Pegasus Racking system with 7T black rails and Insta Flash 2 attachments ensures a strong, durable mount with minimal roof penetrations. Always follow torque and connection tips for the mounting bolts to ensure long-term reliability. Top solar panels with MC4 connectors typically pair well with high-quality components for superior performance and value. However, if you are also replacing an existing electrical panel, be aware that a breaker box replacement can take anywhere from 4 to 8 hours depending on the complexity of the setup.
When wiring, decide whether you want a series or parallel configuration. In a series setup, connect the positive terminal of one module to the negative of the next, increasing voltage. In a parallel setup, connect all positive terminals together and all negative terminals together to increase current. Attach MC4 connectors properly, double-checking the polarity to prevent reverse connections. Route cables carefully through designated openings, using grommets to protect any penetrations through panels or enclosures. For safety, install grounding assemblies to bond the panel frames and any exposed metal parts to your grounding system. When connecting the charge controller, first link the solar panels’ positive and negative terminals to the corresponding points on the controller, followed by the battery connections. After completing all wiring, test each connection for continuity, ensuring tight and secure terminations to prevent future issues.

Product Includes: a kit containing 8 L-Foot mounts with flashing, complete with bolts and hardware, specifically designed for asphalt shingle and composite tile roofs, compatible with most common photovoltaic rails, meeting the installation needs of residential solar modules

Product Includes: a kit containing 8 L-shaped brackets and flash baffles, complete with bolts and hardware, specifically designed for asphalt shingle and composite tile roofs, compatible with most common photovoltaic rails, meeting the installation needs of residential solar modules

Product Includes: a kit containing 4 L-shaped brackets and flash baffles, complete with bolts and hardware, specifically designed for asphalt shingle and composite tile roofs, compatible with most common photovoltaic rails, meeting the installation needs of residential solar modules
How to Connect Your Inverter and Battery Bank for a DIY Solar Kit
Ensure your battery bank’s voltage matches your inverter’s DC input rating before making any connections. This compatibility is essential to prevent damage and ensure proper operation. Install a DC-rated fuse or breaker on the positive cable between the battery bank and inverter for battery protection. Keep this fuse or breaker easily accessible for maintenance or troubleshooting. Use wiring diagrams to verify that your series or parallel configurations match your desired voltage and capacity needs, as incorrect wiring can cause system inefficiencies or failures. To maintain a 12V system, connect two 12V used batteries in parallel by joining positive to positive and negative to negative.
Connect the inverter’s positive DC cable to the positive terminal or busbar of your battery bank. Then connect the negative DC cable to the negative terminal. It’s advisable to place the inverter on the same DC node as your charge controller. This shared connection point simplifies wiring and reduces voltage drop. Keep your DC cable runs as short as possible to minimize voltage losses, and size the cables appropriately so they handle the maximum current your inverter will draw. Torque all connections to the manufacturer’s specifications to ensure a secure and safe connection. Finally, ground the inverter chassis to your grounding system. Keep the ground separate from the neutral unless your inverter’s manufacturer specifies bonding them. When disconnecting the battery bank for maintenance, always remove the negative cable first to minimize the risk of short circuits and sparks.

Manual reset: Visible reset lever shows open condition, unique push button reset Can also be used as a kill switch; Button on circuit breaker can act as a master disconnect for circuits

30A circuit breaker with manual reset; Visible reset lever shows open condition, unique push button reset Can also be used as a kill switch; Button on circuit breaker can act as a master disconnect for circuits

Manual reset circuit breaker: Manual reset button, no need to replace the inline fuse. When the circuit current exceeds the rated current, the fuse burns out and automatically disconnects, which can well protect the electrical appliances. The unique push button reset can also be used as a kill switch.
How to Test Your DIY Solar Kit and Fix Common Wiring Errors
To test your DIY solar kit and fix common wiring errors, start by de-energizing both the AC and DC sides to prevent electrical shock. Measure the open-circuit voltage at the solar modules, charge controller, and downstream points to verify proper output; high or zero readings may indicate wiring issues. Only check the short-circuit current if your tester supports it, as this can help identify current capacity problems. When selecting a battery for your system, consider whether an AGM battery or a standard flooded battery best fits your setup and budget.
Next, verify earth continuity by checking that all grounding paths are intact with your multimeter. Broken or inconsistent ground connections signal grounding faults that must be corrected before re-energizing the system. Inspect fuses for signs of loose connections, corrosion, or blown links. Replace any blown fuse only after resolving the underlying fault, such as a short circuit or overload. To avoid damaging components, always use proper gauging techniques when stripping wire insulation for new connections.
Common wiring errors include reversed DC polarity, which you can fix by isolating the affected circuit, removing power, and reconnecting the wires correctly. Loose connectors often cause intermittent power drops—re-crimp or replace faulty connectors using a reliable crimping tool designed for spade connectors. If you find cables that are undersized for the current load, replace them with appropriately rated wire based on your system’s ampacity calculations.
After performing repairs, retest the polarity to ensure correct wiring, verify continuity throughout the system, and check insulation resistance for any deterioration. Monitor your system’s output closely after fixes; a sudden drop in voltage or current indicates unresolved wiring issues that need to be addressed immediately.